
Loyalty
Loyalty
The loyalty wallet is associated with an interactive feed to lure customers to your loyalty program.
Users can collect points in a digital wallet to redeem later with coupons or free products.
This module is the best to use if you want to build an E-Commerce App.
Installation
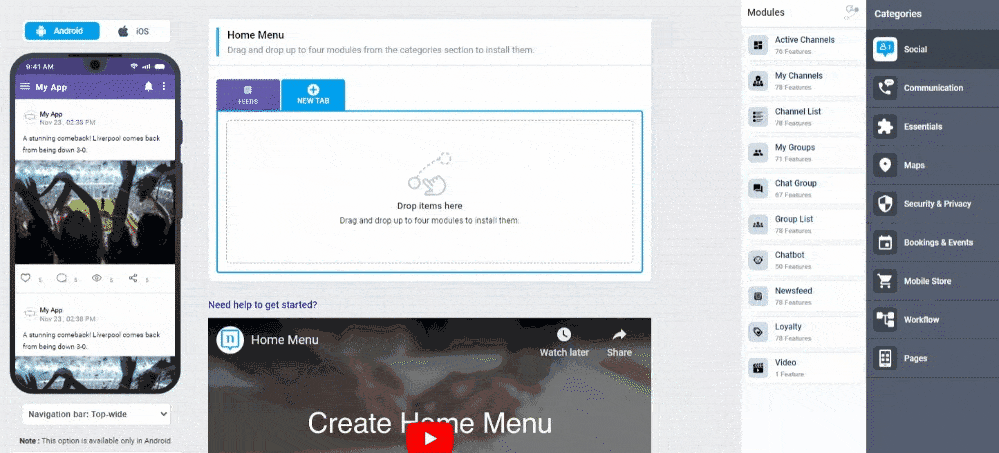
You can install this module in your app in the following places:
- App's Home Menu ✓
- App's Side Menu ✕
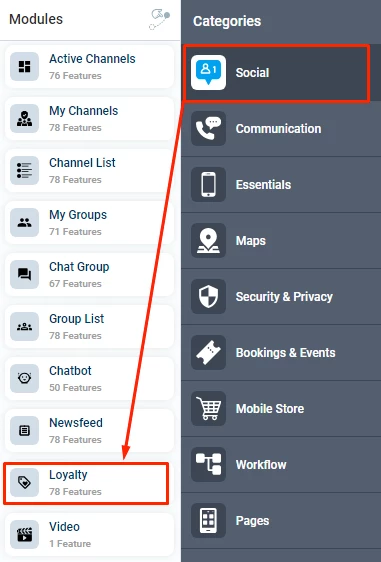
You can find the loyalty module in the social category. Click or drag and drop the module into your home menu to install it.
Duplicability
This module can only be installed in the home menu.
Configuration
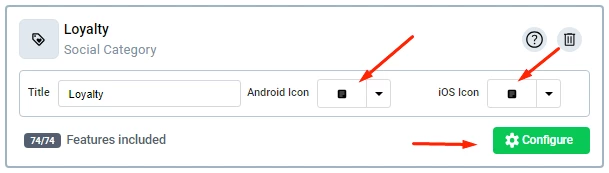
1.) Once you have installed the module by clicking or dragging and dropping it in the home menu,
You can rename the module and choose an Android and an iOS icon for it. Click the "Configure" button to open the settings of the module.
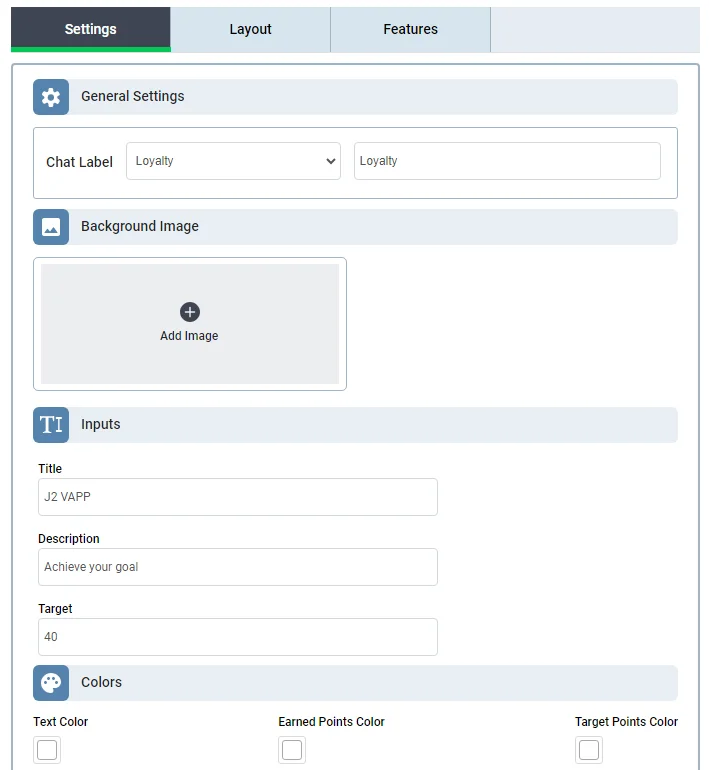
2.) In the settings tab, you can customize the main page for the loyalty module that will be displayed to your users. The page will display the number of points that users have collected and how many points remain until they hit the target you set and receive their prize (either points or coupons).
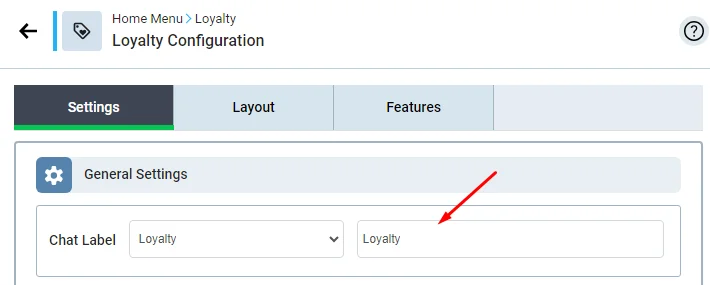
The chat label section relates to assigning specific posts to a module tab based on its label if your app has numerous loyalty modules or other modules like Newsfeed or ID. Depending on your preference, label your module.
You can set an image of the display message, rename the title, the description, and the target points, after which your users will receive a prize. You can also edit the colors of the text, earned points, and target points in the message.
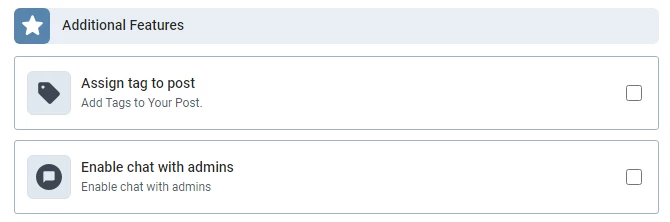
You can enable assigning specific tags to allow specific users (tags) to see your loyalty posts. This feature can be used to target a specific segment of your users.
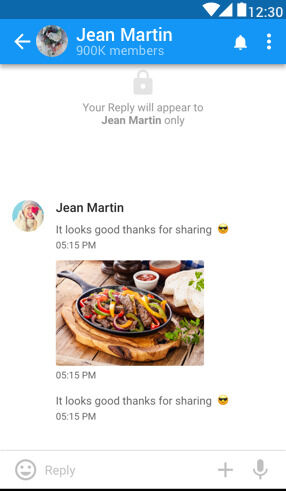
Add specific tags to your loyalty posts for app users to chat directly with admins listed under the tag.
Click here to learn how to create a new tag.
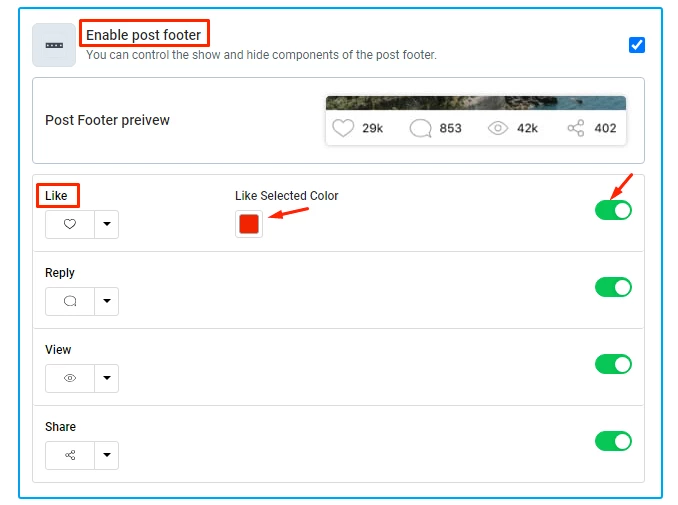
Enable post footer: You can choose to add the like button, the reply button, the number of views, and the share button. You can also choose the button icon and customize its color.
Enable sticky notes on your posts: Add promo points to your loyalty posts for users to collect and redeem, it is displayed as a small bubble that is attached to the bottom right side of the post.
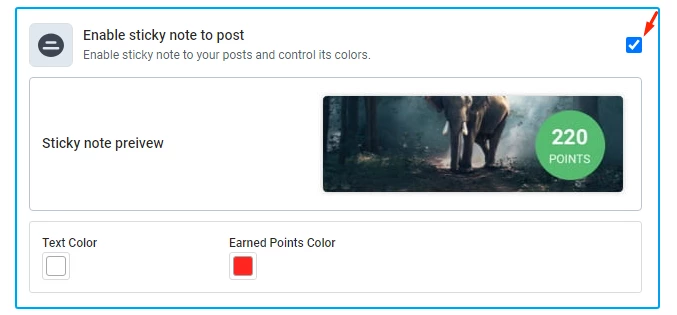
Which will look like this:

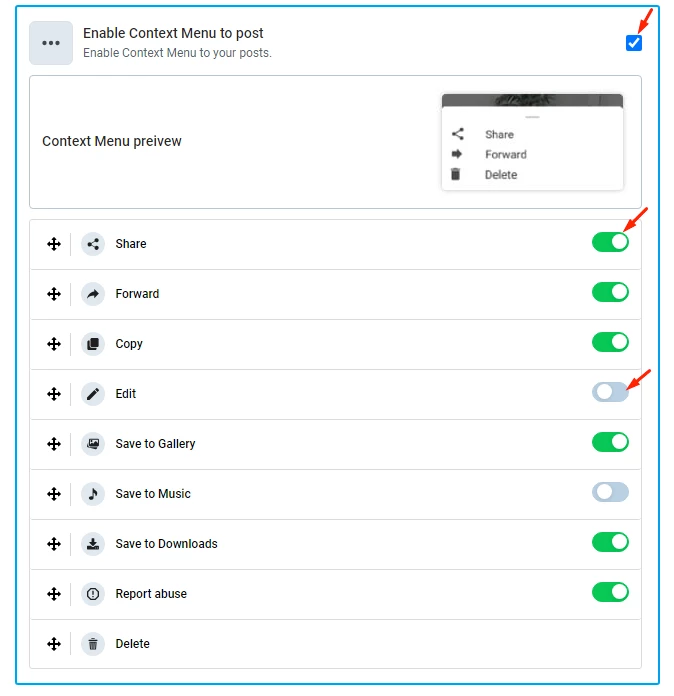
Enable Context Menu to Post: Displays a set of actions to be done to the selected content. Click on the toggle to activate or deactivate the action.
There is one action (delete) that is shown by default and eight actions that are user-selectable, which are:
- Share
- Forward
- Copy
- Edit
- Save to Gallery
- Save to Music
- Save to Downloads
- Report abuse
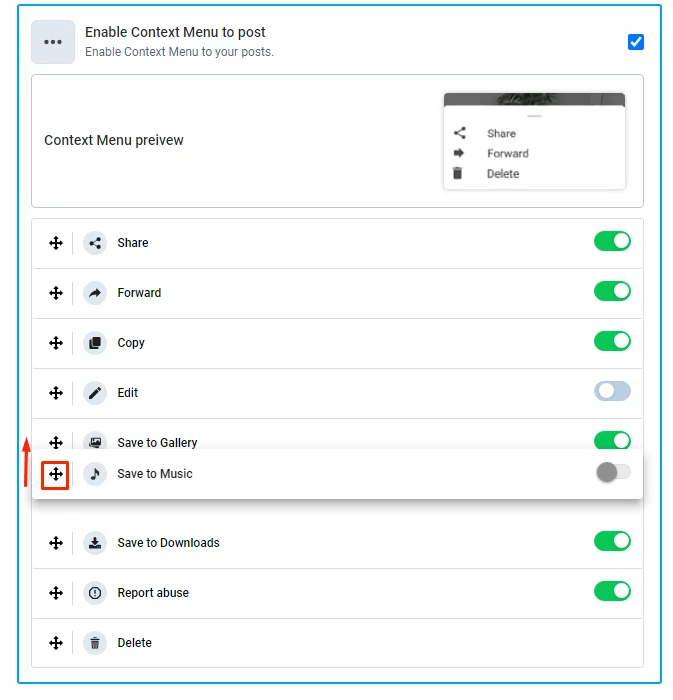
You can also change the order of the actions by clicking and holding the move icon and dragging up and down to move the action.
The context menu will look like this:

3.) After you're done editing, you will be able to see the displayed message on iOS and Android.
| iOS | Android |
|---|---|
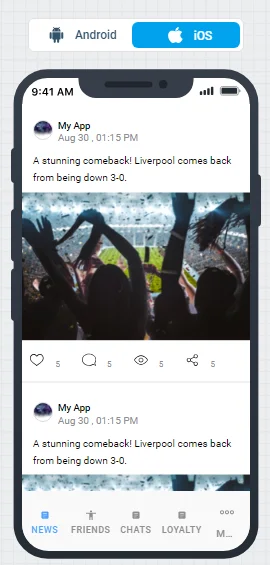 | 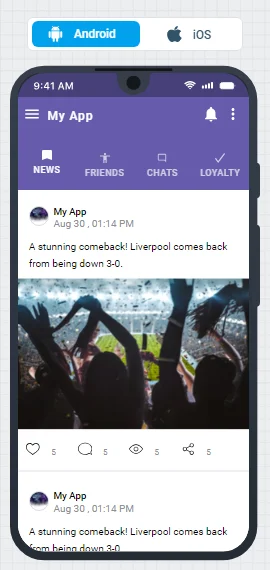 |
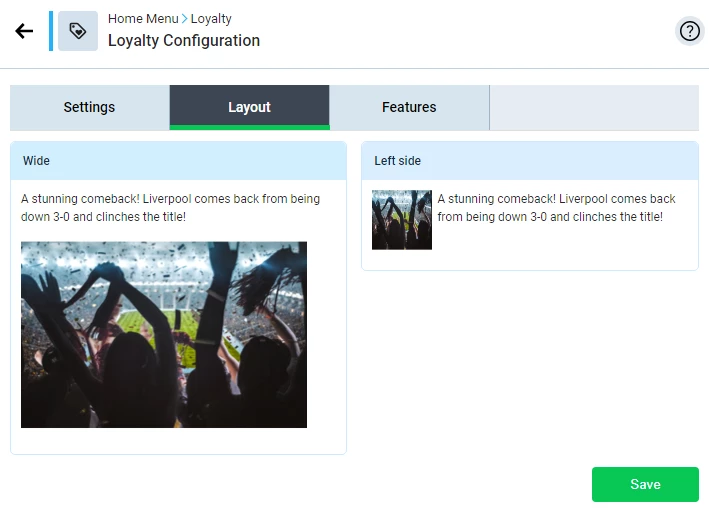
4.) From the layout tab, you can choose the display style from a wide or side view.
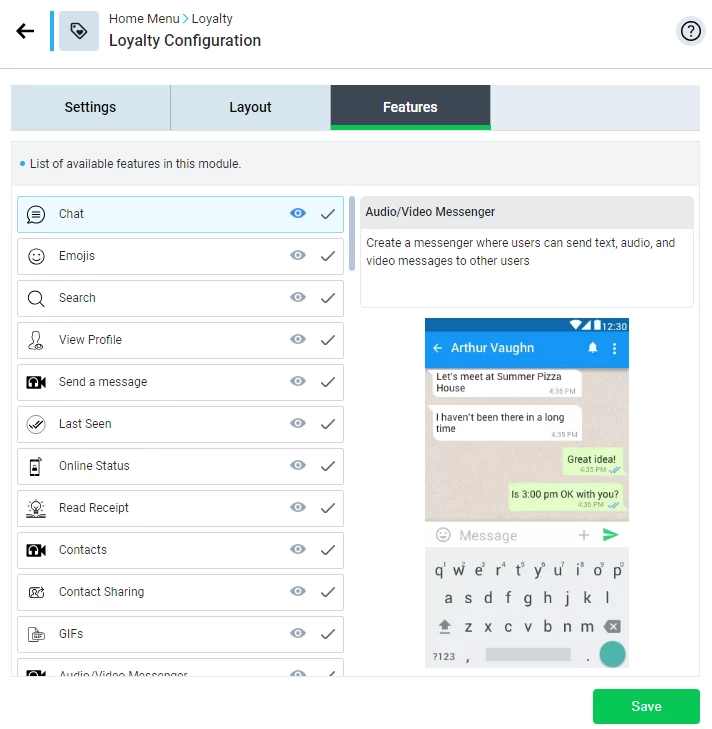
5.) You can check out the features on the last tab.
6.) Don't forget to save after any changes you make.

Complementary Modules
- My Channels: It shows the users a list of all channels they have joined on your app.
- Channel List: It shows a list of all your app's channels for users to join.
- Polls: It enables creating polls and attaching them to posts.
Module Walkthrough
Activating the Loyalty Module
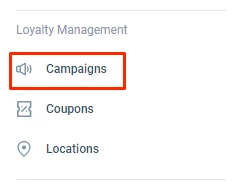
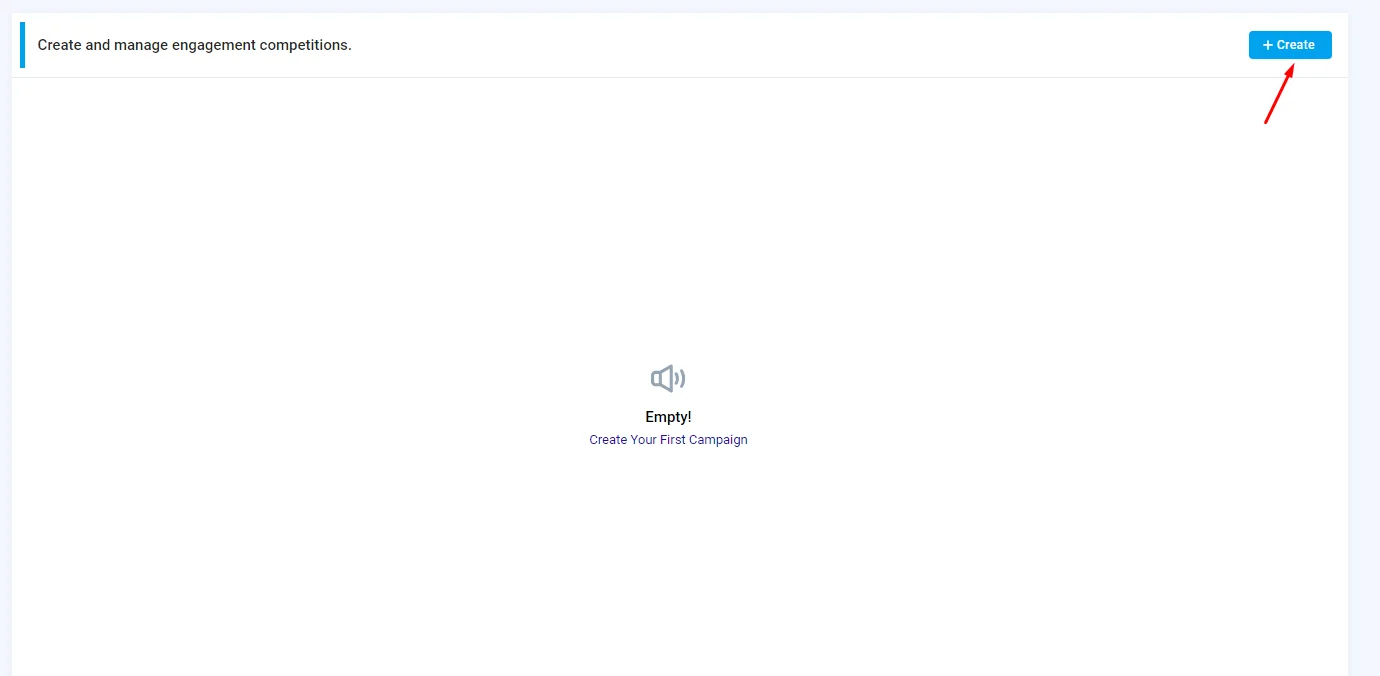
1.) From the left admin menu, click on Campaign.
A campaign is a competition you customize that includes certain triggers that you can choose (user likes a post, user shares a post, user joins a channel). These triggers make the user eligible to enter the qualifications to win prizes that you choose (points or coupons).
2.) Click create to be prompted with a pop-up window where you can create a campaign.
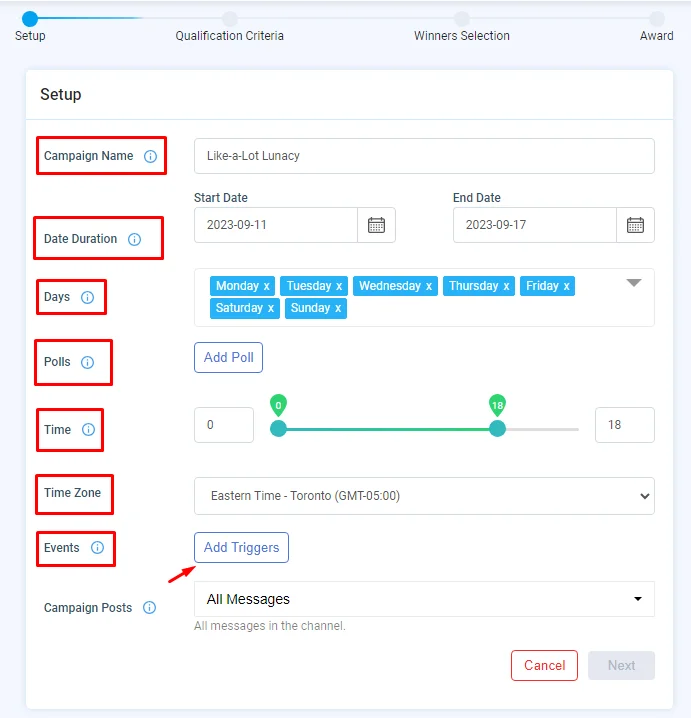
3.) Setup section: You will find fields as follows:
-
Campaign name: the name of your campaign.
-
Date Duration: For the running period of this campaign, set the start and end dates on which your campaign will be active.
-
Days: The days in which your campaign will run and which hours during the day
-
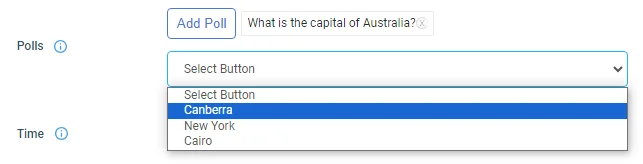
Poll: You can also set up a poll where your users can win if they choose a certain answer you set. From the setup section, click on Add Poll.
If you haven't created a poll, click here to jump to the create poll section.
-
Time: Set the time at which the campaign will run; 0 means midnight up to 23, which is 11 PM.
So if you want your campaign to run from 11 a.m. to 11 p.m., set it from 11 a.m. to 23 p.m., as shown below. -
Time Zone: Select your time zone.
-
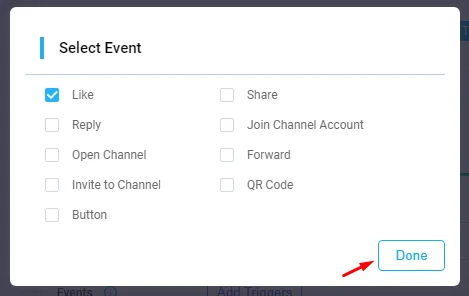
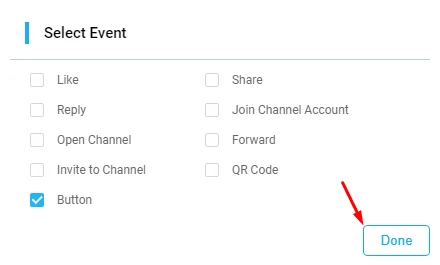
Events: select the trigger, after which the user will qualify to win.
You can choose from different triggering options, then click 'Done'
You can also select which messages your campaign will run on.
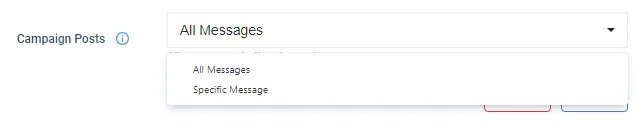
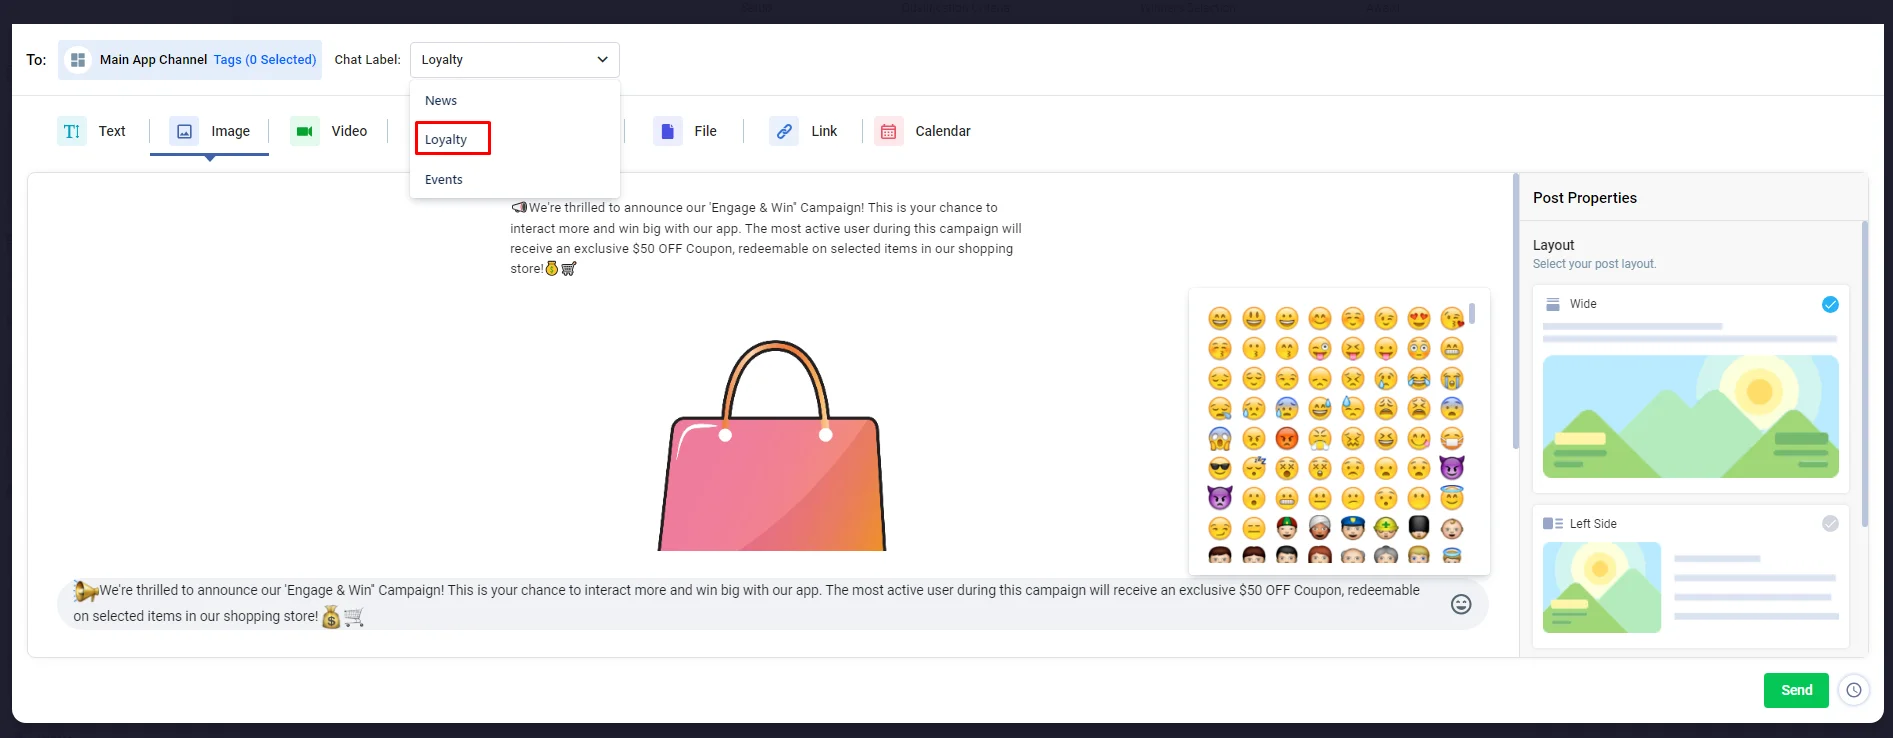
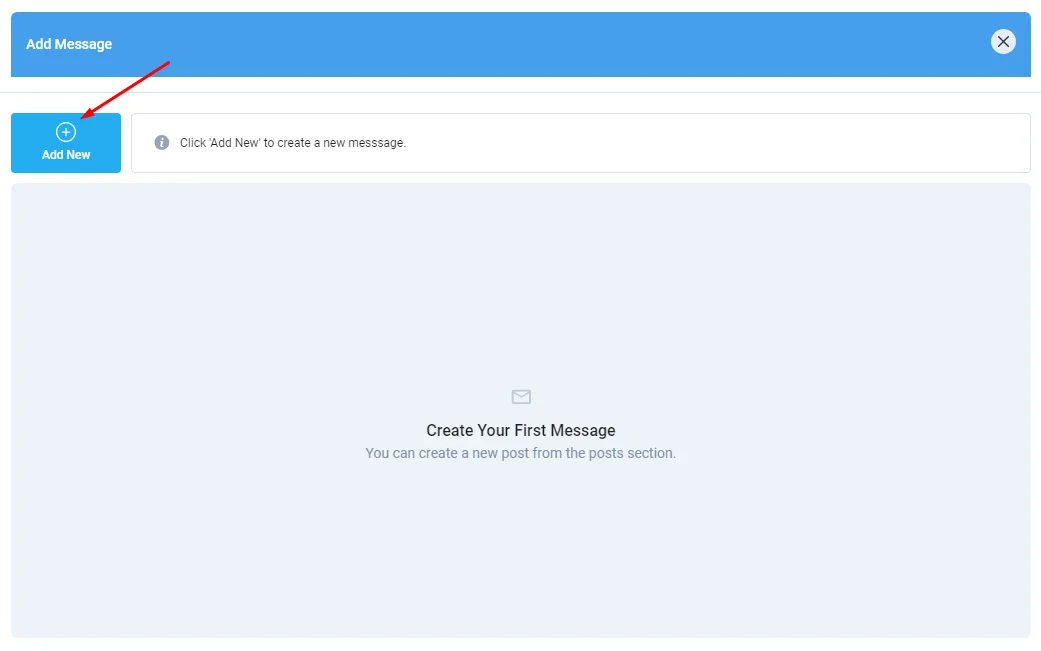
If you choose "Specific Message", you will be prompted with a window in which you can create a new scheduled post. Click 'Add New' to create a new post.
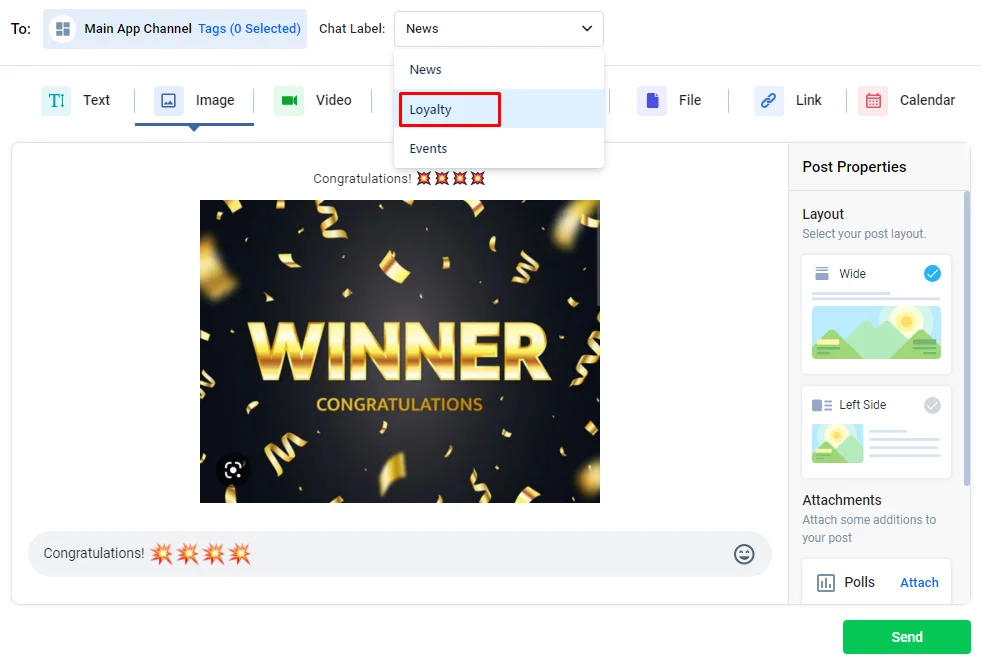
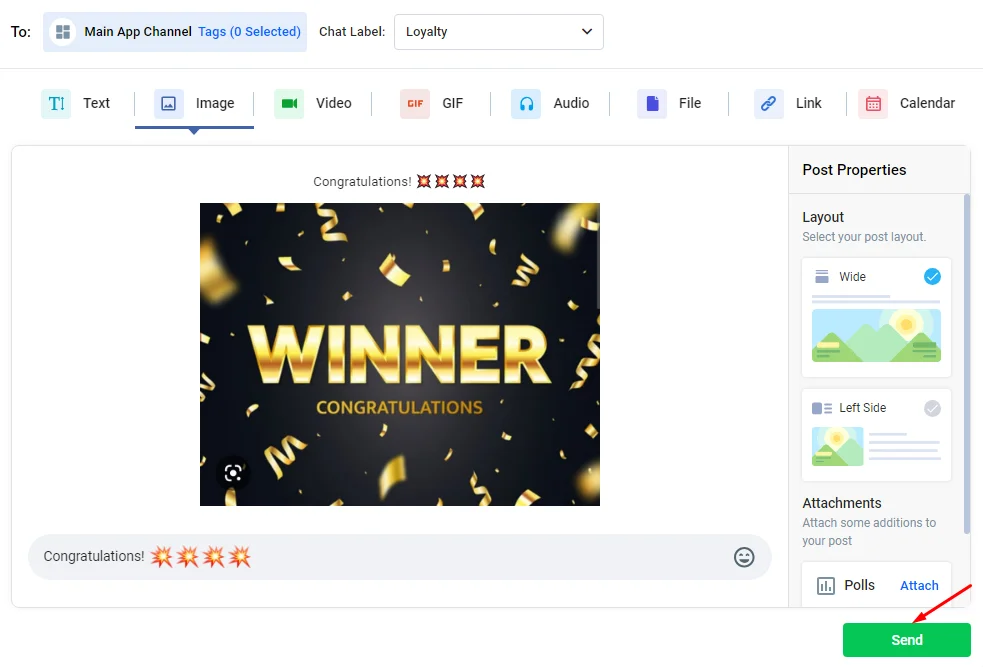
You will be prompted with a new post screen where you can create your message. After creating the post, choose the chat label of 'Loyalty' to assign it to the module, or you can select other tabs if you want to send it in different area in your app, like News, Events, etc.
When you are ready to schedule your post, click the calendar icon at the bottom.
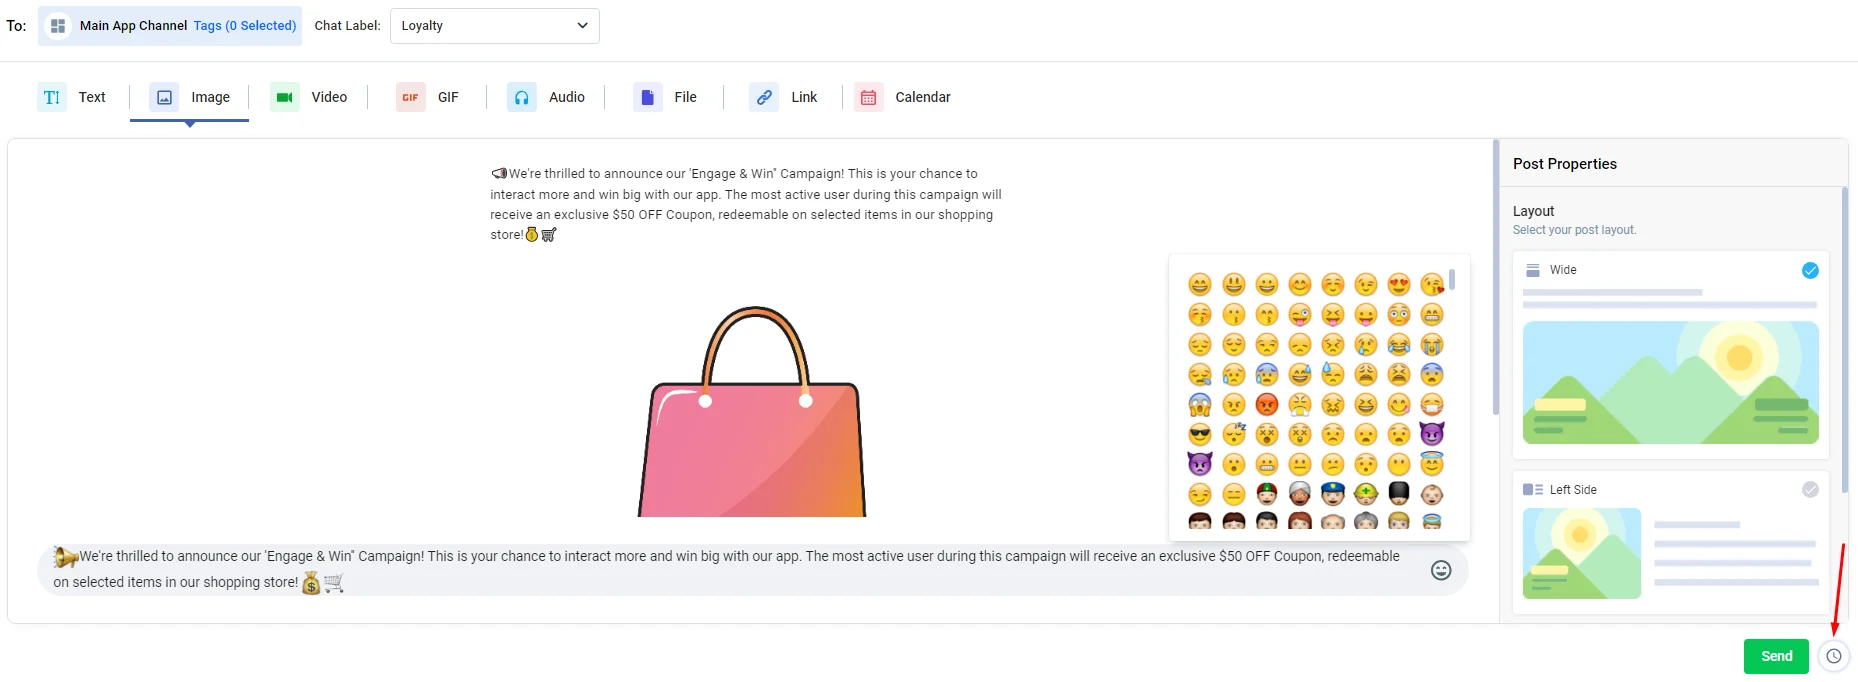
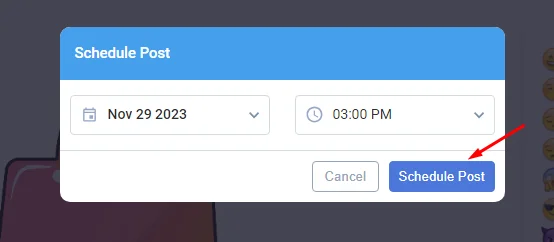
Choose the date and time for the post to be published, then click 'Schedule Post'.
And click the send icon.
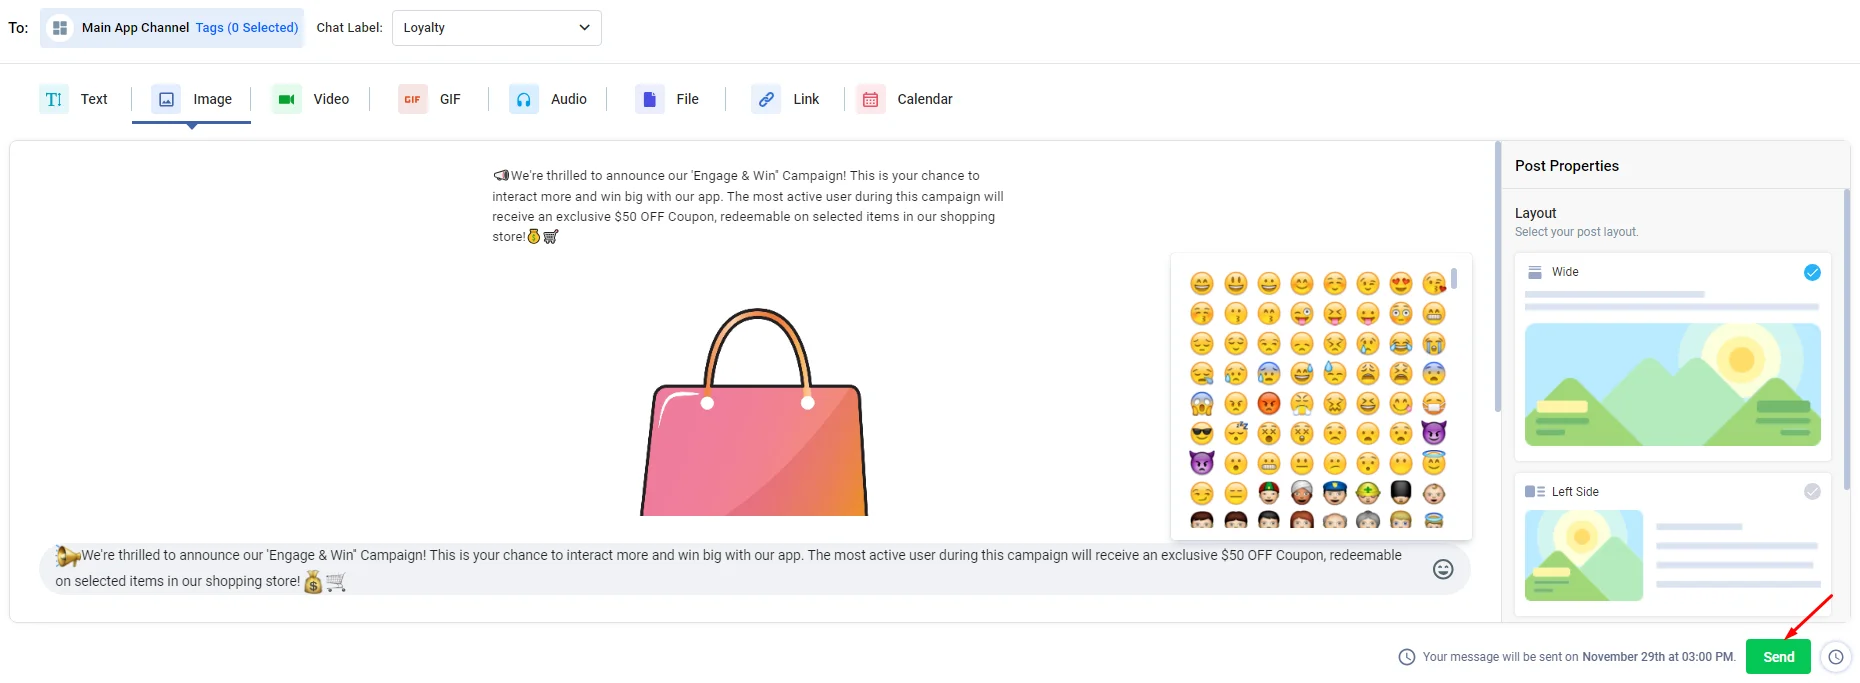
Select the post you created and click 'Insert'.

Once you're done, click next.
4.) Qualification criteria section:The qualification criteria allow you to choose how many events are required for the user to qualify for a prize. If you select "Only" and enter a number, then the user has to activate the trigger you specified equal to the number that you specified to qualify to win. So, for example, if you set the trigger to "Like" and set it to "Only" and enter the target to "3", then the user has to like three posts in order for them to qualify for winning.
However, if you set it to "Every" and set a target to "3" and the per section to "Week", then the user has to make like three posts every week to be able to qualify to win. You can choose from different periods.
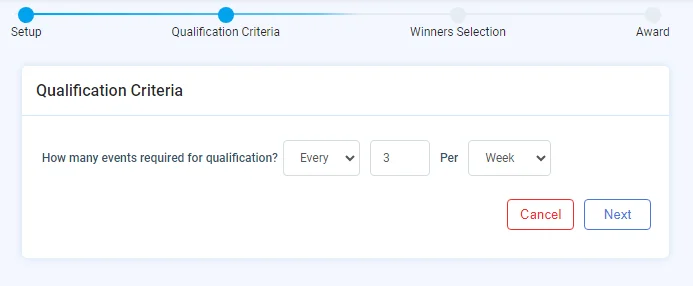
Once you set the qualification criteria, click Next.
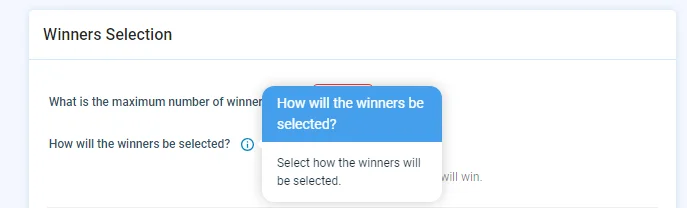
5.) Winners selection section: You have the winner selection section, where you can determine the maximum number of winners.
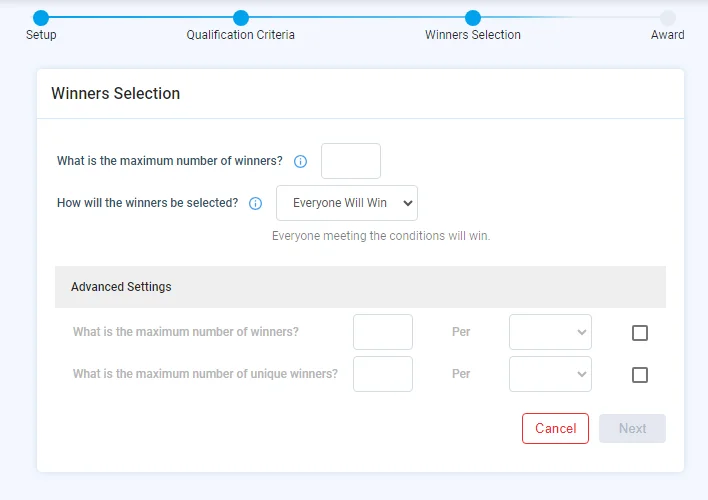
You can also choose how the winners will be selected. If you set the trigger to 'Everyone Will Win', then the first number you set in the "Maximum number of winners" will be the number of users who will win. So, for example, if you set the trigger to 'Like' and the maximum number of winners to 10, and a thousand users liked a post, only the first ten will win.
However, if you selected 'Random Winners', then you can determine the number of winners from a group of qualifiers, so if you entered the values 1 out of 10, then 1 user will win out of each of the 10 qualifiers.
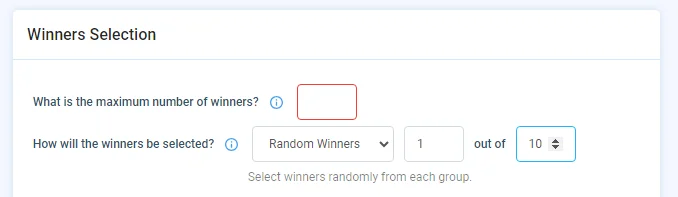
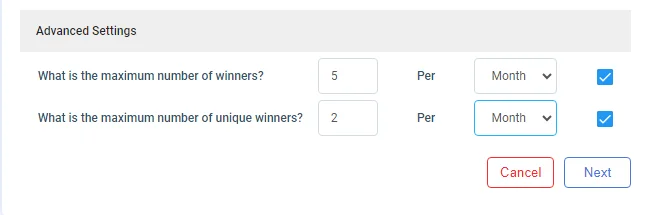
You can also limit the number of winners per day to a certain number. You can also restrict a user from winning more than once per period; just tick the option you want and configure it.
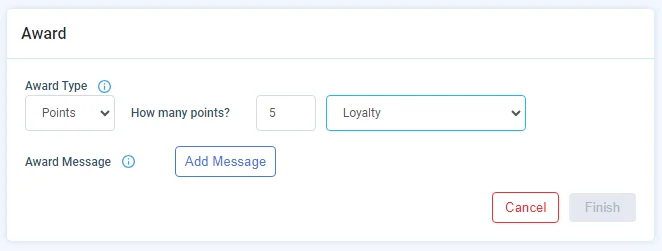
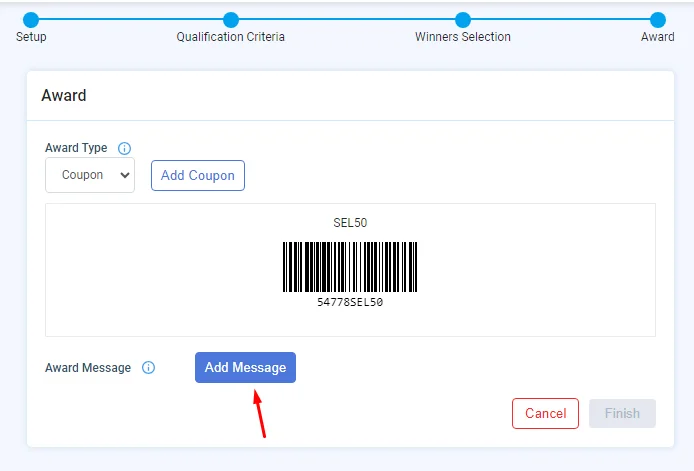
6.) Award section:Finally, you have the Award page.
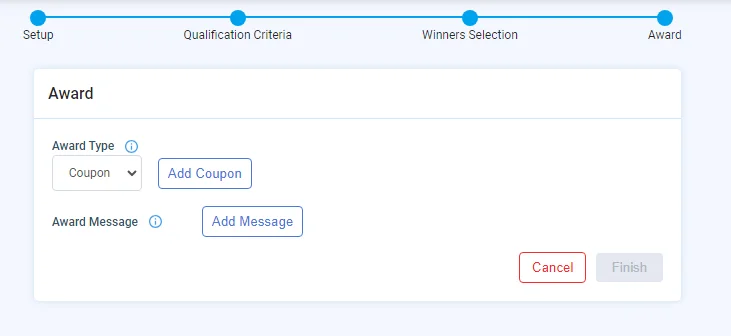
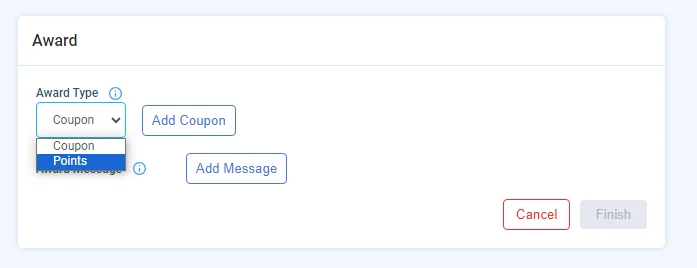
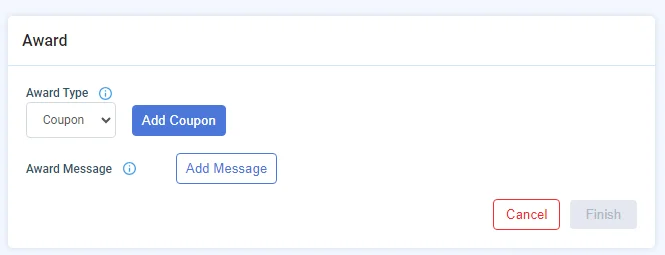
You can select the award type as points or coupons.
If you select points, enter the number of points that the user will be awarded, and choose "Loyalty" from the drop-down menu.
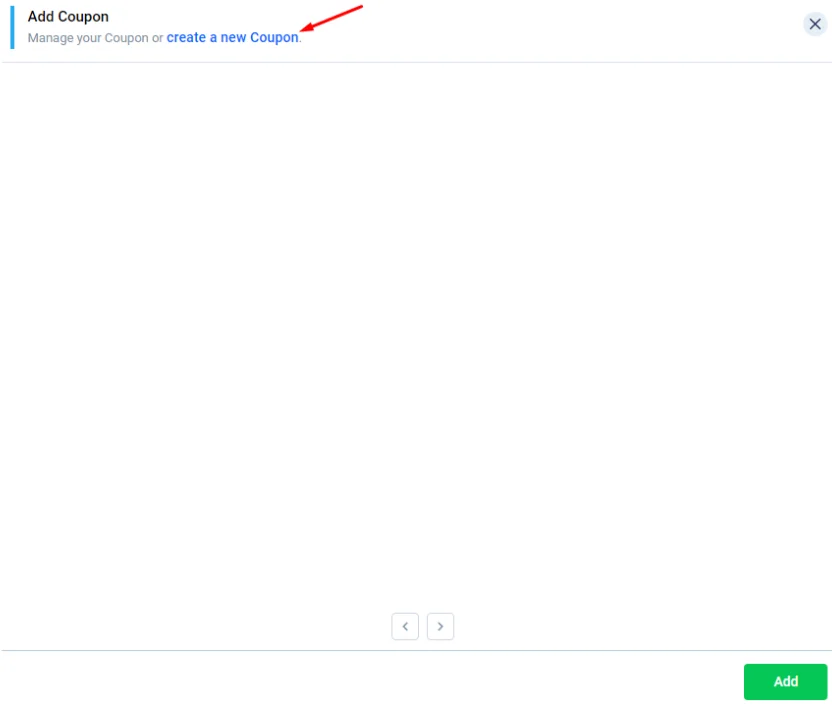
If you chose a coupon, click on Add Coupon.
Click 'create a new coupon'.
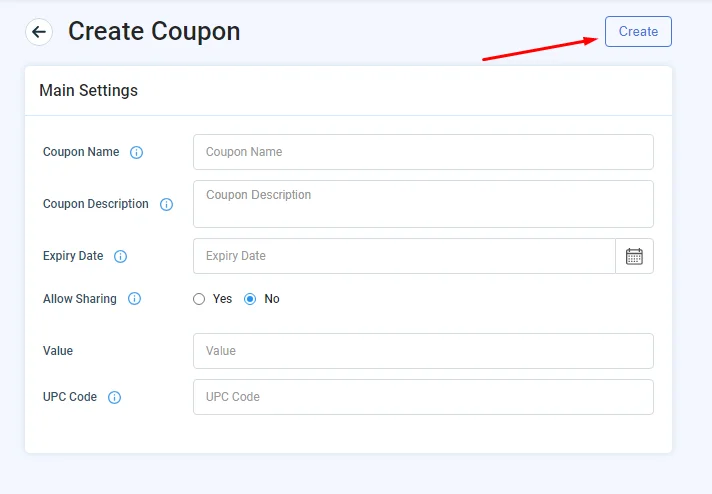
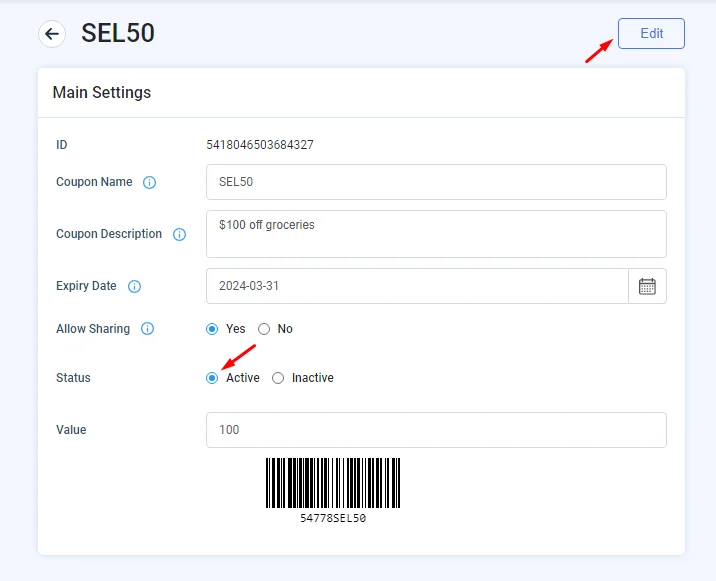
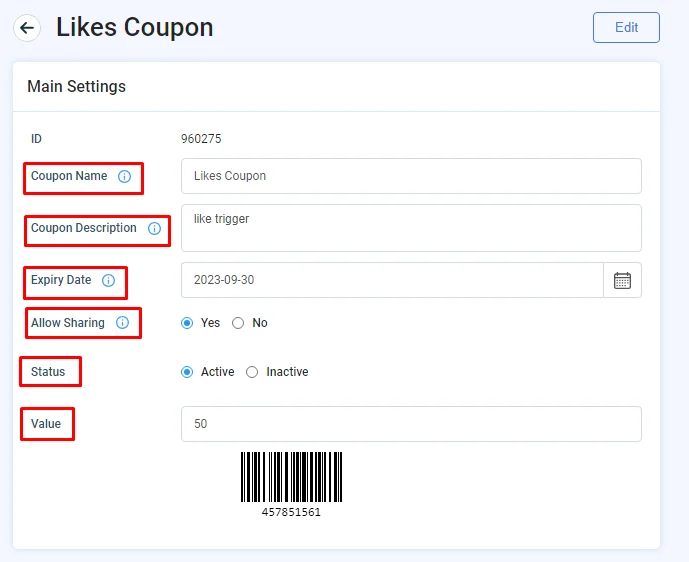
And you'll be directed to the coupon creation page. Enter the coupon's name, description, and expiration date. You can also allow the option of sharing with others. Set the value of the coupon and assign a UPC (Universal Product Code) for it, which is a unique code for the system to identify and redeem the coupon when the user chooses to.
Then click 'Create'
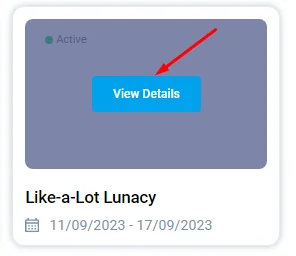
After creation, click 'View Details'
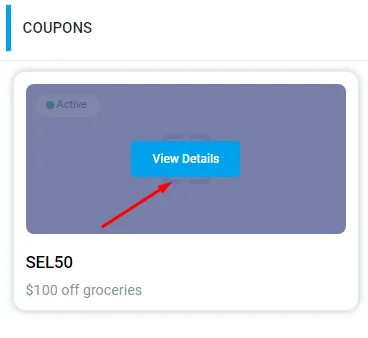
Make sure that your coupon is active, and then click 'Edit' to save.
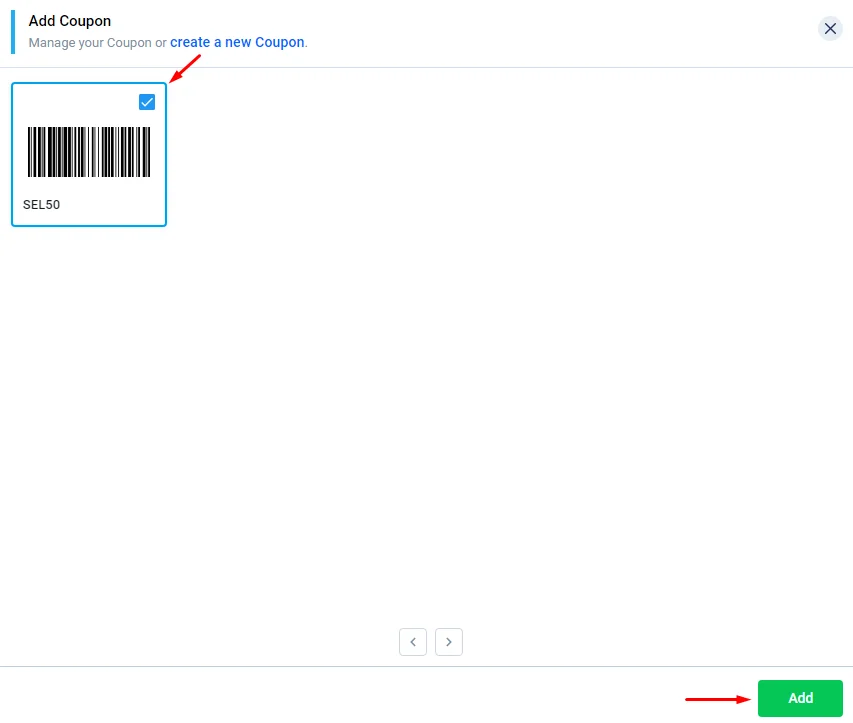
Your coupon has now been created successfully. Now you can select it and click 'Add'.
You can also set an award message that the user will receive when they win, click on "Add Message" to create one.
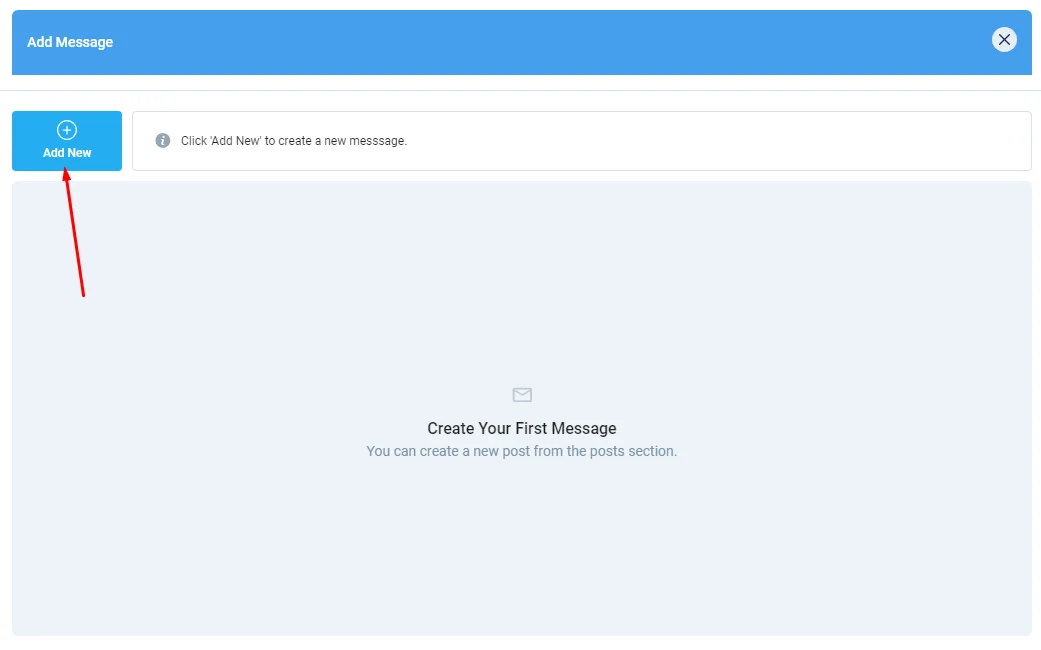
Click on Add New.
After creating your award message, choose your chat label
And click send.
Then you'll need to select your message and click Insert. When you are done, click finish.

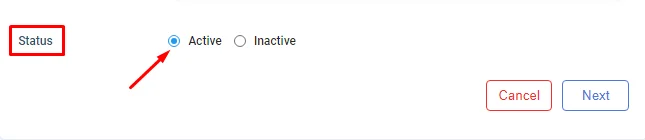
Note: The campaign you will create will be deactivated; after saving it, make sure to hover over it again and click 'View Details'
Change the status to 'Active', click 'Next' till you reach the last section and click 'Finish'
And that's it!
Create a Coupon
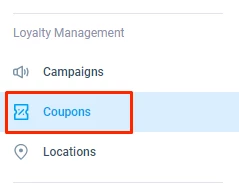
From the left admin menu, click on Coupon.
Enter the coupon's name, description, and expiration date. You can also allow the option for sharing with others. Set the value of the coupon and assign a UPC (Universal Product Code) for it, which is a unique code for the system to identify and redeem the coupon when the user chooses to.
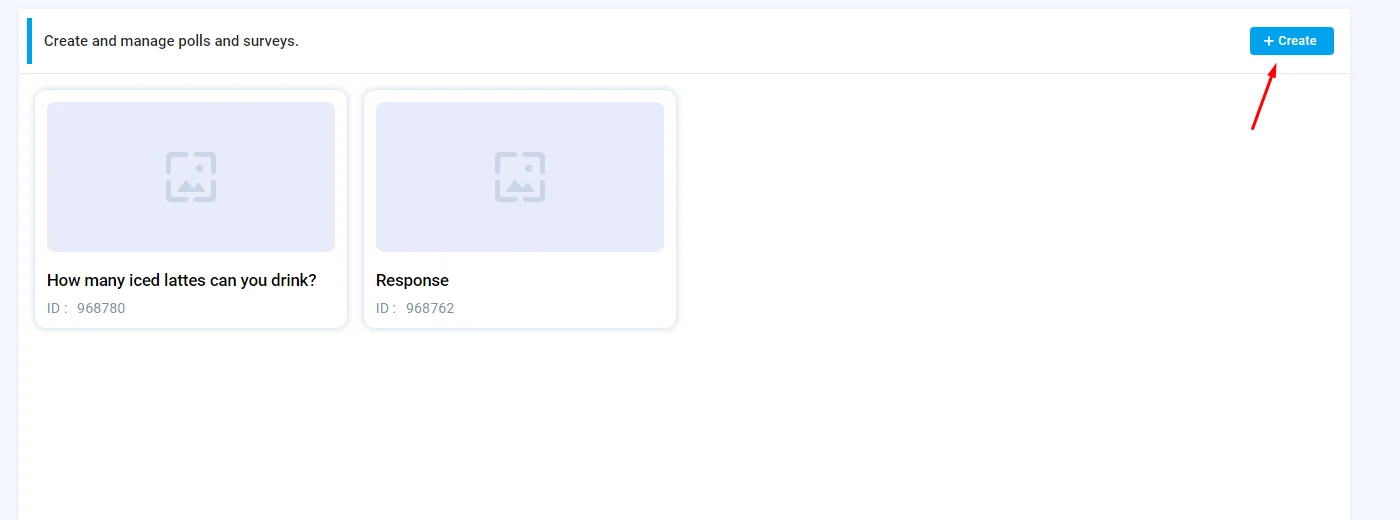
Create a Poll
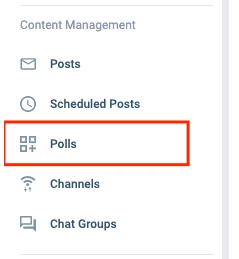
1.) From the side menu, click on polls.
2.) Click Create to create a new poll.
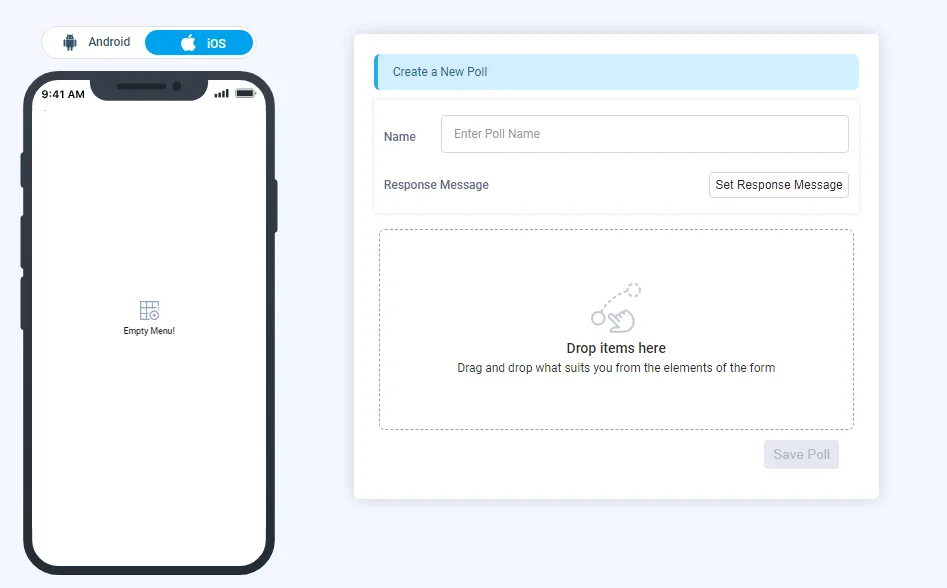
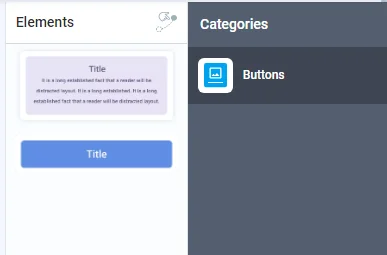
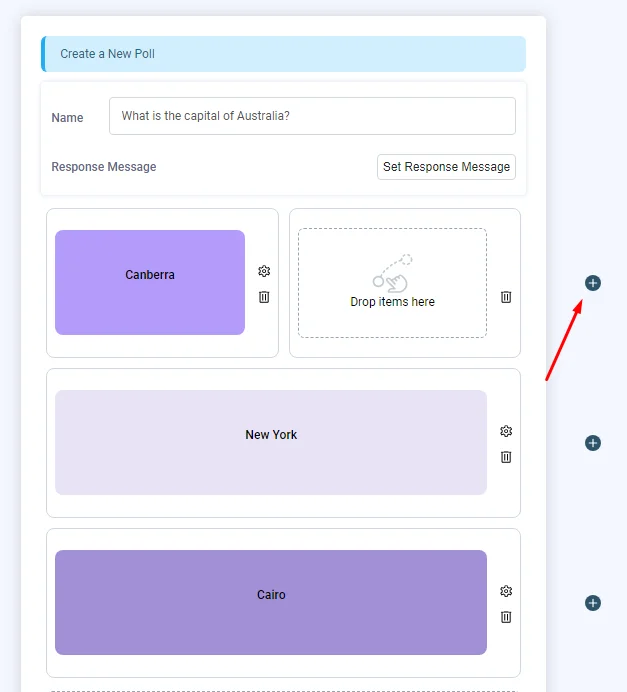
3.) Enter the poll name and response message Once the user picks a choice, click on the "+" button to create a new choice.
4.) Once you click on it, you will be prompted with a window where you can edit the style of the button.
5.) Once you choose the poll, you can click on each button to edit it.
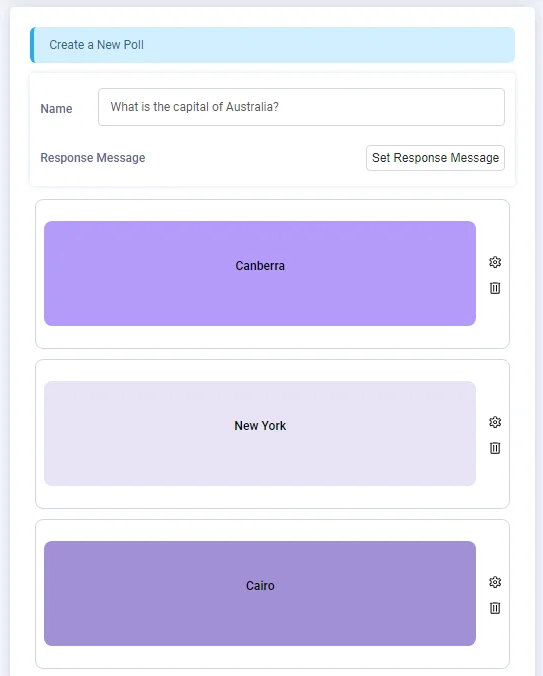
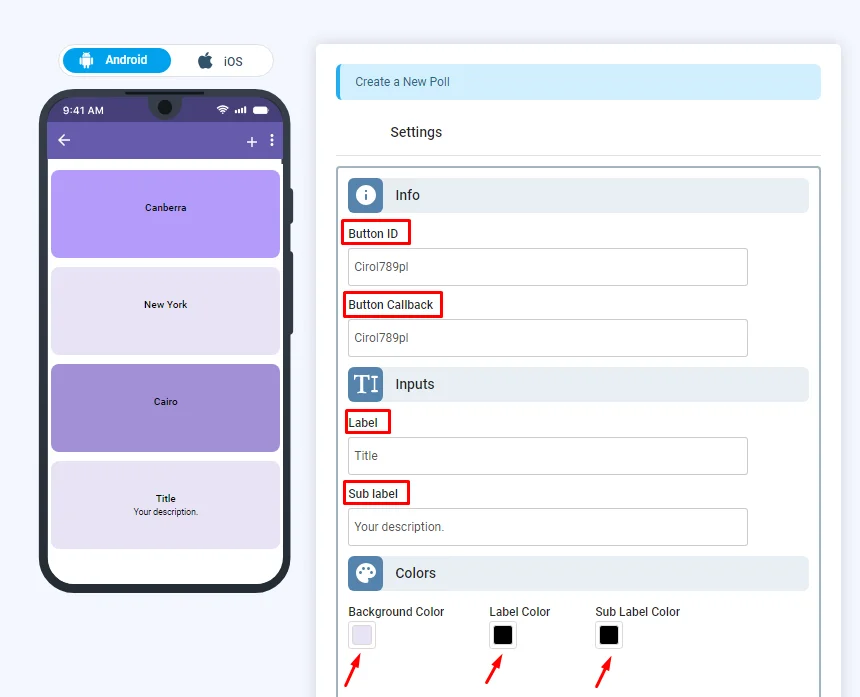
- For this button, the button ID and button callback are restricted to developers only. You can add the label, sub label, choose background color, label color, and sub label color.
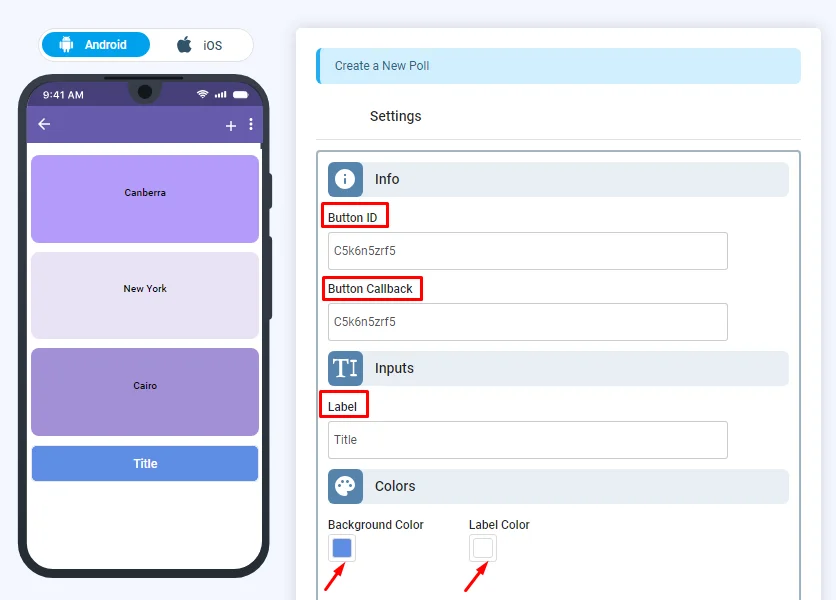
- For this button, the button ID and button callback are restricted to developers only. You can add label, choose background color and label color.
You can also add more buttons along with the one you created by clicking the plus icon.
6.) Once you're done, click back and then click Save Poll.

Create a Competition Poll
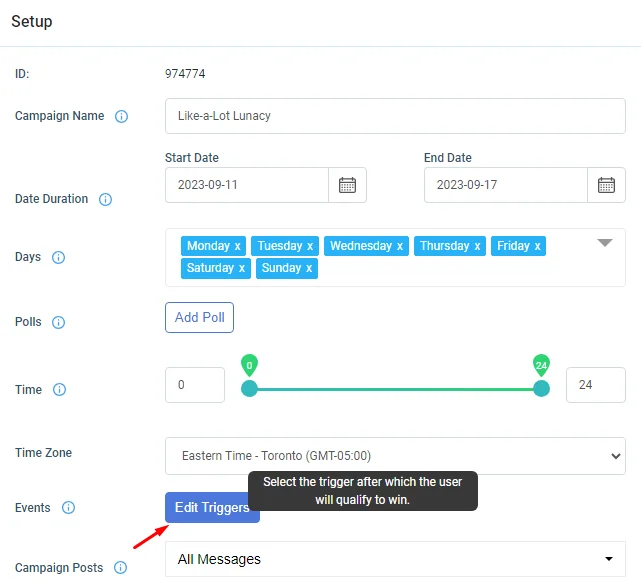
1.) You can also assign the trigger to be when a user chooses a certain answer in a poll. To do that, get back to the events section and click "Edit Triggers."
2.) Choose "Button" and click 'Done.
3.) From the setup section, click 'Add Poll'.

4.) Choose the poll that you created and click "Insert".

5.) You can then choose which choice the user will qualify for if they choose it.
Updated about 1 year ago