
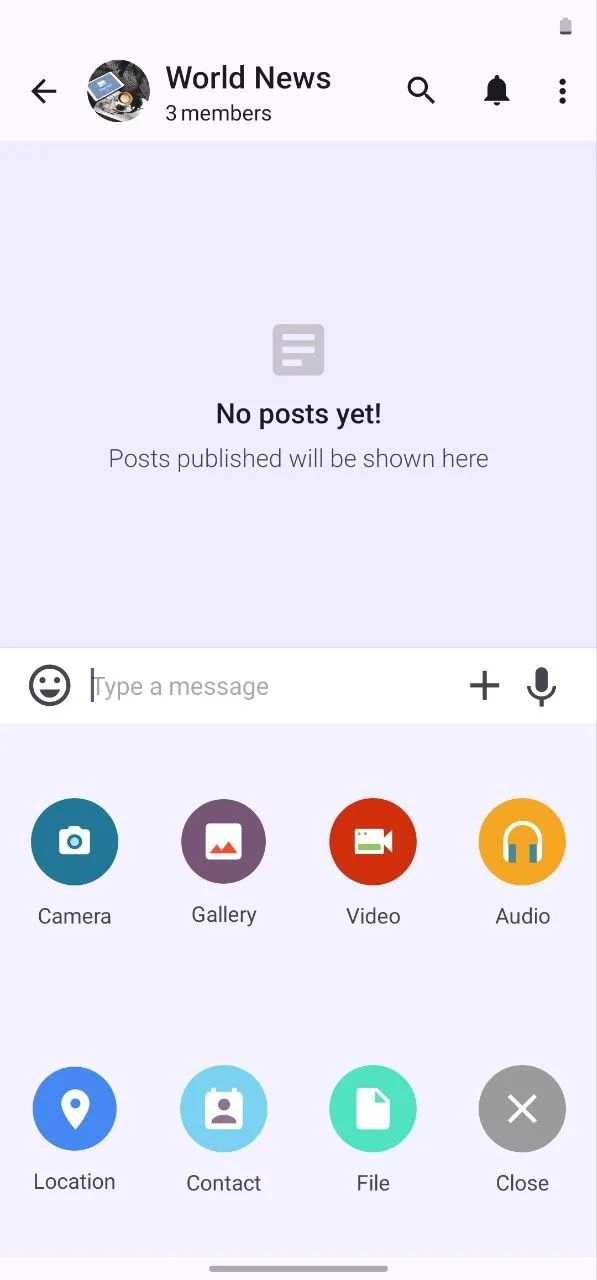
Entertain your audience with interactive content and keep them posted with the latest updates while receiving their feedback privately. Channels allow you to post messages, images, videos, and files, with the option of targeting and segmentation. With unlimited subscribers to each channel, you can include multiple channels on your app to deliver diverse content on each one of them.

This component is the best for Communication, Educational, Messaging and Entertainment apps.
Included Features
- Posting
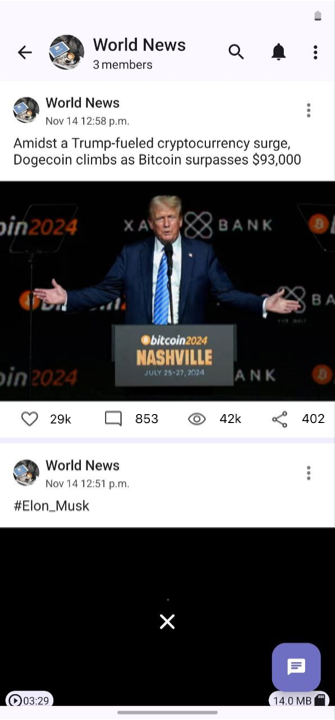
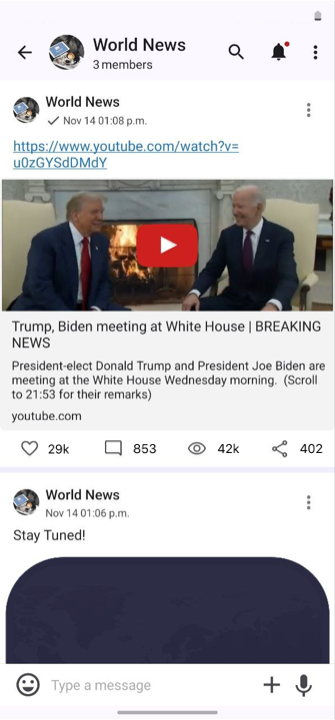
You can post messages, images, videos, GIFs, and files to your different channels. You can also add segments and tags to your audience for targeted posts.

- Read Counter
Displays simple statistics for how many users viewed a post within its first two weeks; the bar also enables the users to engage with a post by adding a like, comment, or share. While the comment dashboard collects comments and displays them in a list for channel administrators.

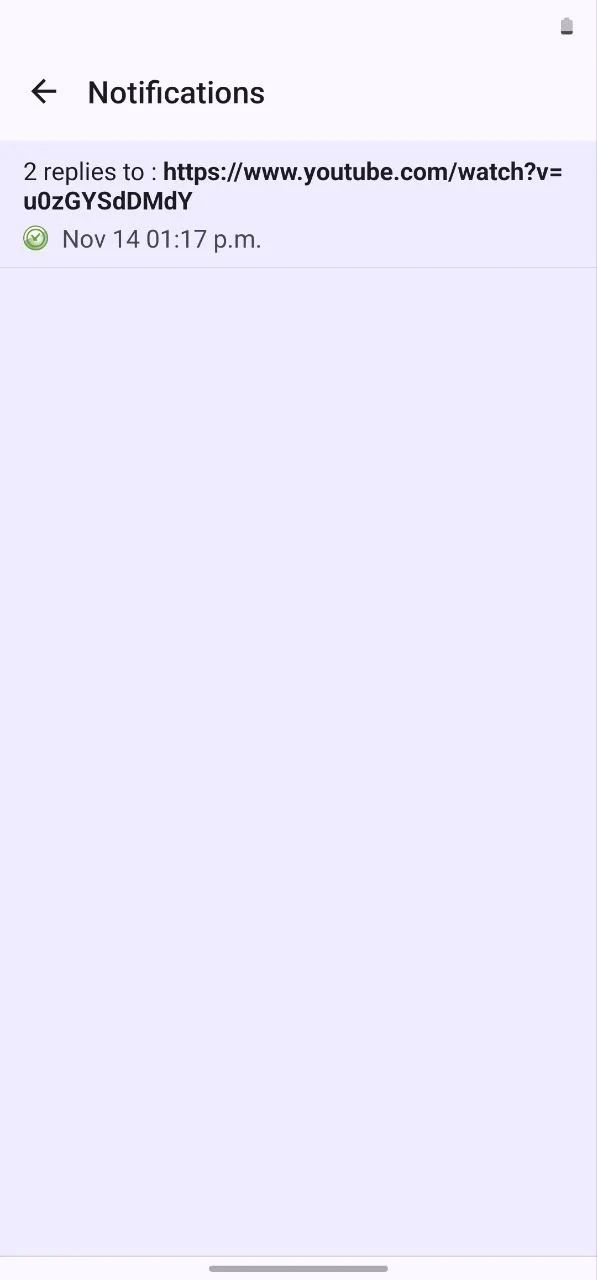
- Notifications
Notifications page that displays recent notifications, shows unread ones, and provides the ability to respond to different types of messages.
- Link Metadata Fetching
Enables fetching metadata from a URL upon posting it on the channel.
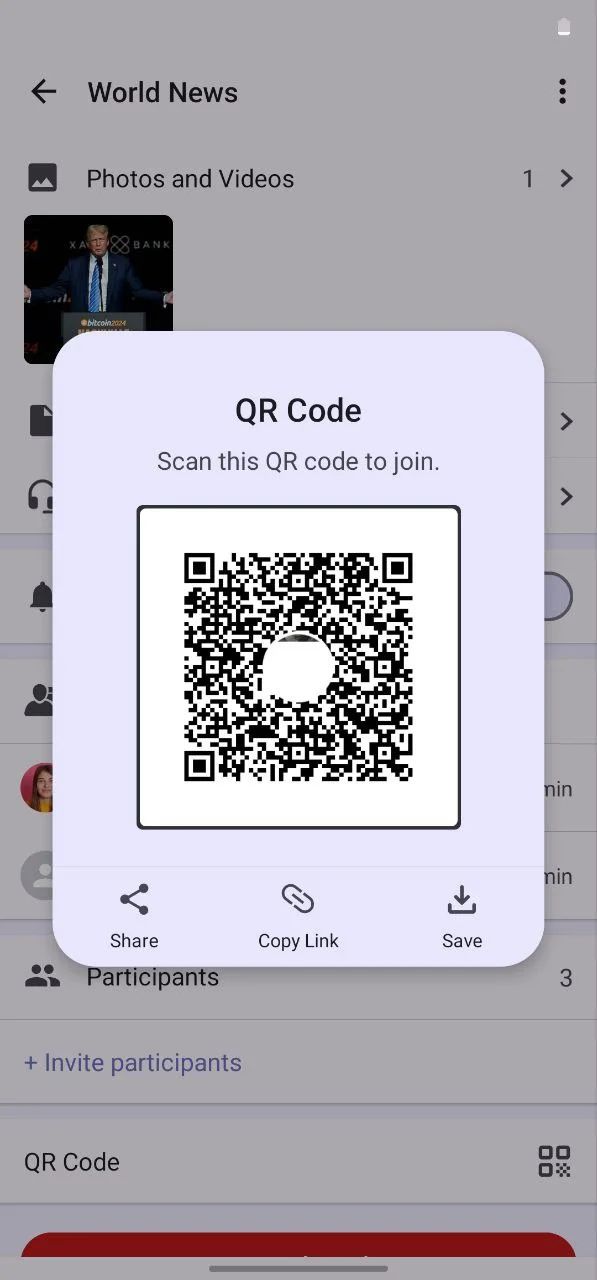
- Invitation QR Codes
Users can subscribe to your channel on your app by scanning QR codes.
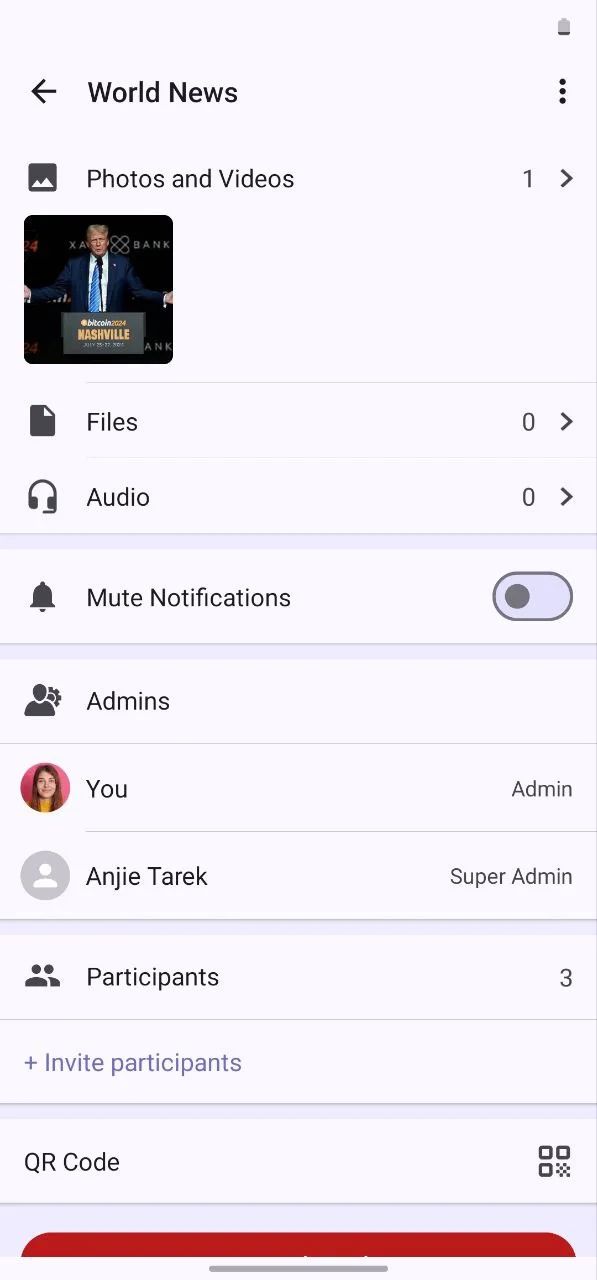
- Multiple Administrators
Allows you to assign multiple administrators to your channels.
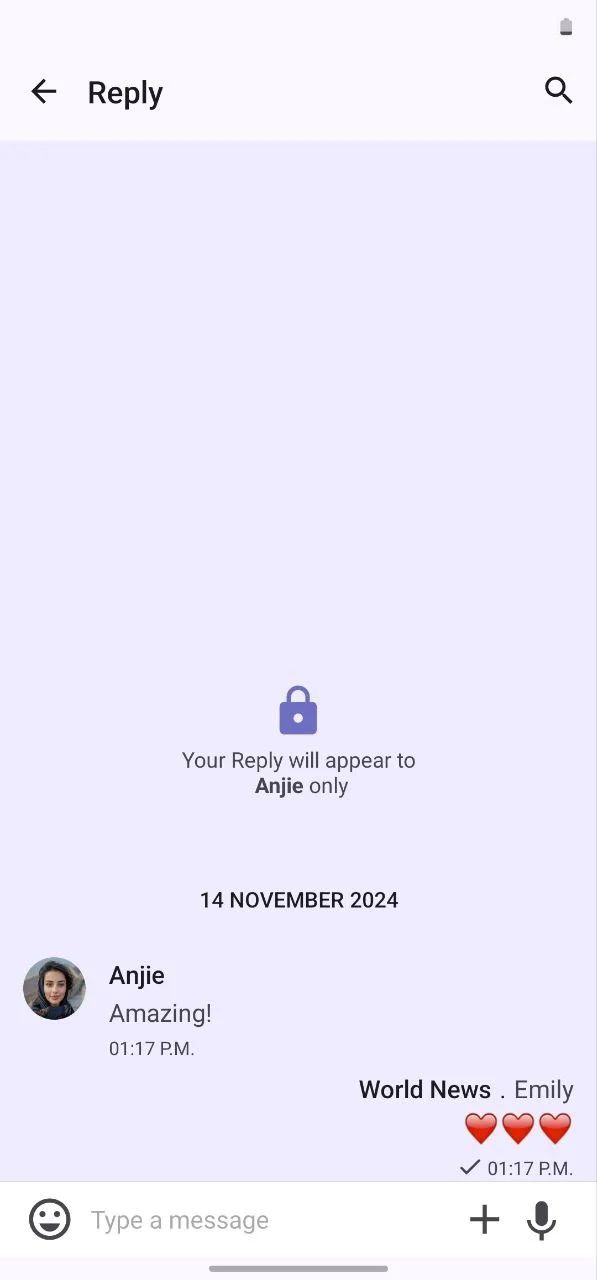
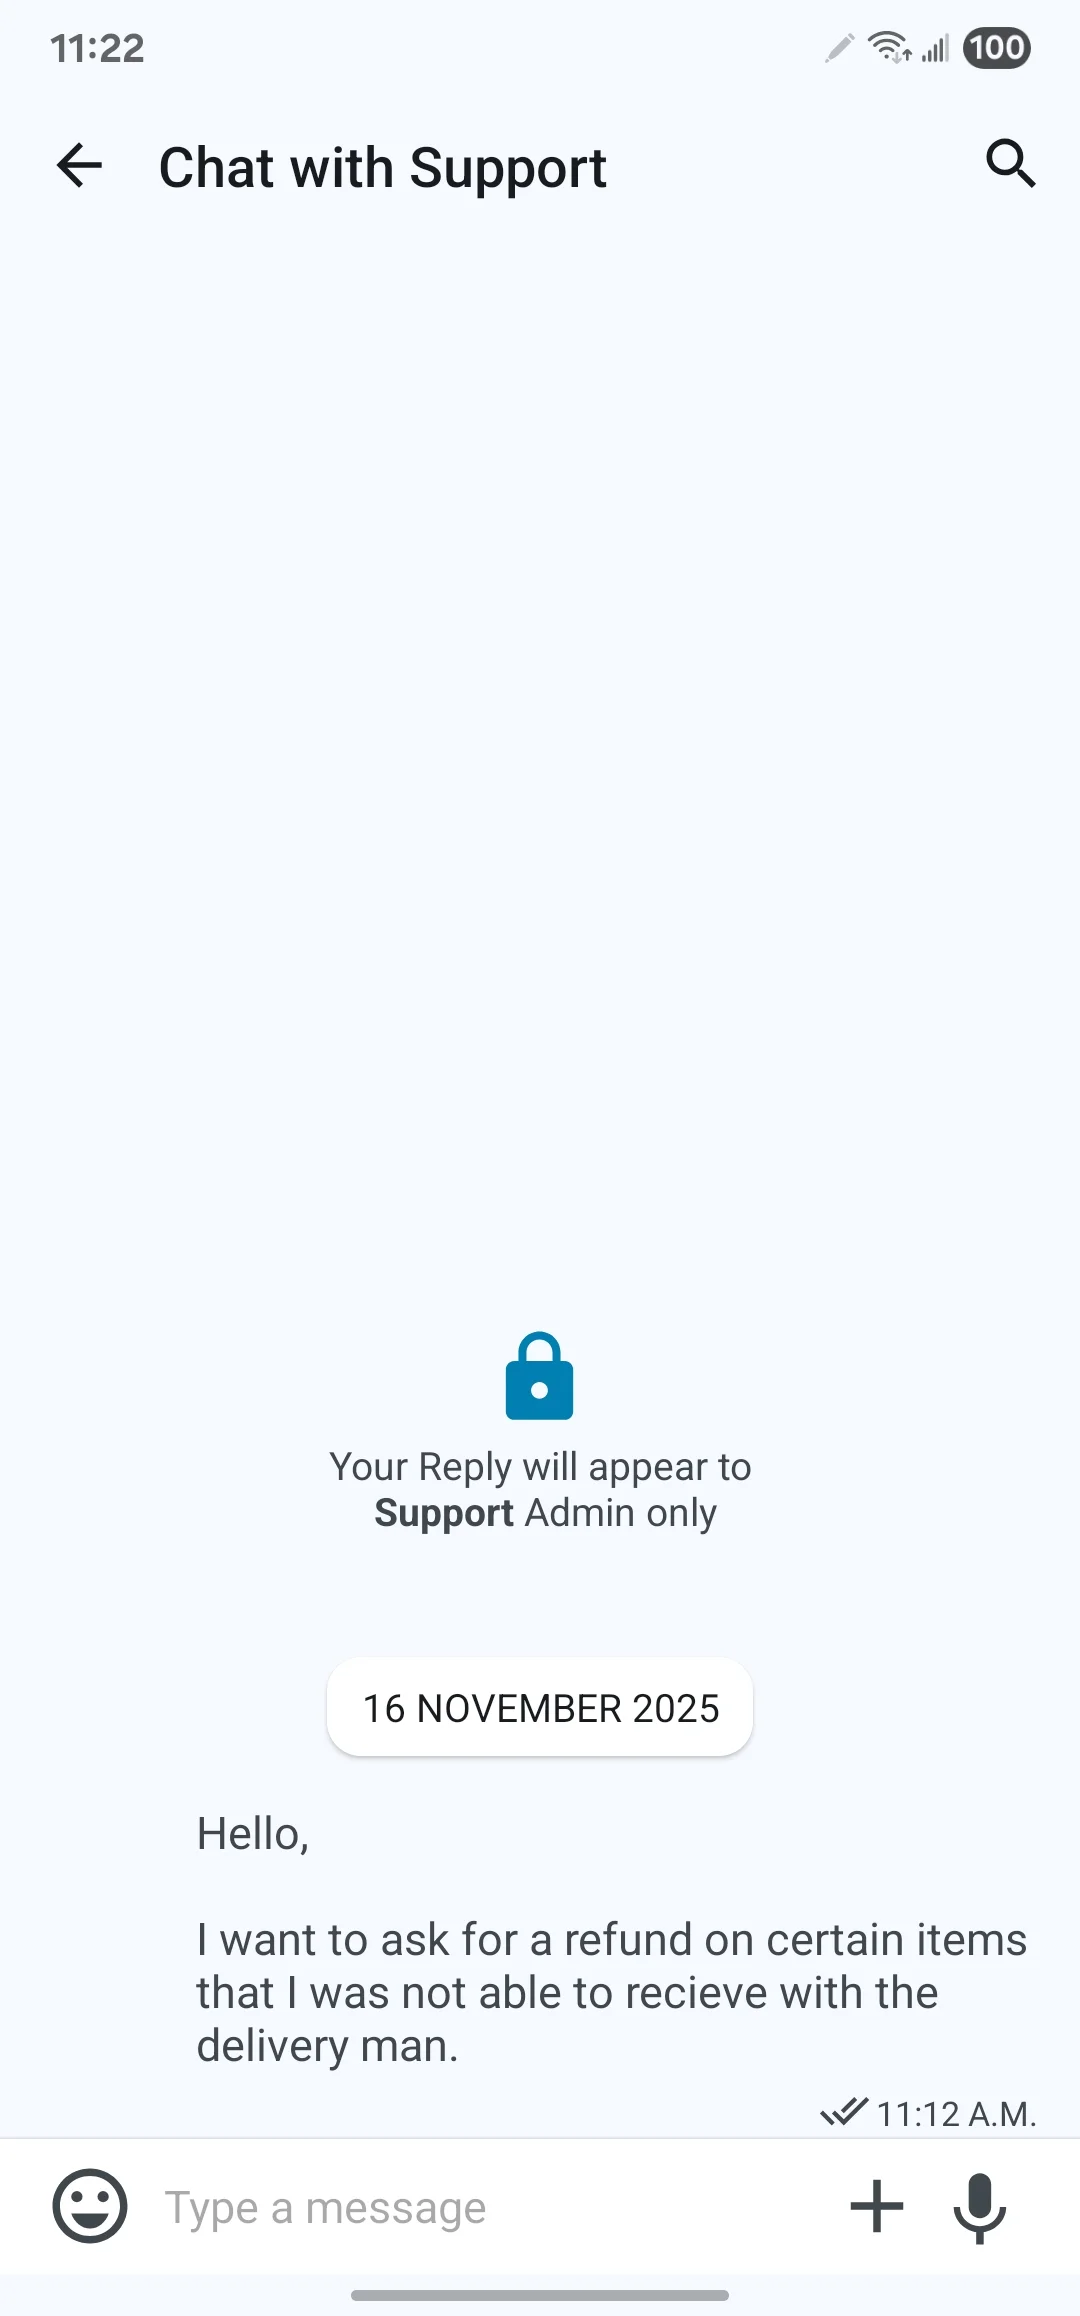
- Talk To Admin
for app users to chat directly and privately with the admin.
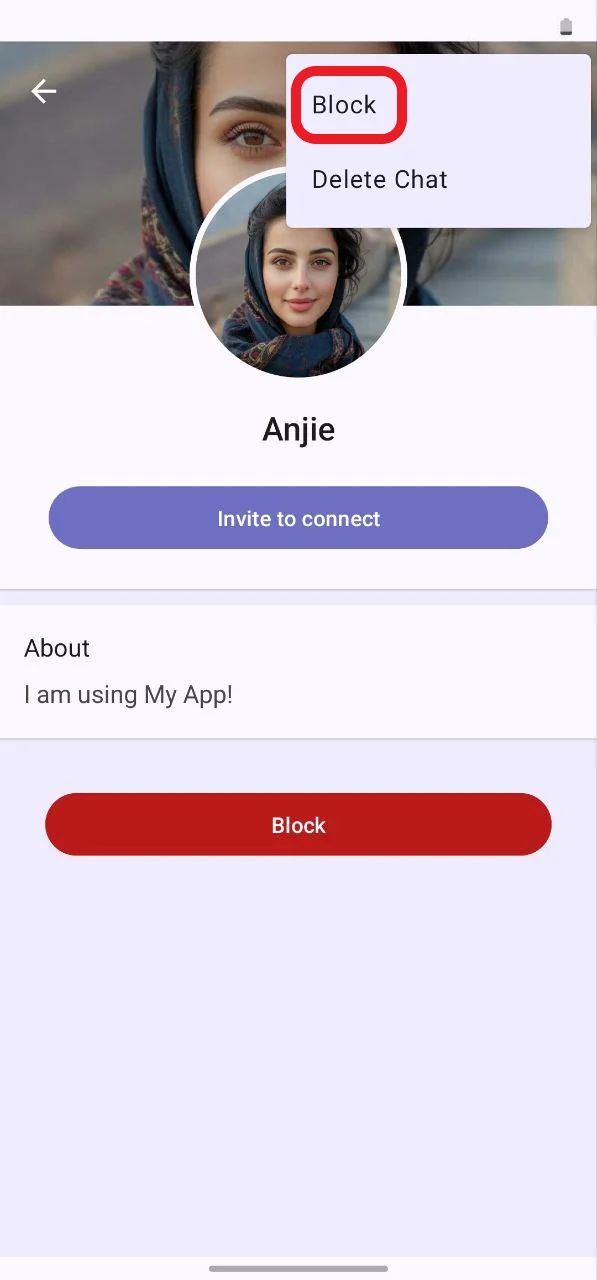
- Block Users
Allow administrators to kick out specific users from channels created on your app.
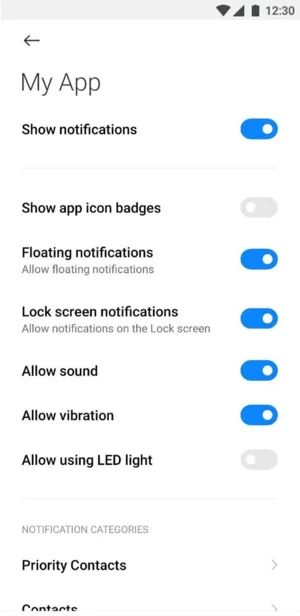
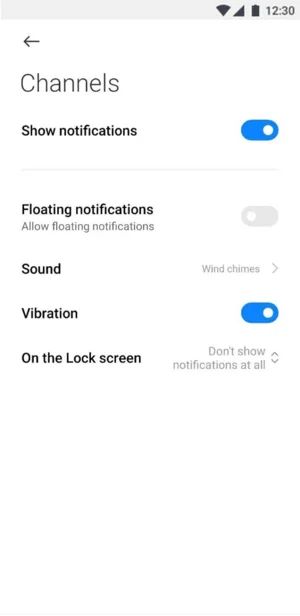
- In-App Sounds & Vibrations
For users to customize in-app app sounds, vibrations, and notification tones
Components
There are three components included:
- Channel Suite: Show the channels that the user is active on.
- Subscribed Channels: Show the channels that the user is subscribed to.
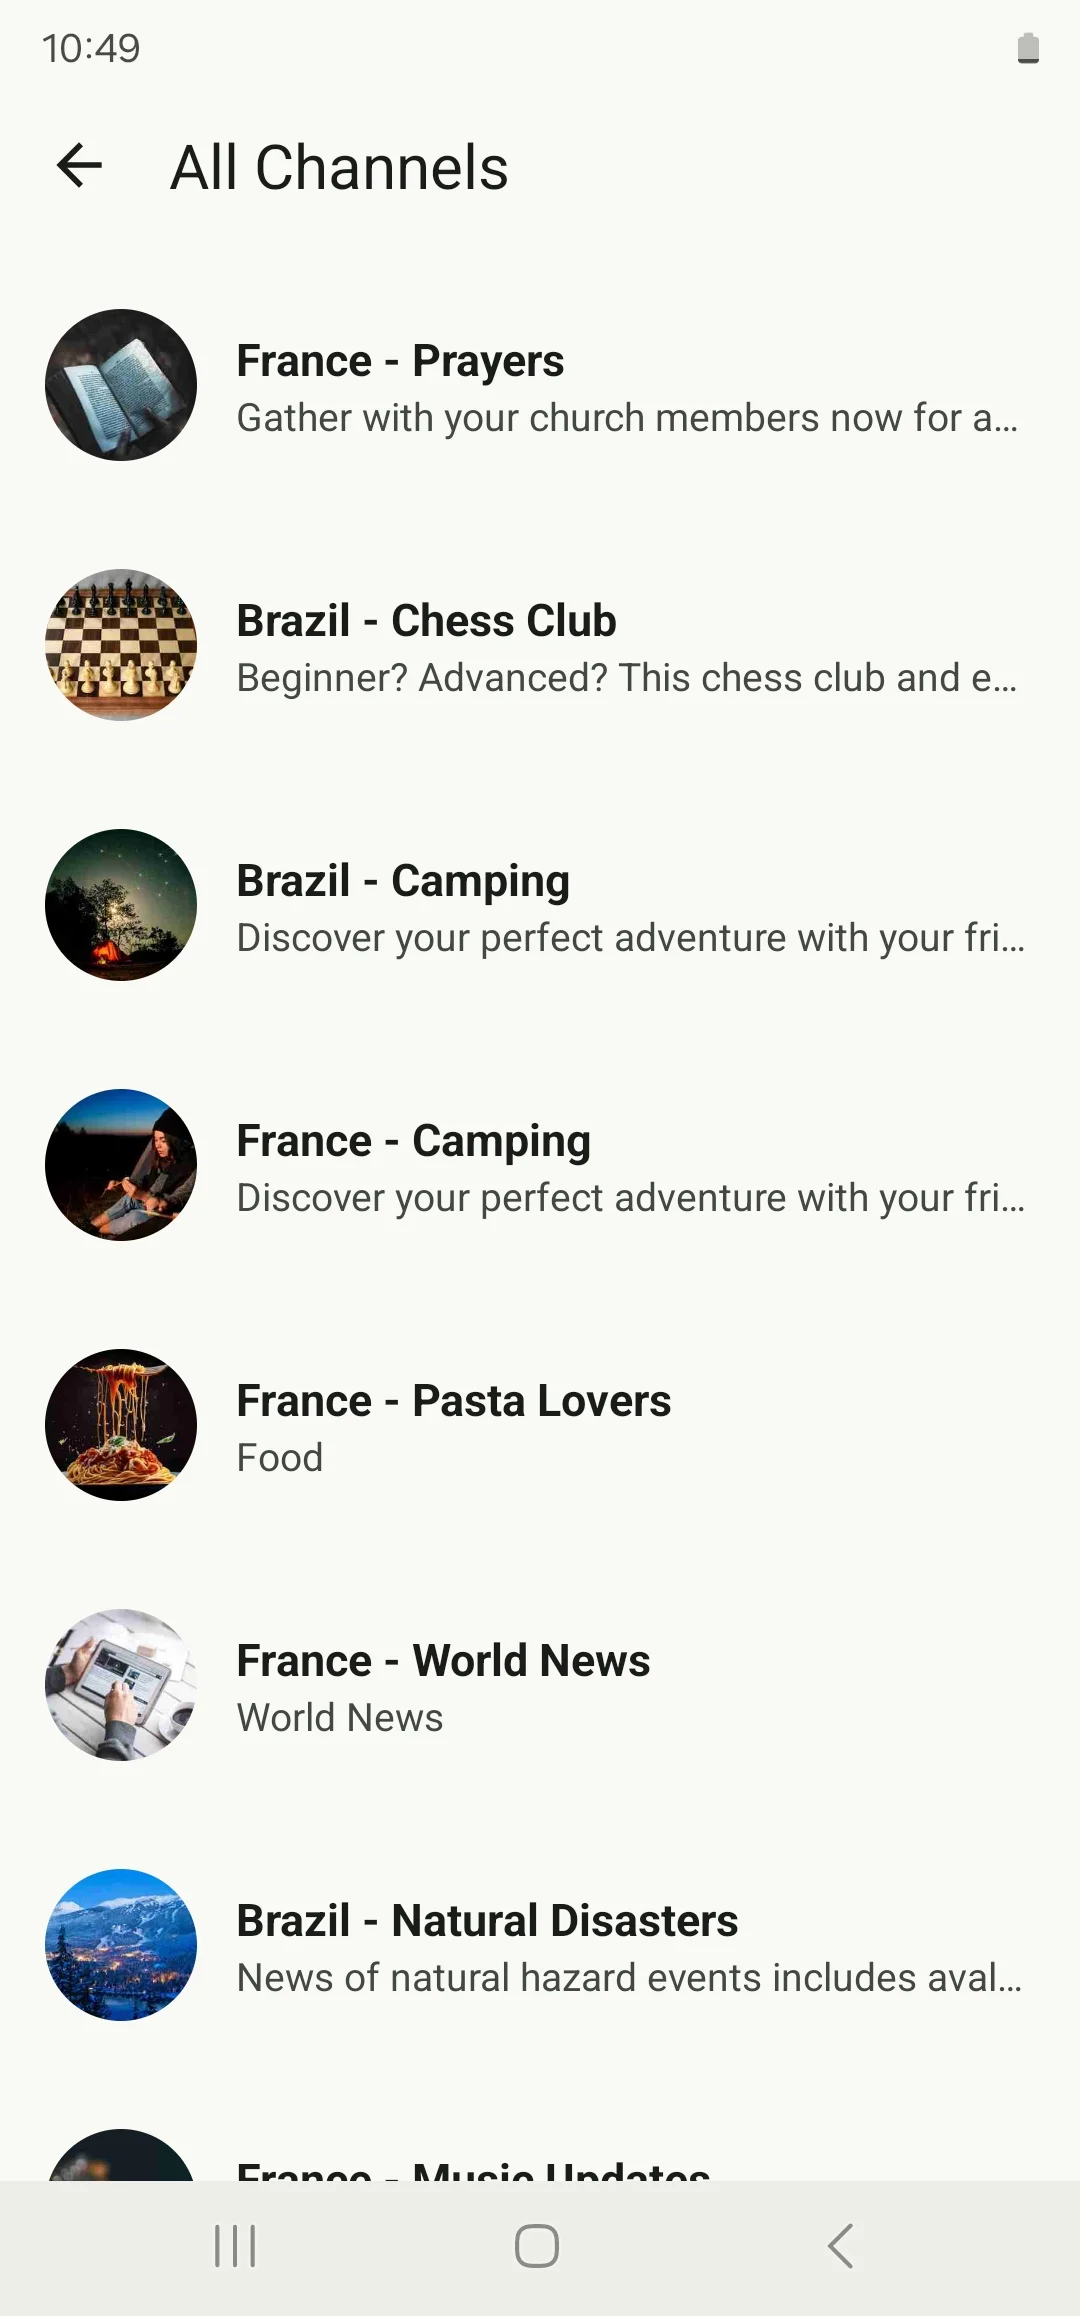
- All Channels: Displays the list of all channels that are available on the app.
- Open A Channel: Opens a certain channel of your choice.
How To Install The Component
These components can be installed in:
- App's Navigation Page ✓
- App's Side Menu ✓
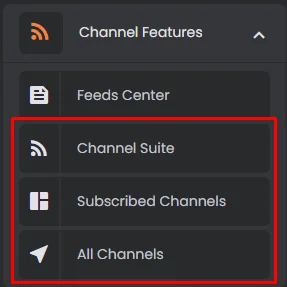
You can find the Channel Components in the Channel Features section. Click or drag and drop the components into your navigation or side menu to install them.
How To Configure The Component
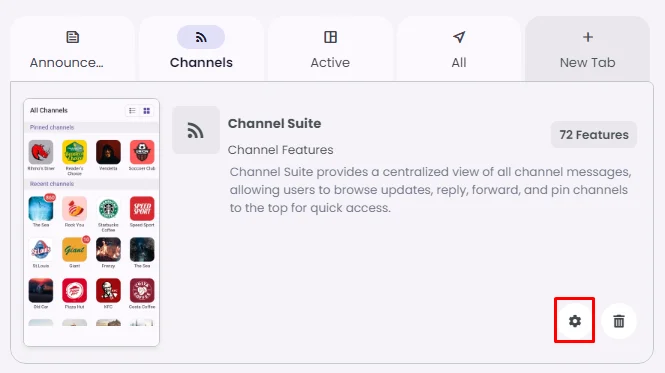
- Channel Suite:
Click the gear icon to configure the component settings.
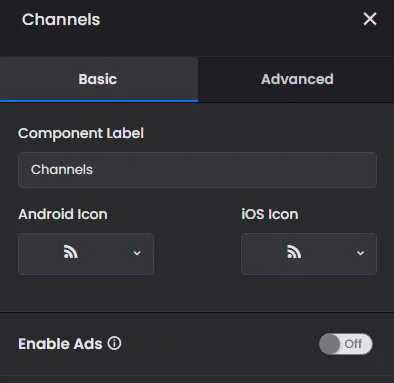
Basic Section:
Rename the component and choose an Android and an iOS icon for it. You have the option to include ads in your app using Google AdMob.
Advanced Section:
Enable the post footer: turn on the toggle and start picking an icon and icon color for each element in the menus.
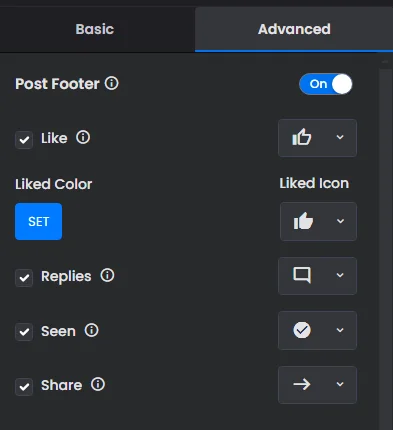
Enable Context Menu to Post: Enable the menu if you want to add options for users when it comes to certain posts. Start picking the option with its icon.
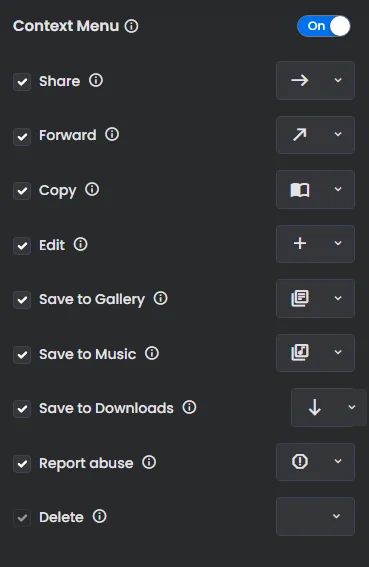
Switch the toggle on if you want to hide invitational links from being shown to users.

Note that both Subscribed Channels and All Channels have the same configurations as Channel Suite.
Create A New Channel
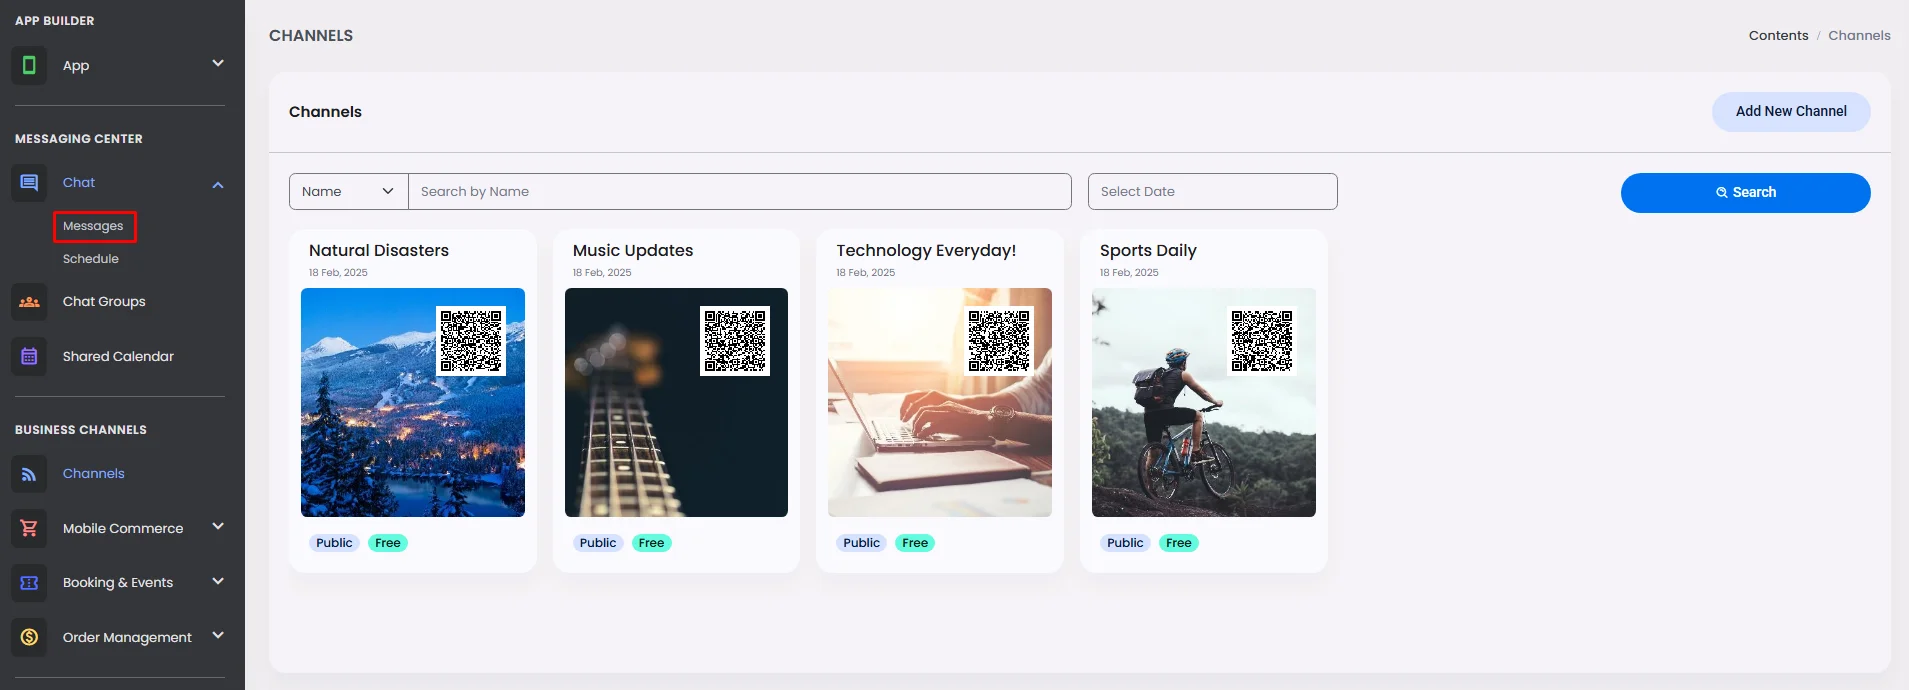
- From the admin menu, go to the Business Channels section and click ‘Channels.’

- Click ‘Add New Channel.’

- A window will appear where you can enter your channel name and description, image, type (Public or Private), category, language used, time zone, and whether you want to enable Google Ads or not.

- Search Keywords:
You can give your channel certain keywords that users can use to find it.

- Splash Screen:
You can add a splash screen to your channel by turning the toggle on, which includes an image, title, and description. You can also change the button text and colors associated with it.
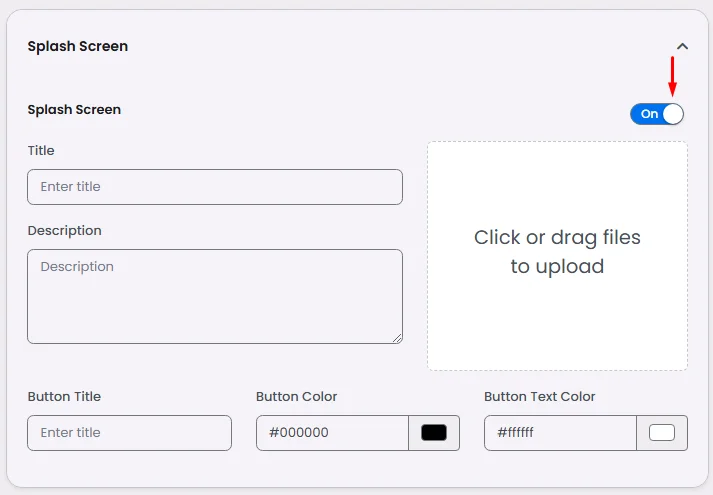
A splash screen is an introductory graphical screen that shows an explanatory message when you first install an app. It can also be displayed when a user first enters your channel.
Which will look something like this:

And when you click ‘Create,’ additional options will appear:
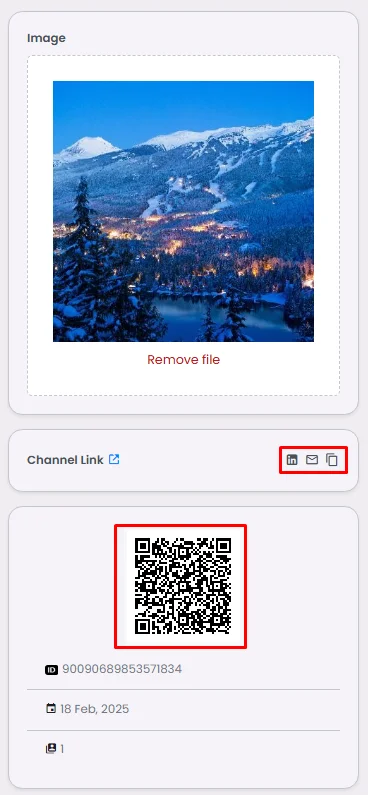
- Channel Information:
Below the channel image, you’ll find the channel's invitational links, QR code, channel-created ID, date of creation and number of members in this channel.
- Channel Type:
Choose between Standard and Onboarding:
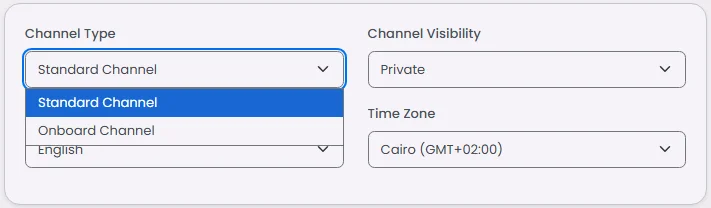
- Standard Channel
- Used for broadcasting content to users.
- Only admins post; users can view but do not reply.
- Suitable for content such as news, updates, food offers, sports, and general announcements.

- Onboarding Channel
- Used for two-way communication between users and the admin.
- Users can send messages directly to the admin through this channel.
- The admin receives and manages messages from all users in one place, making it ideal for onboarding, customer support, or feedback.
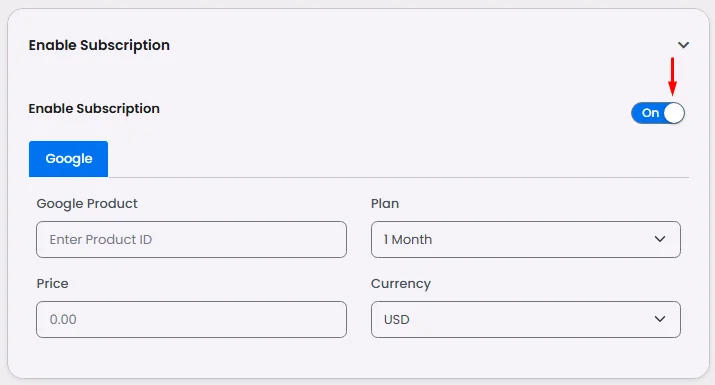
- Enable Subscription:
If you're enabling the subscription feature, this part is for you. Check out our guide for In-App subscriptions configuration.
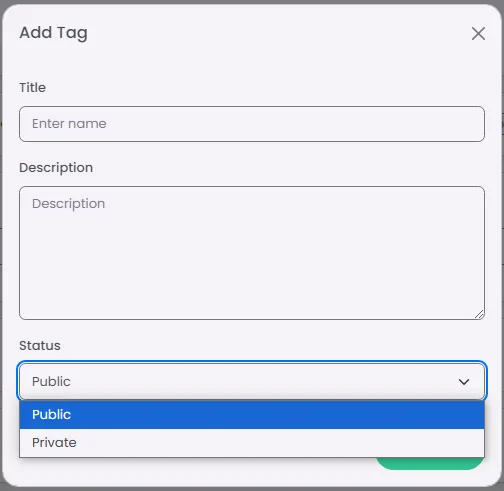
- User Tags
You can add tags related to your channel category. Click ‘Add.’

Add the tag's name, description, and status (public or private), and click ‘Add.’
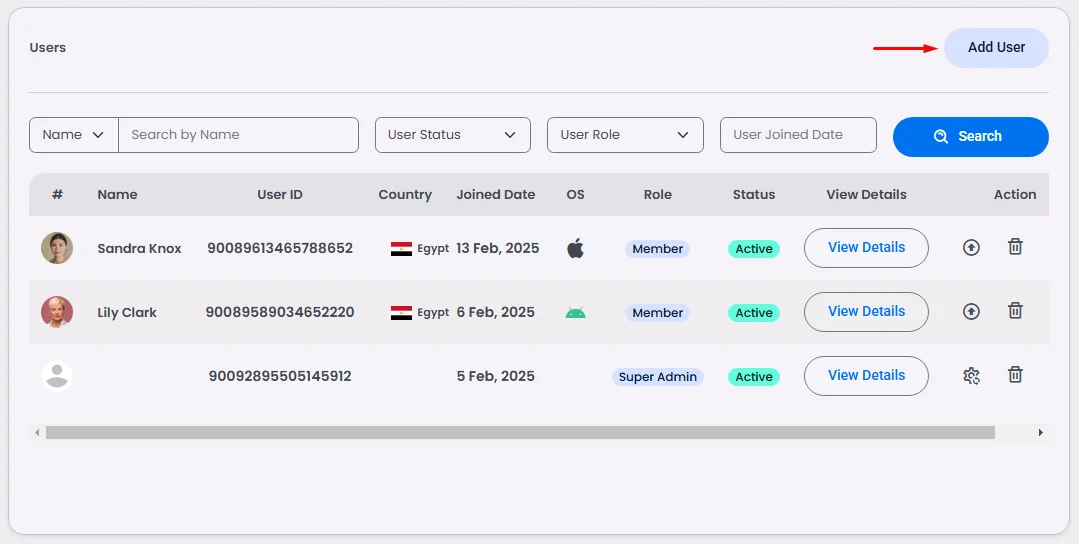
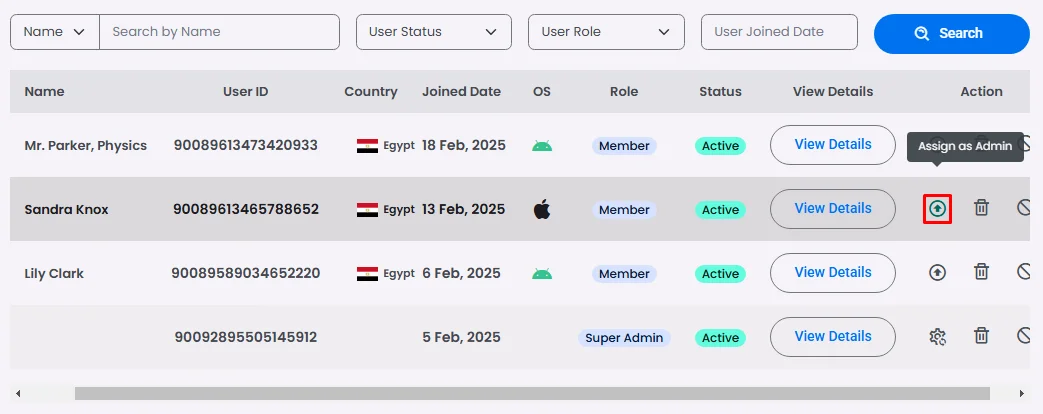
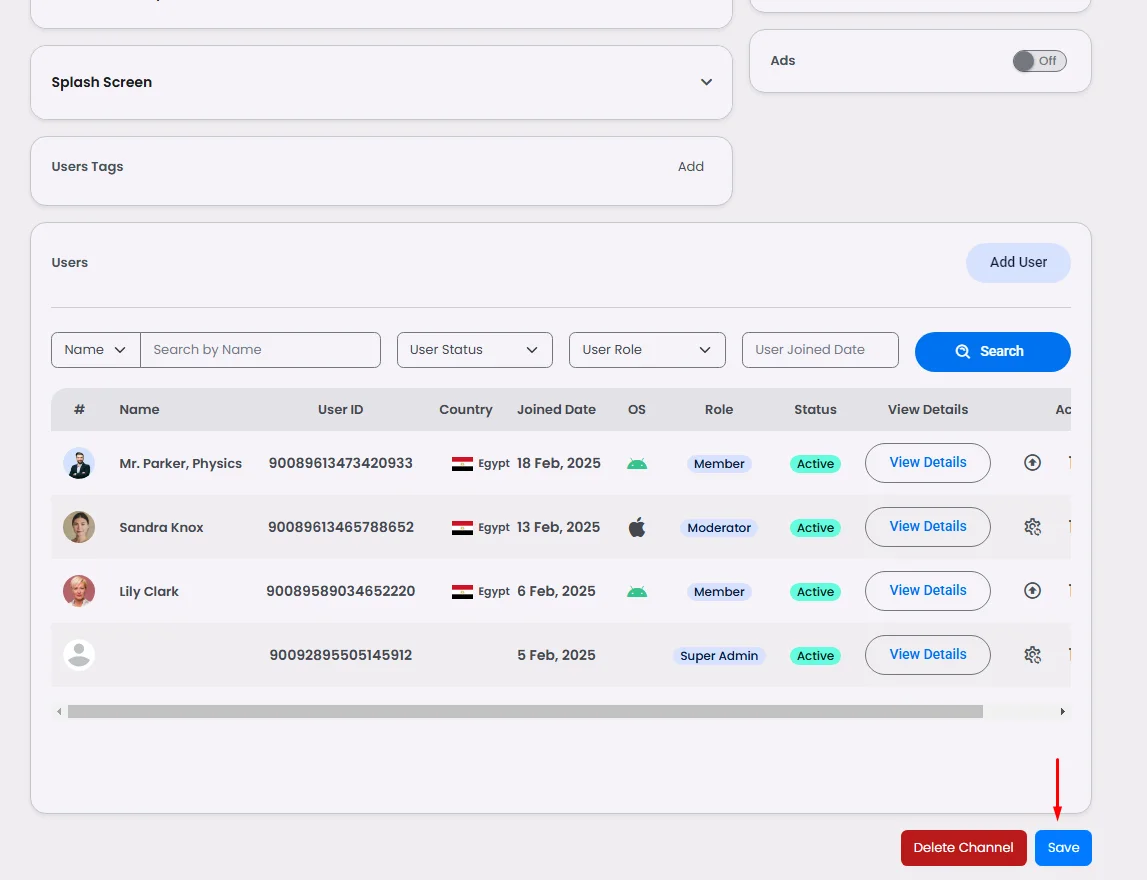
- Users
You can review channel members through the Users section and even search for certain members. Also, you can add users to the channel from this section.
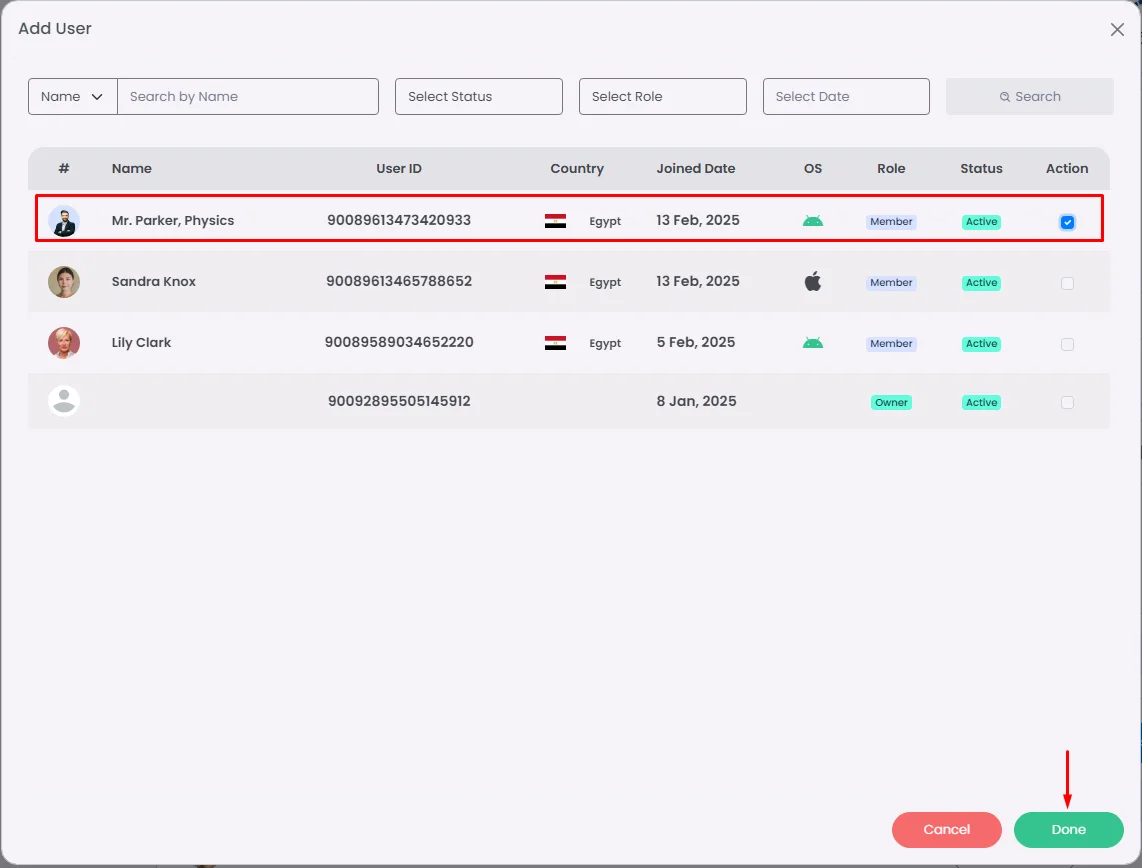
Click ‘Add User.’
Mark the user and click ‘Done.’
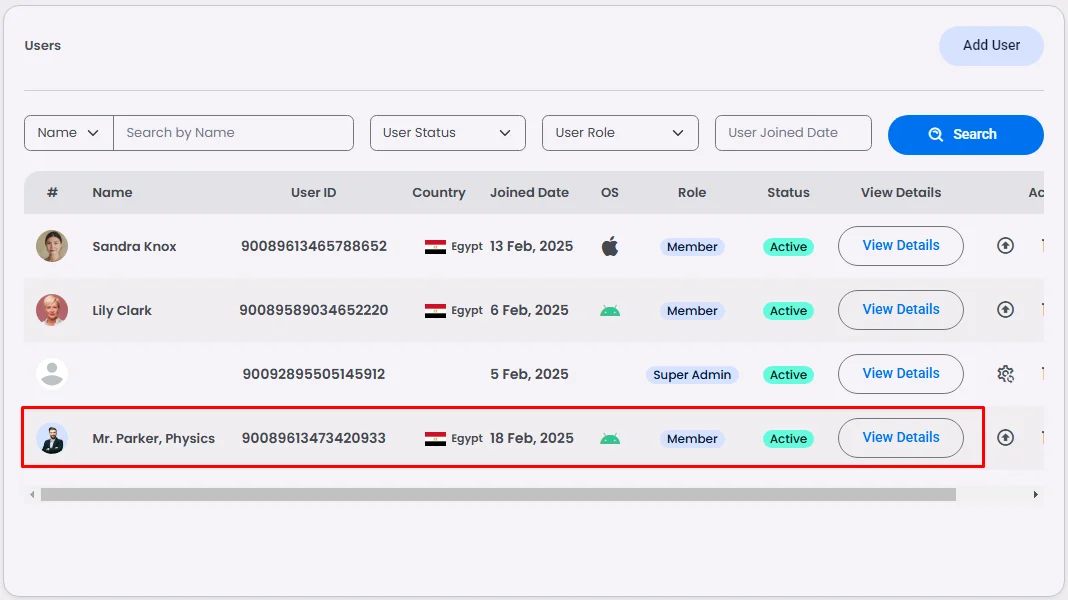
And you will find the user added in the channel’s user list.
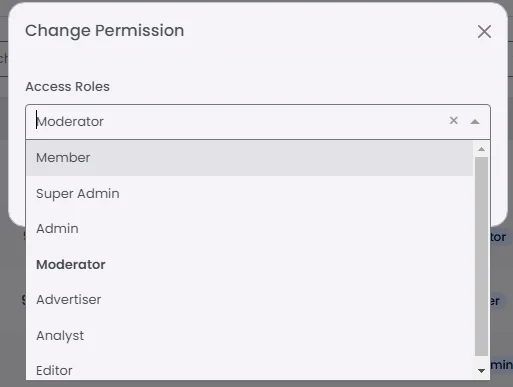
You can upgrade a user role to be admin on the channel by clicking the upgrade icon.
And you can change the admin role later by clicking the gear icon and setting another role for the user.
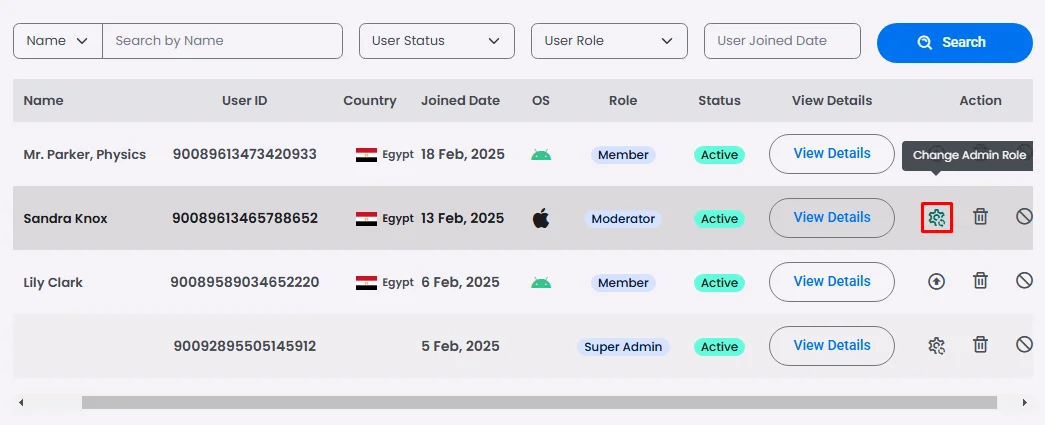
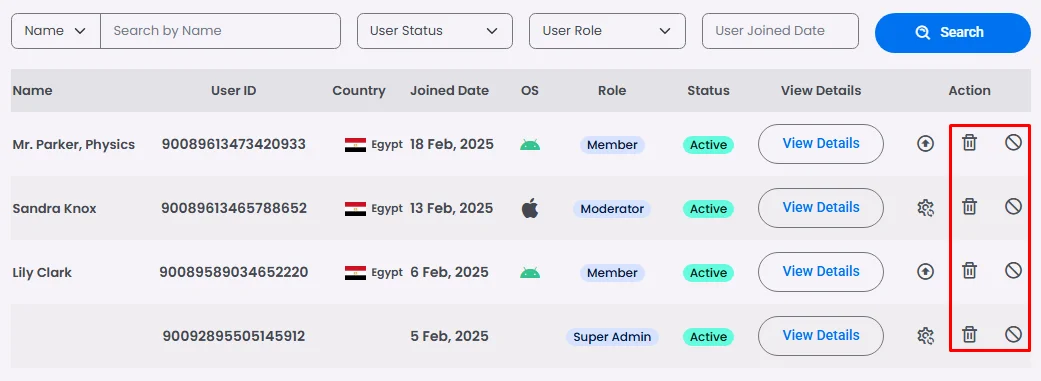
With the ability to delete or block users from the channel.
Then click ‘Save’.
Check this document to learn more about user management.
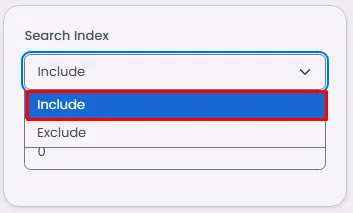
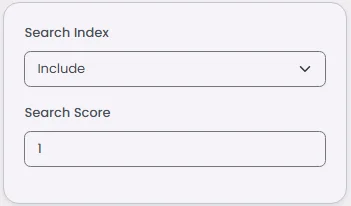
- Search Settings
If you want your channel to appear in the search, make sure to choose ‘Include.’
The search score determines the order of the channels in the search; for example, add 1 to make your channel the first one to appear.
Posting From The App Builder
You can send posts to a channel from the app builder or your device, but in order to use the feature, you need to have admin privileges, as you can do so from the Users section in the channel itself.
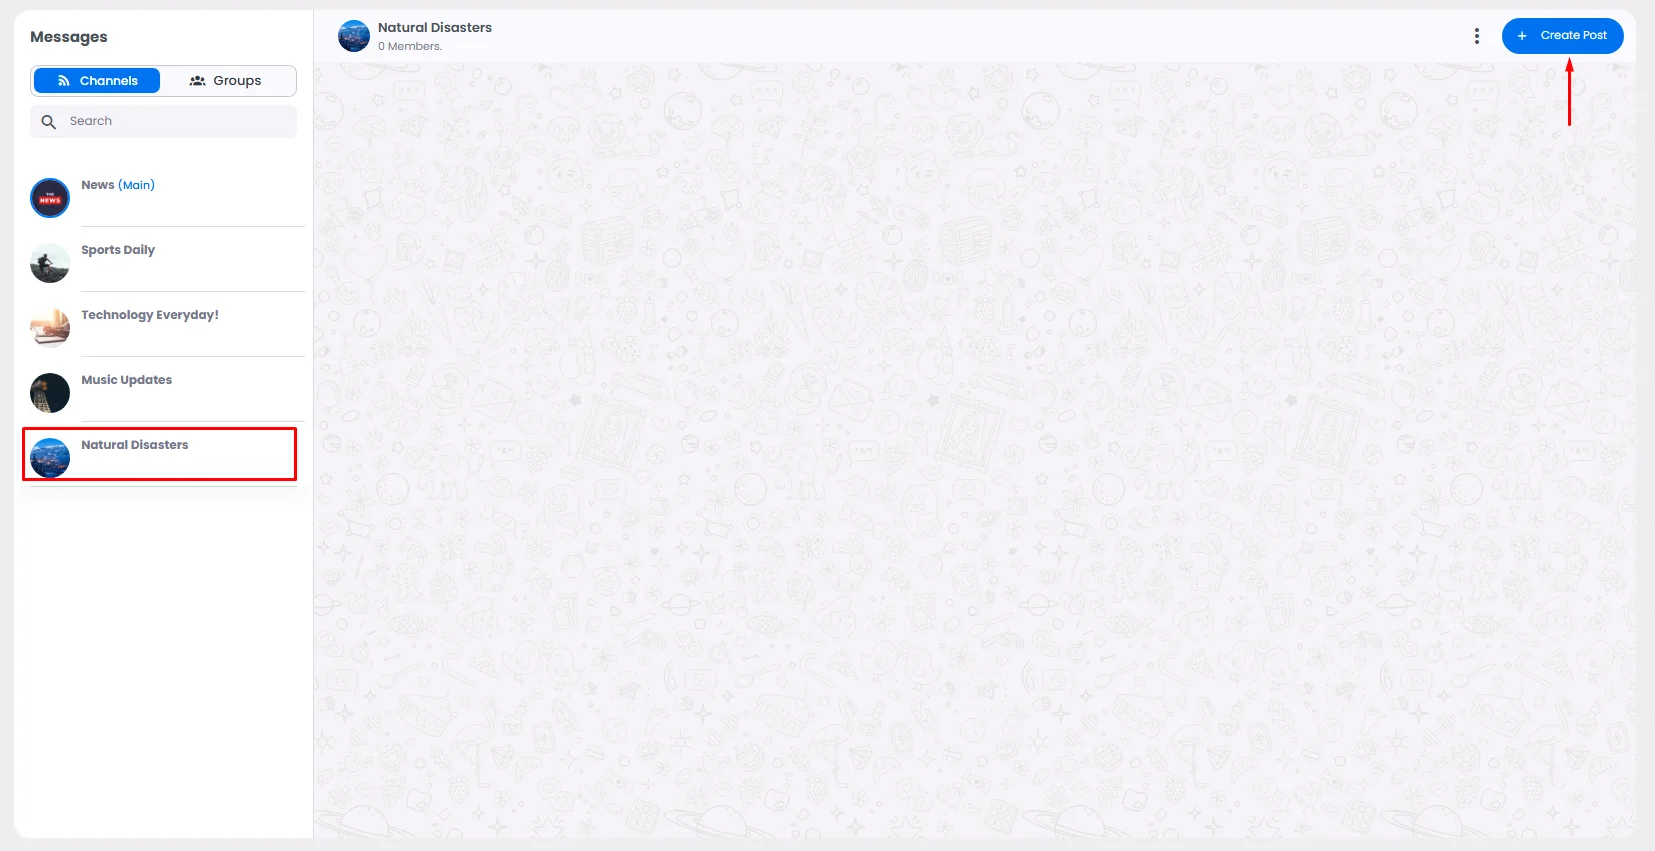
- From the admin, go to the Chat section and click ‘Messages.’
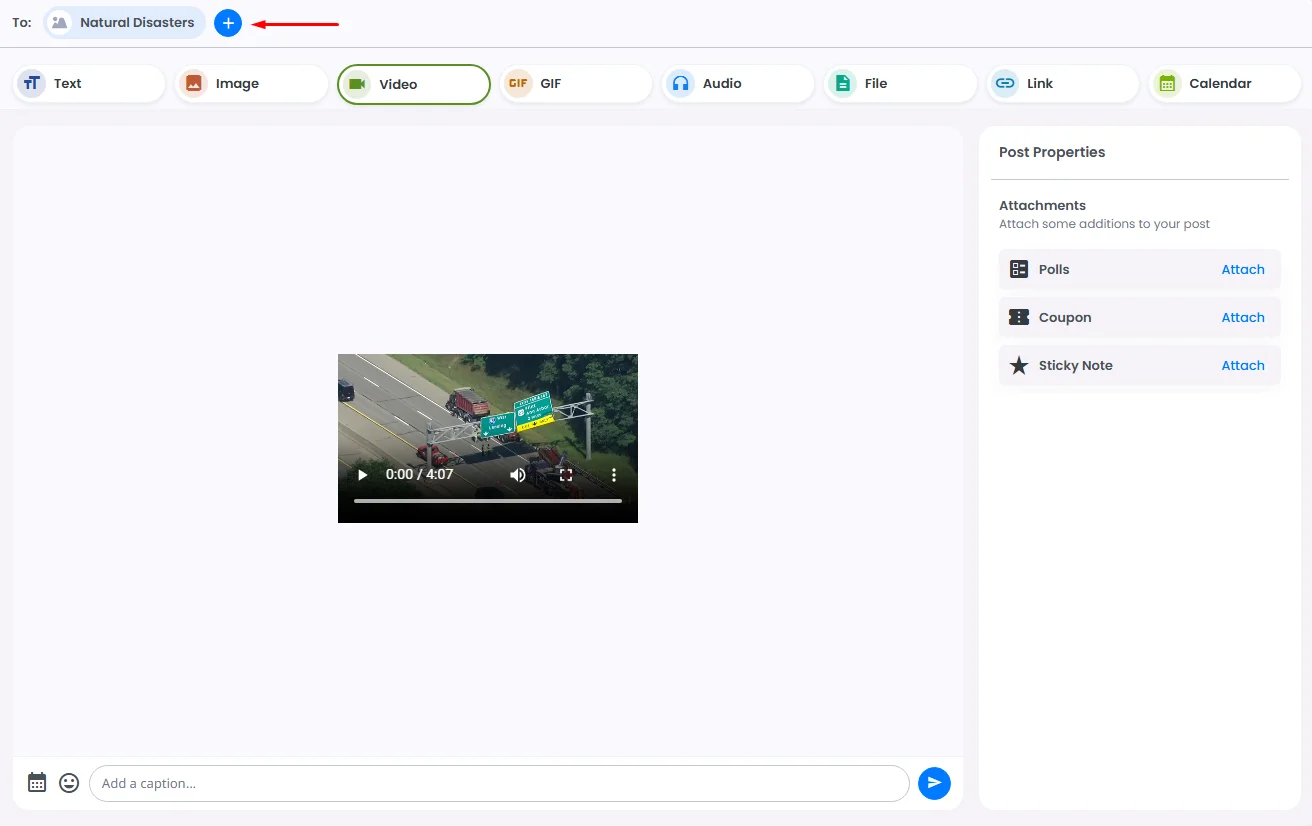
- In the Channels section, choose the channel you want to post in (text, image, video, etc.) and click ‘+ Create Post.’
Check out this documentation to learn how to create a post.
- After you create your post, you'll find the (+) icon.
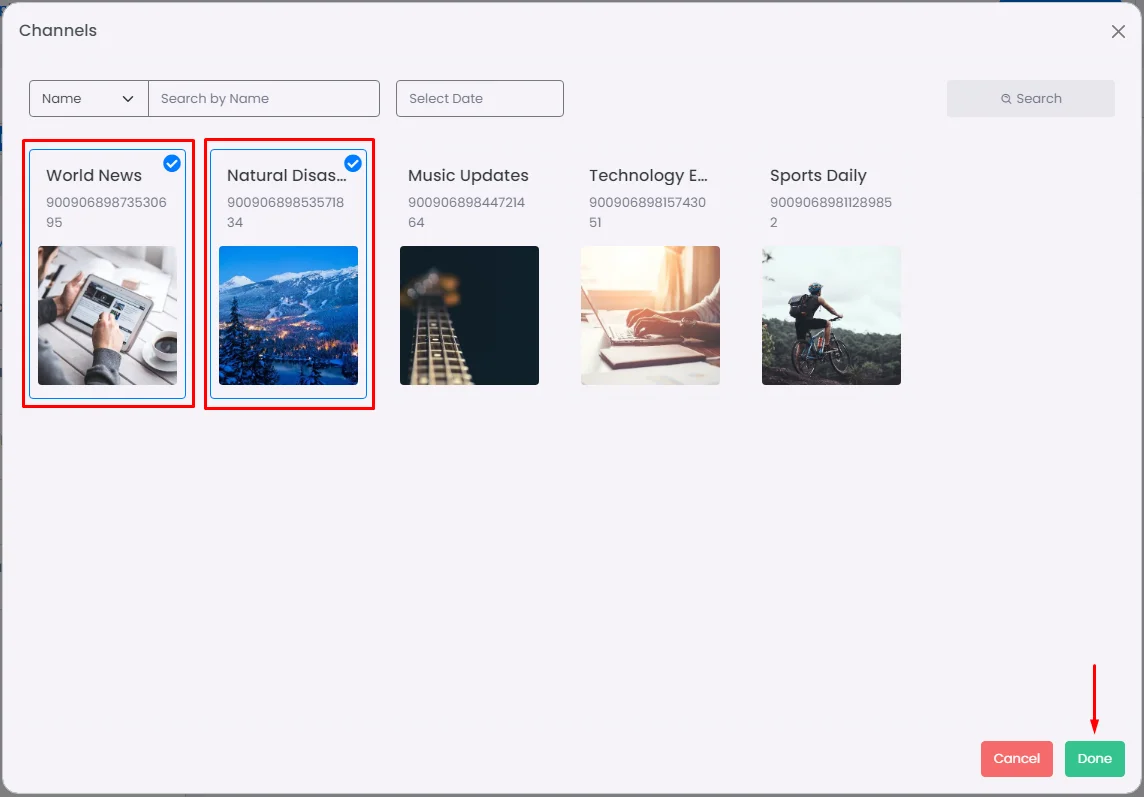
- When you click on the (+) icon, you can choose to share your post on more than one channel Select the channels where you want the post to be submitted, then click ‘Done’.
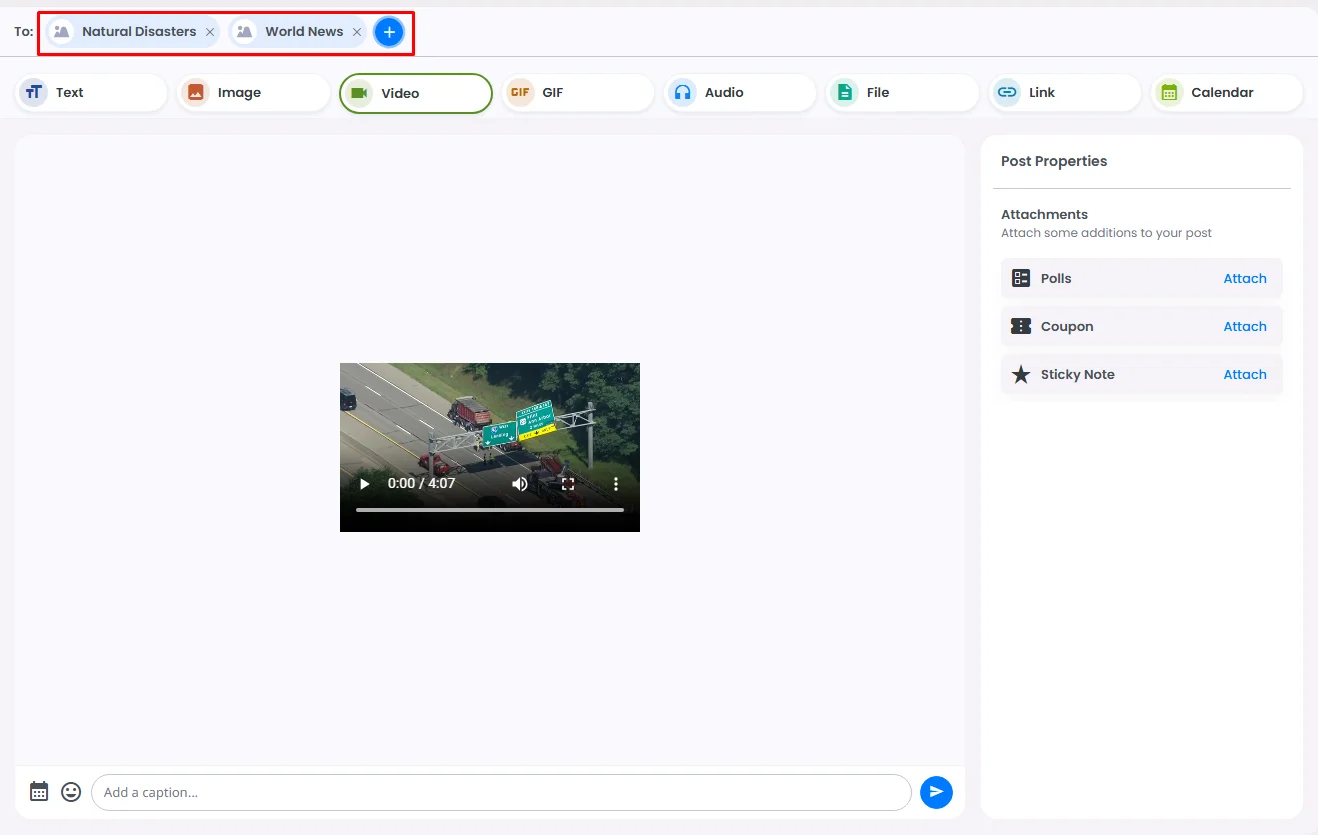
- You'll find the channels you selected your posts to at the top, then click 'Send'.


Posting From Your Mobile Device
In order to post, you need to assign yourself as an admin in this channel. Check out the previous Users points in the Create a New Channel section to configure how to assign a certain user as a channel admin.
Then, you can create a post on your device. Type anything in the box or attach any file or media and send it to your users.

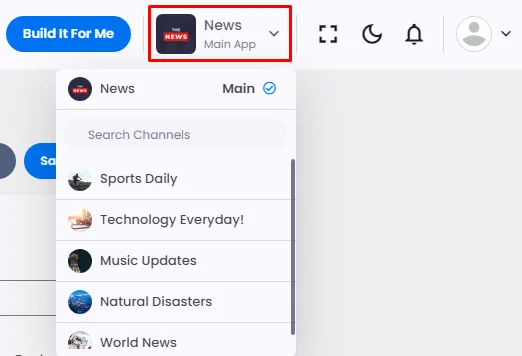
Note that you can always access your channel directly by clicking the ‘Main App’ button in the admin settings top bar and tapping the channel you want to access.
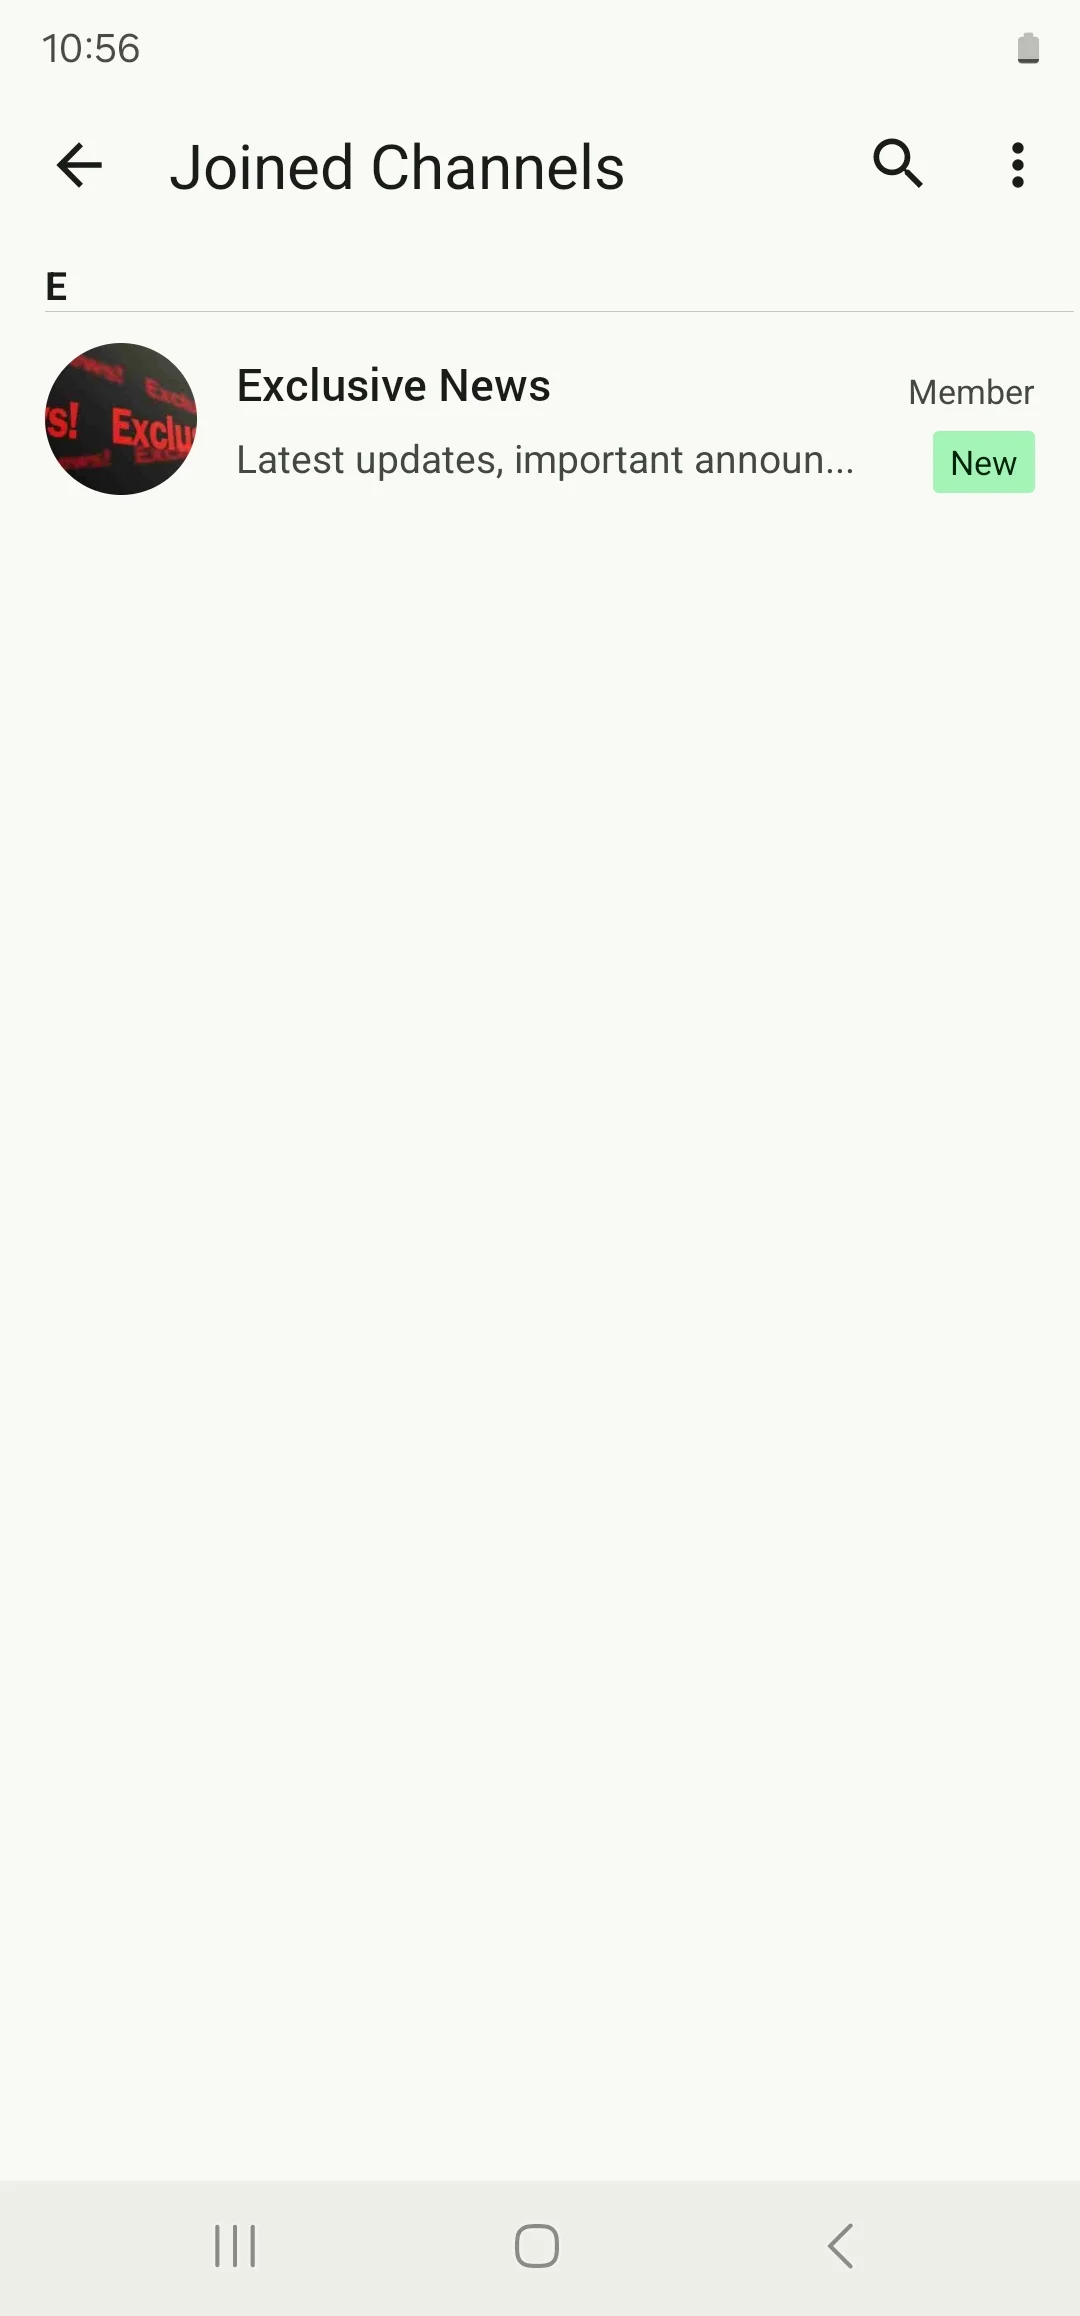
How Can Users Join Private Channels
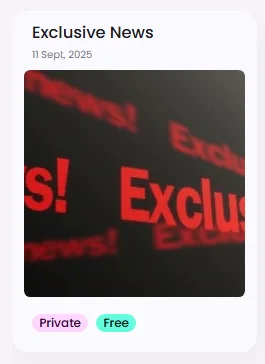
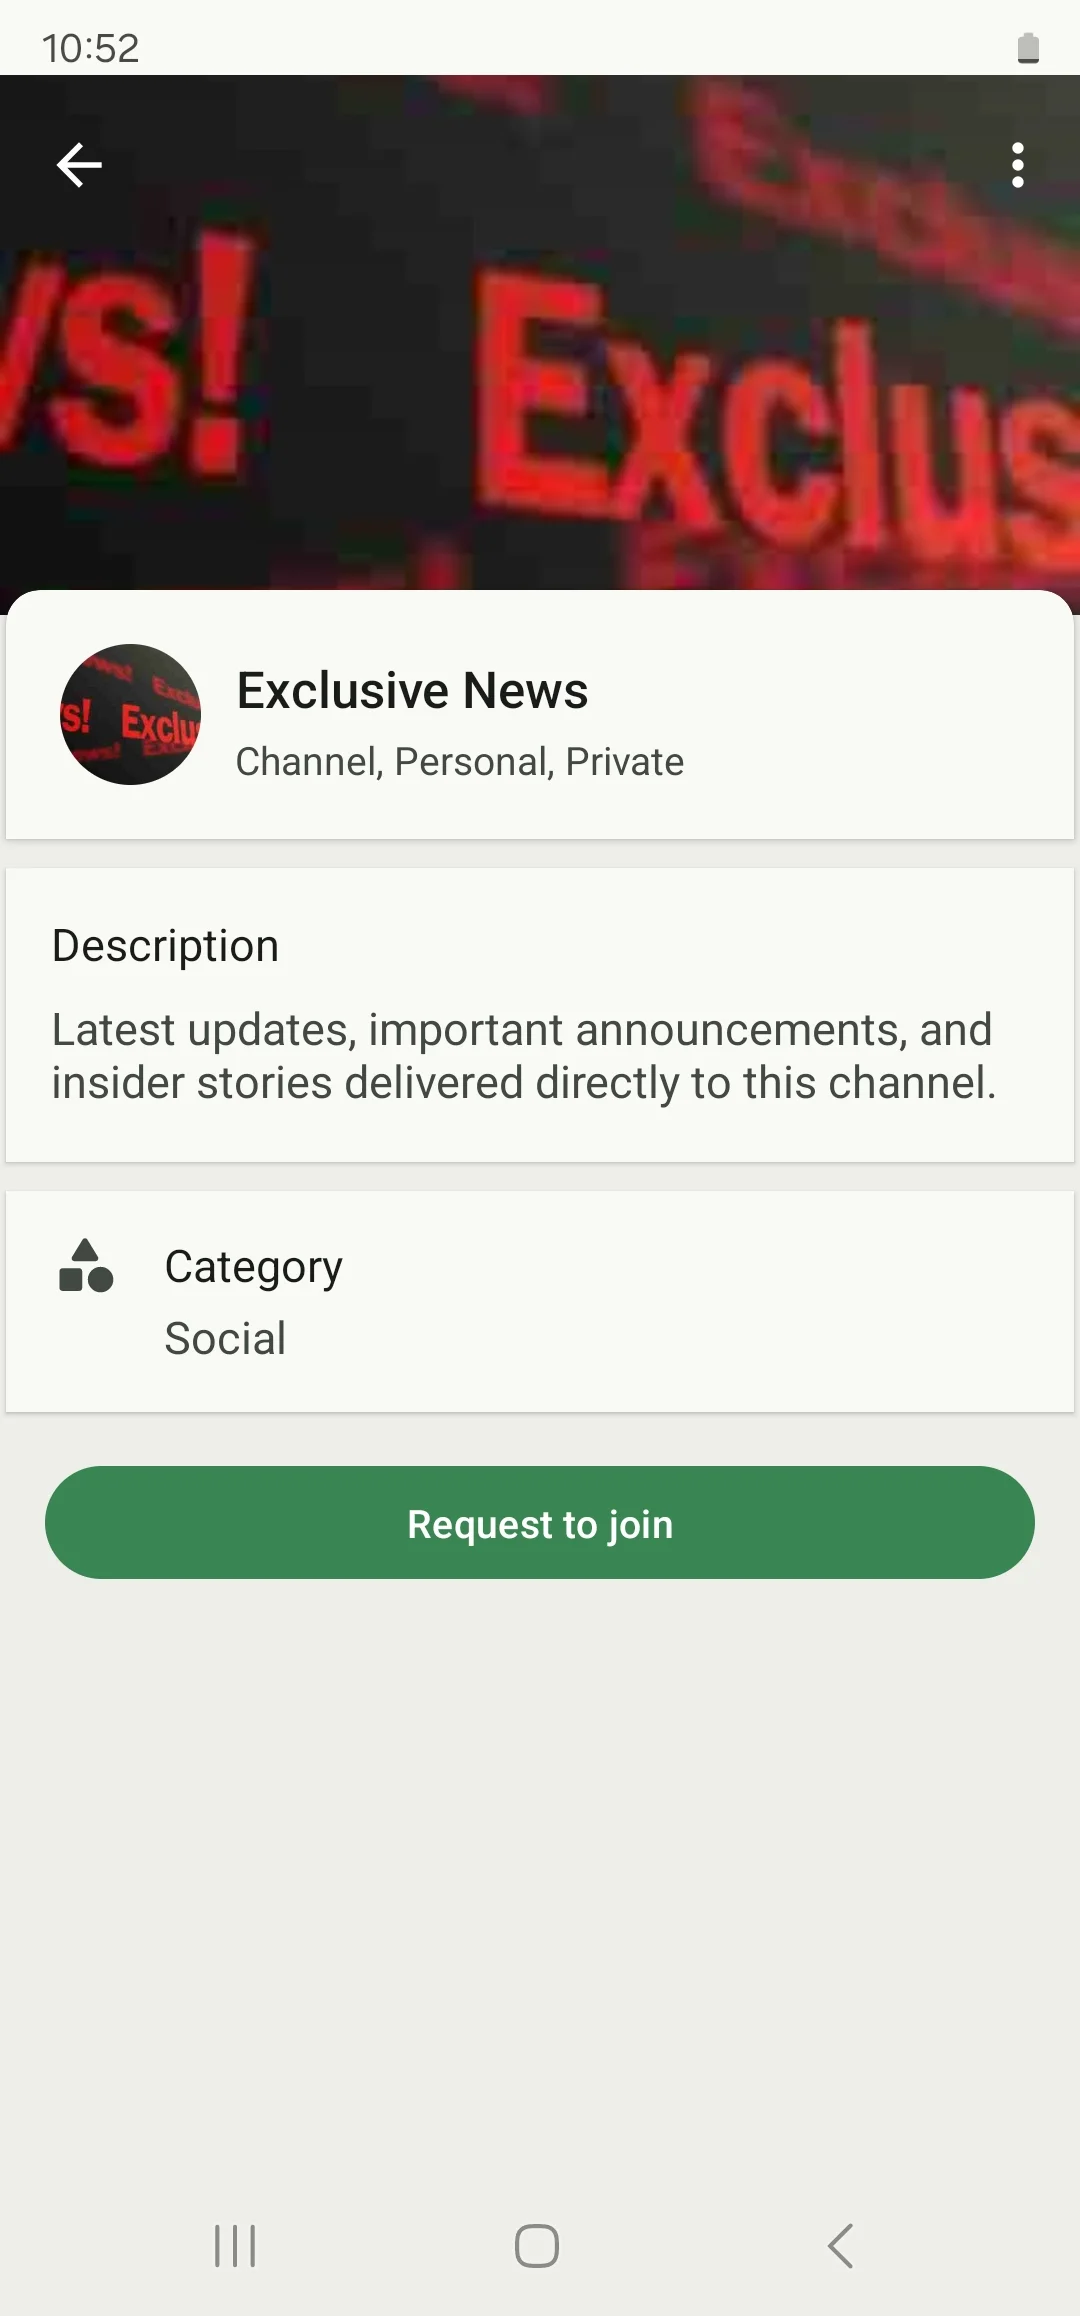
You can now create private channels that don’t appear in the All Channels component. Instead, users can find them in your Search List. When users find a private channel there, they’ll see a Request to Join button and can send a join request.
Let’s say that you as an app owner or admin have created a private channel called ‘Exclusive News.’ the user wants to find this private channel but it’s not listed in the ‘All Channels’ component.
User Perspective
Go to the search tab and search for the channel.
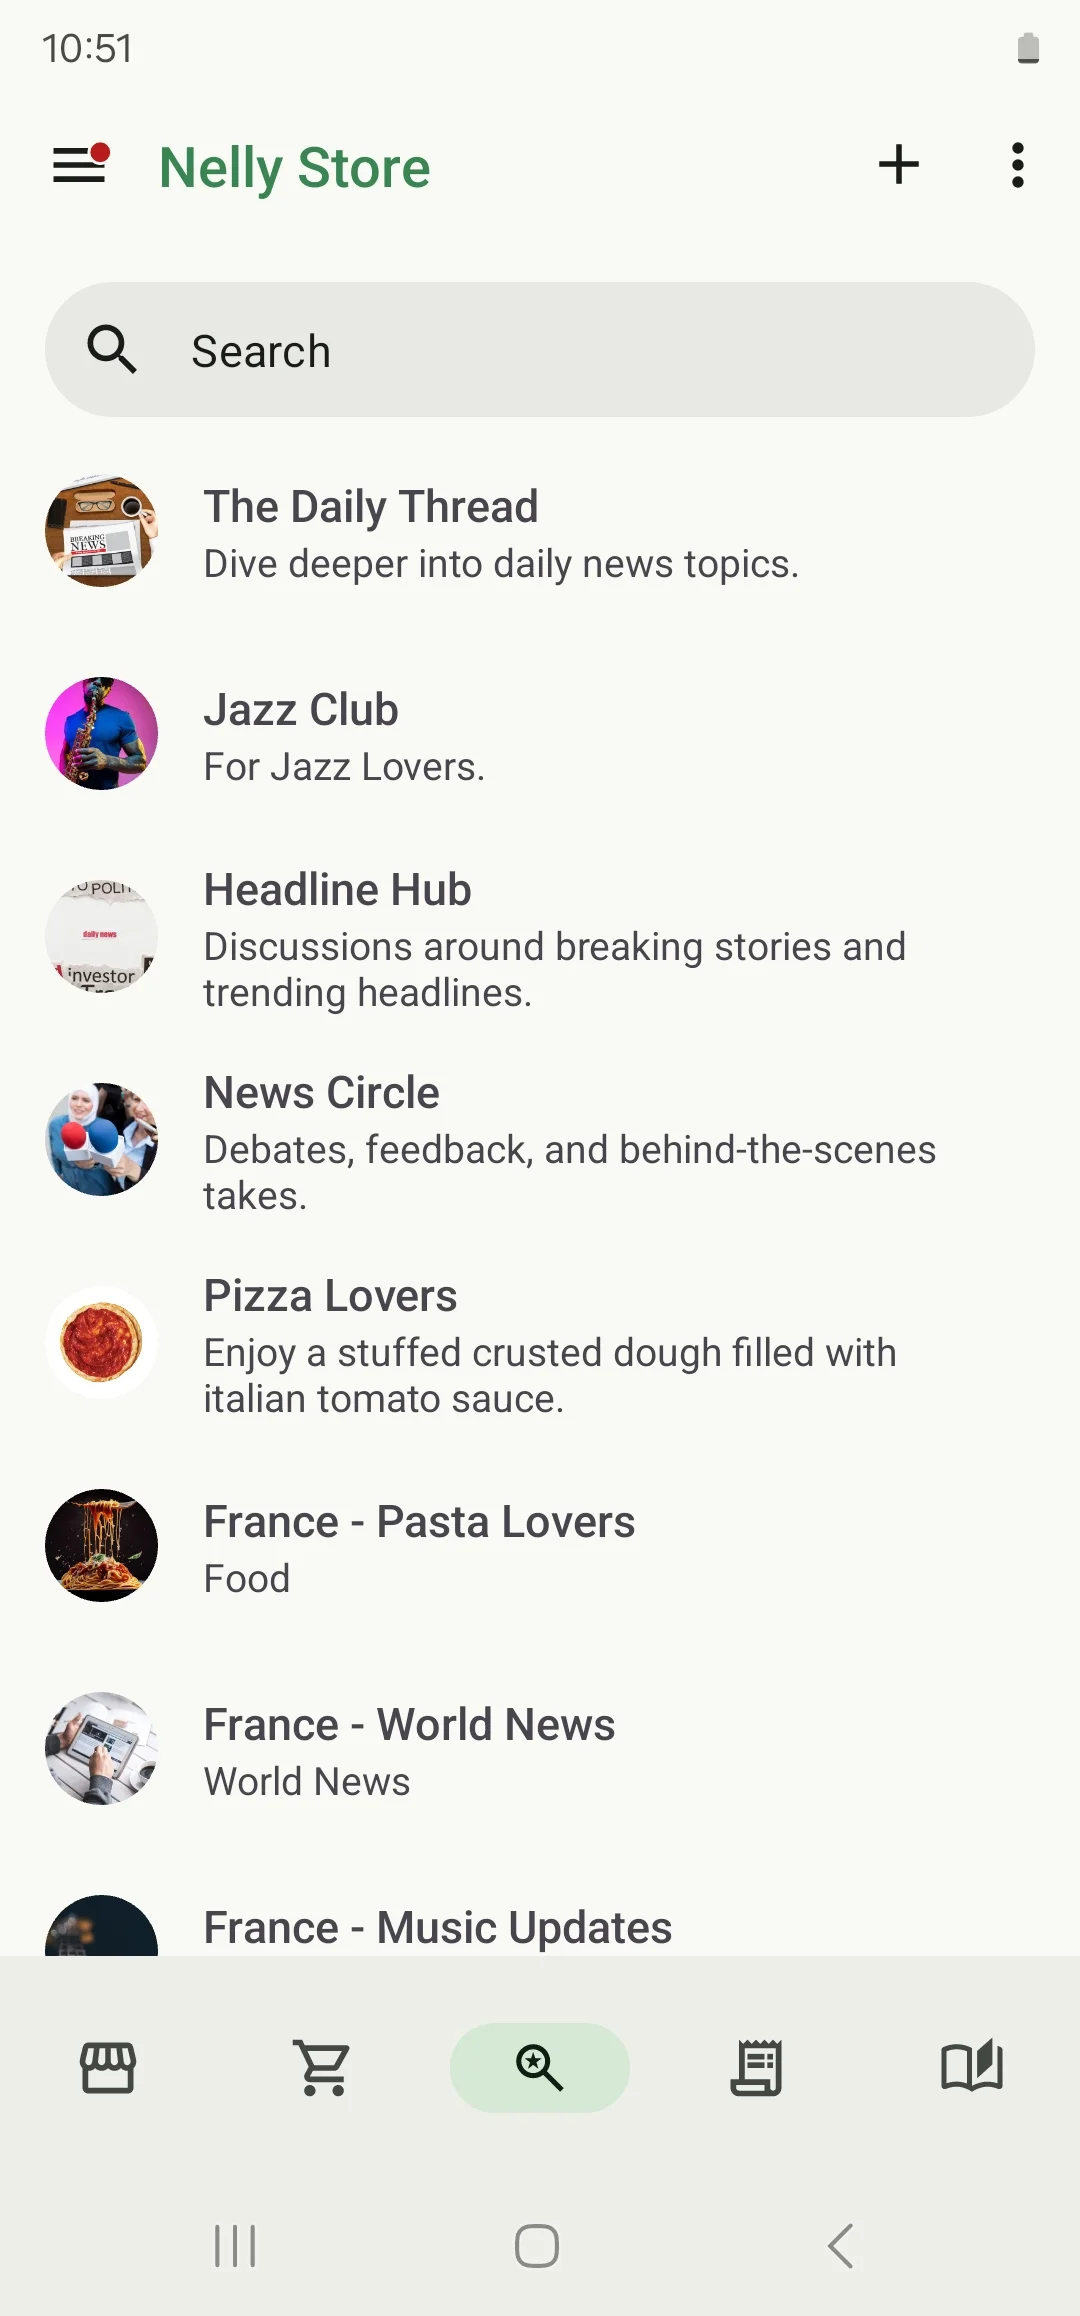
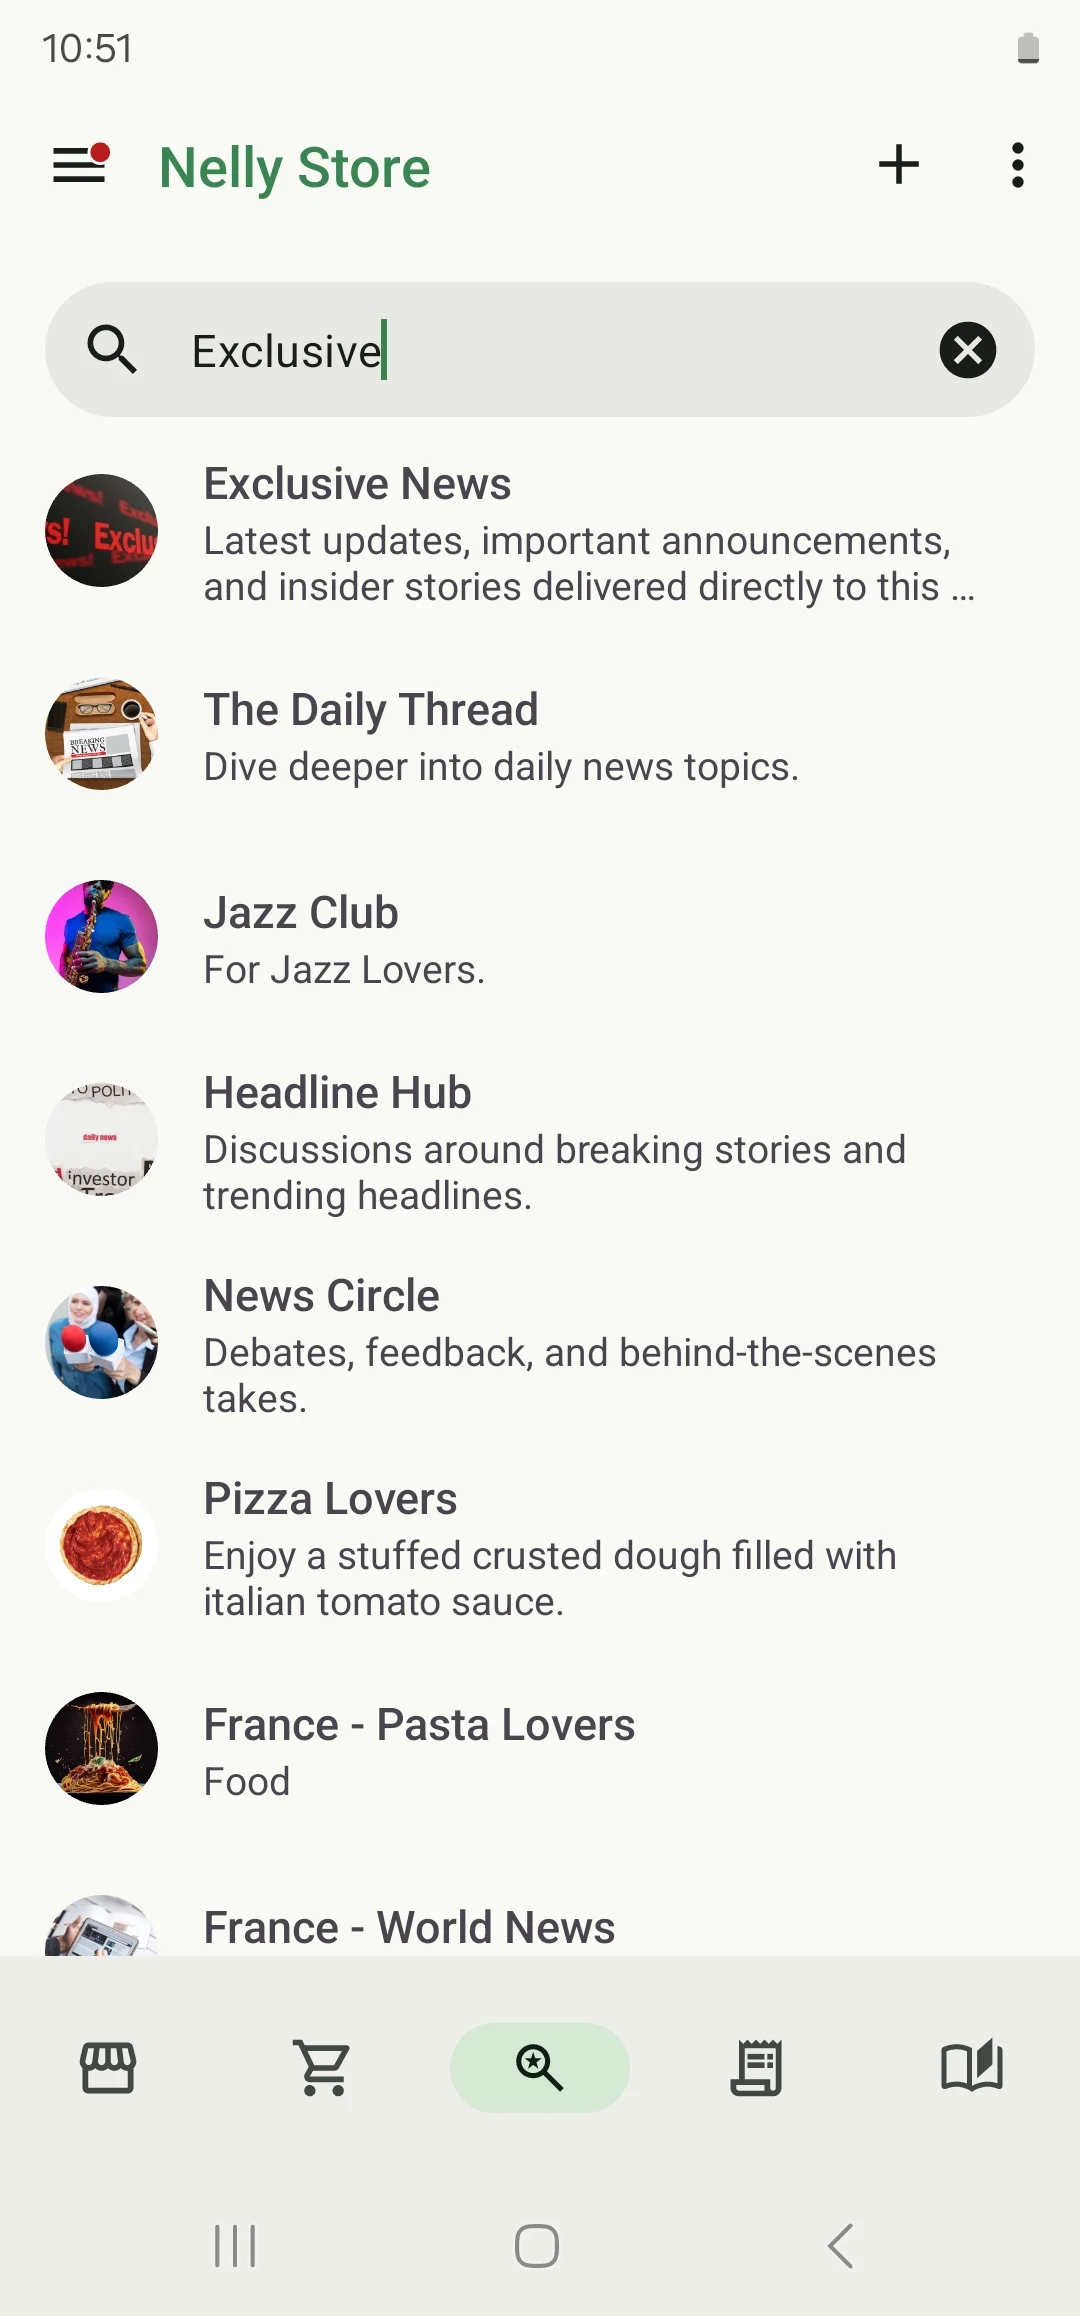
Click ‘Request to join.’
Admin Perspective
Now the channel’s admin will receive a request in his invitation tab.
The channel admin is the only one who will receive the invitation request by the user to join the channel.
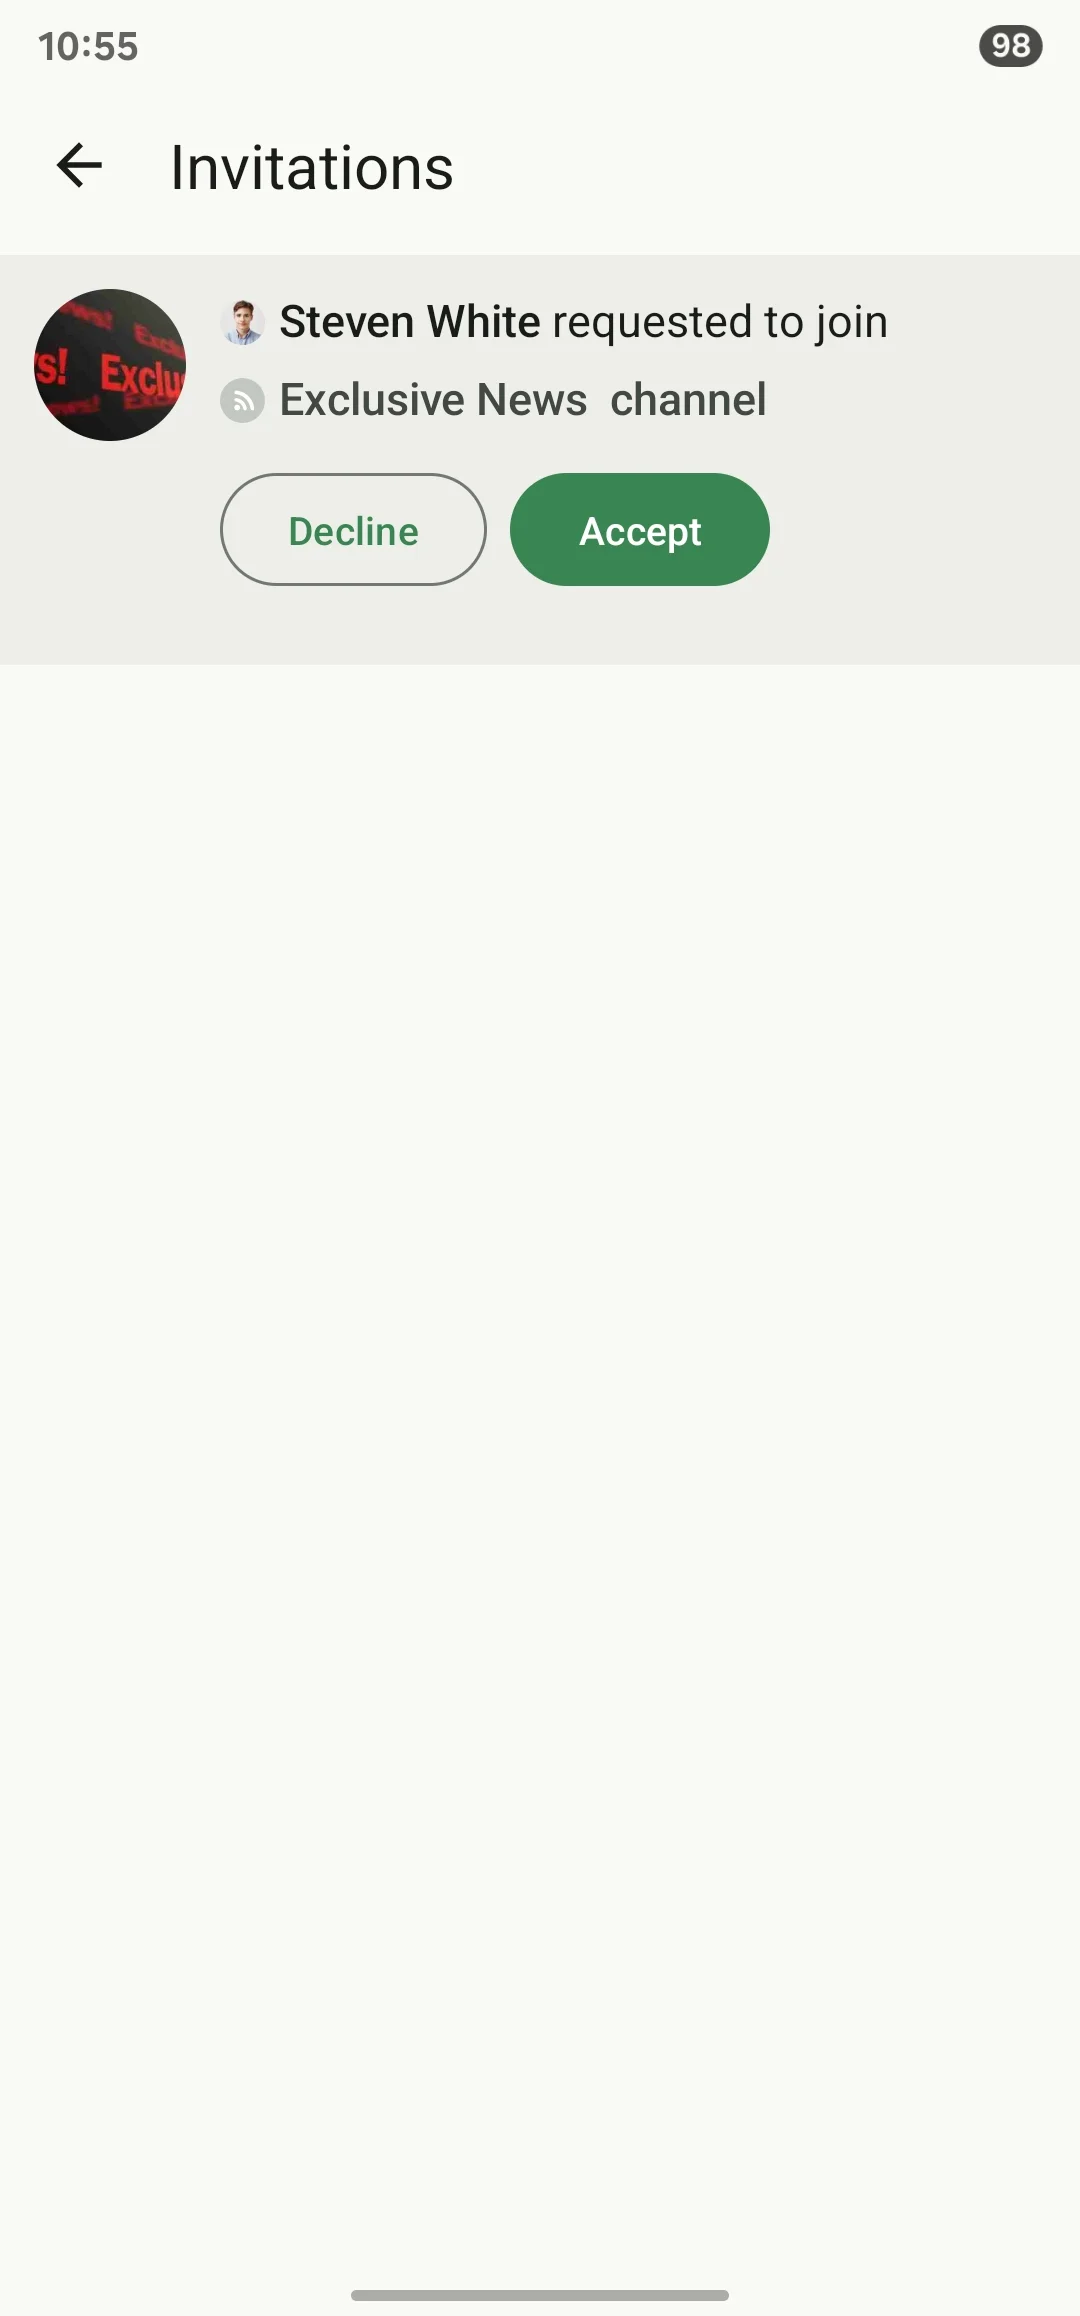
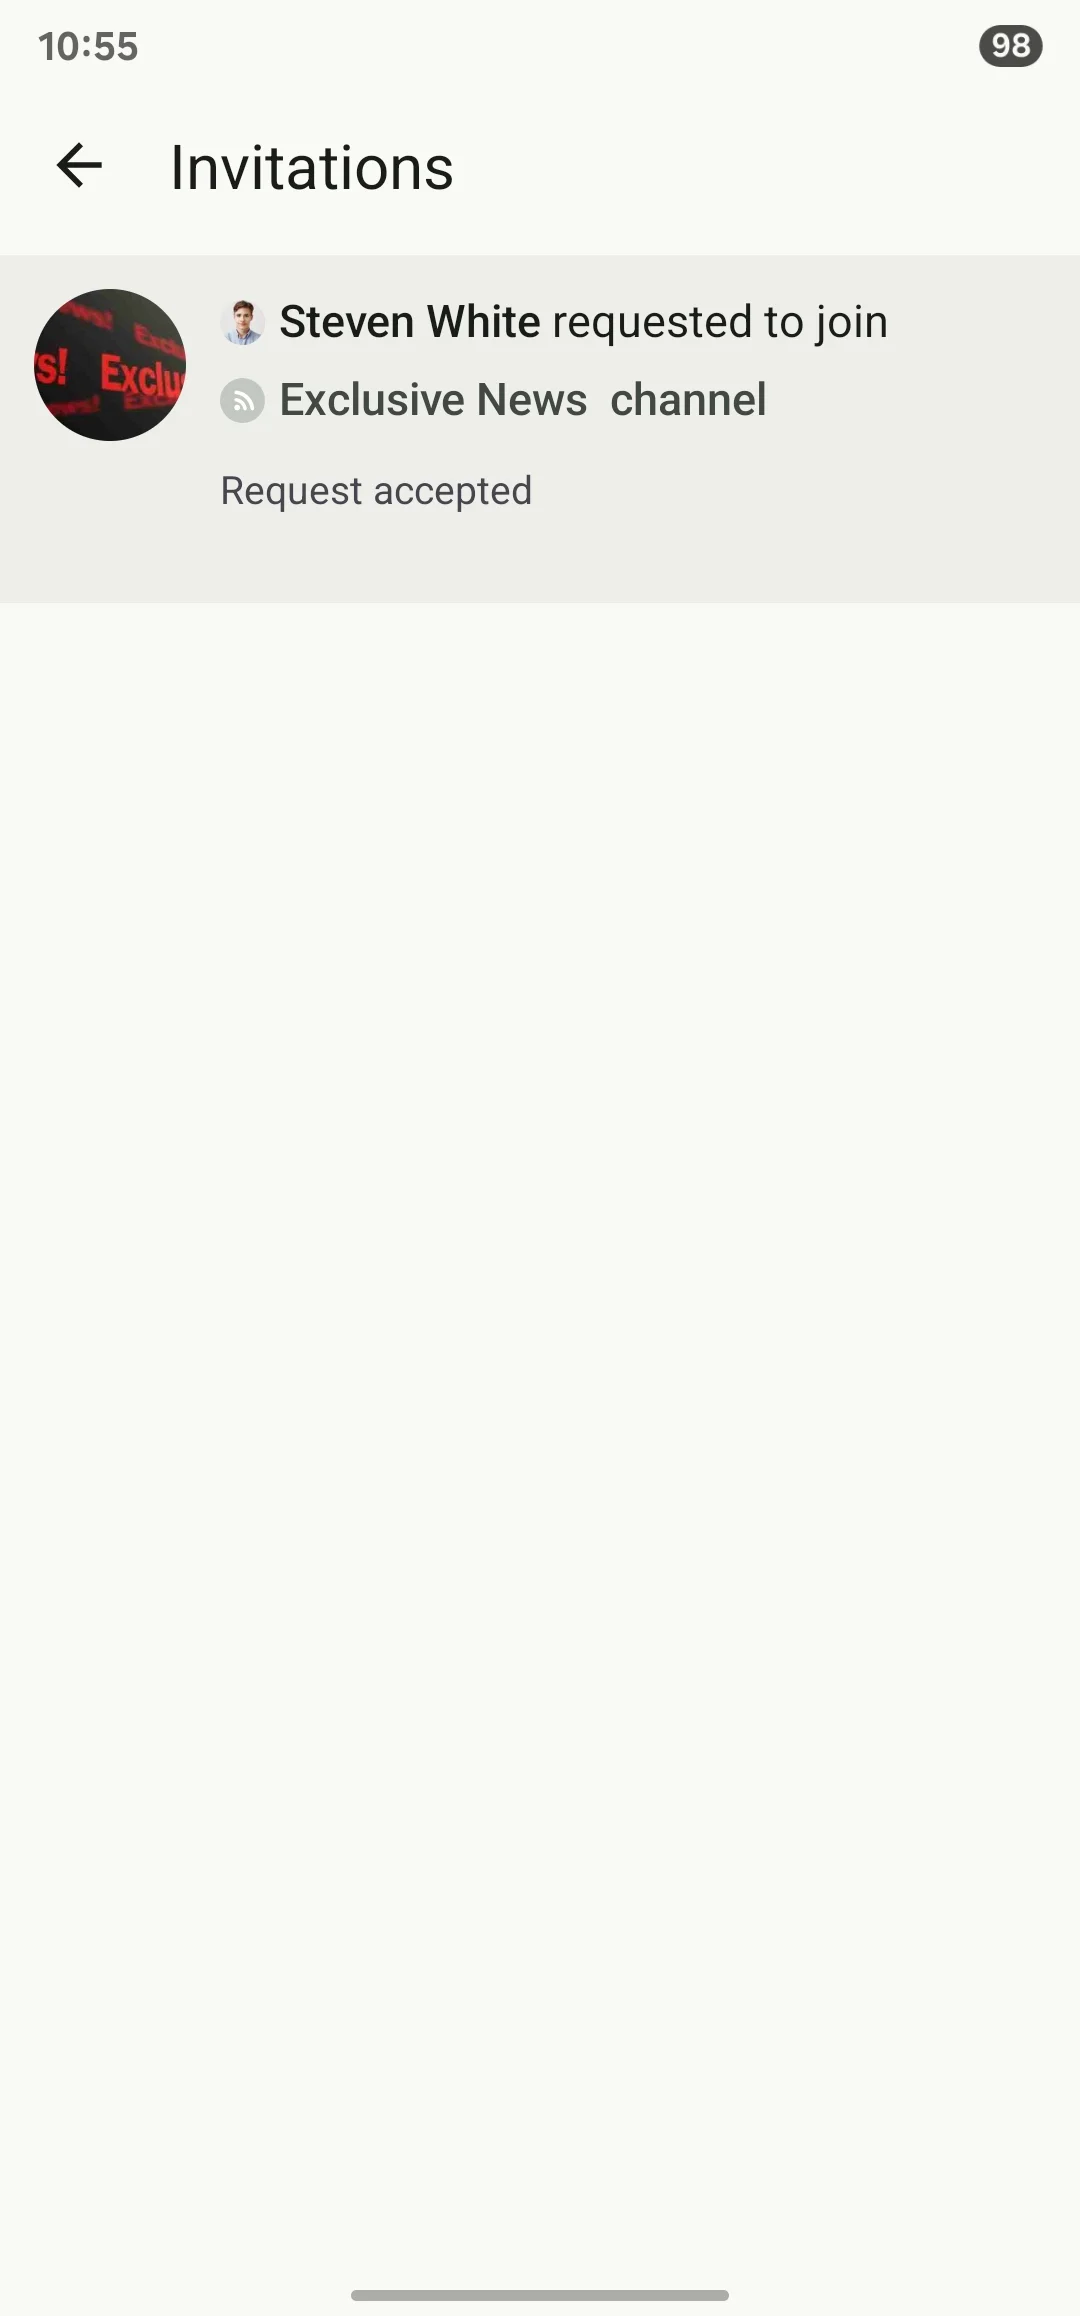
Once accepted, the user will find himself already in the channel.
Recommended Components
It’s better to include all Channel components together in your app as a default, including:
- Smart Calendar: You can post calendars to show timetables and schedules for users.
❓ FAQs
Q: How do I create separate channels in my app so I can group content for different audiences—without coding?
A: You can create a content channel visually using nandbox’s Channels feature—no development needed. Just drag in the Channels component, configure it, and start posting segmented content streams for your users—all from the builder.
Q: What can each channel include?
A:
Channels let you post:
- Text, images, videos, GIFs, and files/documents
- With unlimited subscribers, plus likes, comments, and shares,
- Includes read counters (showing views over two weeks) and private user feedback via comments.
Q: How do I install and configure Channels in my app UI?
A:
- Drag the "Channels," "Subscribed Channels," or "All Channels" component into your navigation or side menu.
- Click the gear icon to rename the tab, upload platform icons, and enable extras like:
- Post footer icons, context menus,
- Optional QR invite link,
- Enable Ads.
Q: How do I create and manage a new channel?
A:
- In Business Channels → Channels → "Add New Channel”.
- Provide:
- Name, description, image, type
- Category, language, time zone
- Set Google Ads, keywords for search, and an optional splash screen.
- Save to reveal:
- Invite link, QR code, creation date, and member count,
- Enable subscription features and optionally sell in-app subscriptions.
- Manage user tags and members, assign admins, and remove or block users.
Q: How do I post content to a channel?
A:
- As an admin, go to Messaging Center → Chat → Messages → select your channel → tap + Create Post.
- Add text, images, videos, GIFs, or files.
- Optionally share the same post to multiple channels using the (+) button.
Q: Can I post from my mobile device?
A: Yes! If you're assigned as a channel admin:
- Open the channel in your app.
- Tap the message box and attach content.
- Send it to broadcast updates on mobile as well.
Q: How can users join a private channel in my app?
A:
Users can:
- Find your private channel in the Search tab (it won’t show under All Channels).
- Tap Request to Join to send an invite request.
- Wait for the admin to approve—once accepted, they’ll be added right away.
Q: As an admin, how do I manage join requests for private channels?
A:
Admins can:
- Open the Invitations tab to see pending join requests.
- Approve or decline requests with one click.
- Once approved, the user is instantly part of the channel.