
Up to 50,000 members can join your app's chat groups and enjoy the seamless features of nandbox, including voice memos and multimedia file sharing such as videos, photos, documents, etc. There is no limit to the number of chat groups you can create in your app.
You can create chat groups for businesses and individuals. With the ability to personalise each group chat with a name, display picture, description, and category classification, the group chat admin can change these details at any time.
You can configure your chat groups to be public or private. A public group is the best option if you want to allow anybody to join the group and have members invite other users to join, while in a private group, only the chat admin will be able to invite new members to join, with the option to choose the group admins for each group.

This component is the best for Communication, Educational, Messaging and Entertainment apps.
Included Features
The Group Messaging component comprises 67 features, set as default.
- Chat
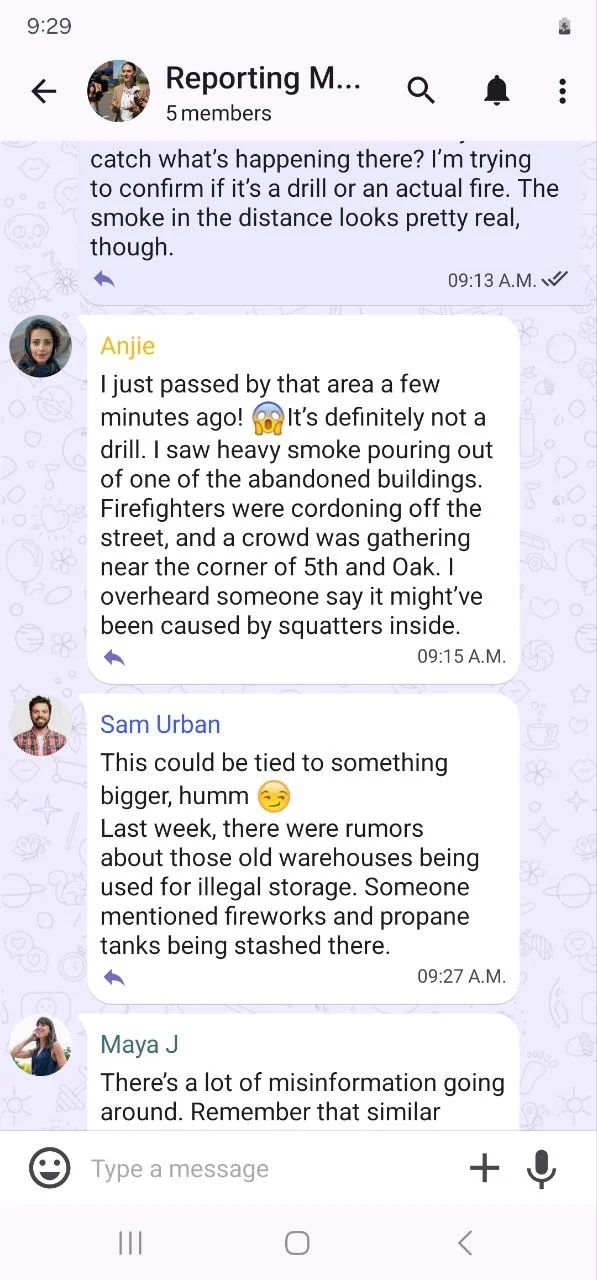
Your app users can chat as well as share images and receive push and in-app notifications.
- View Profile
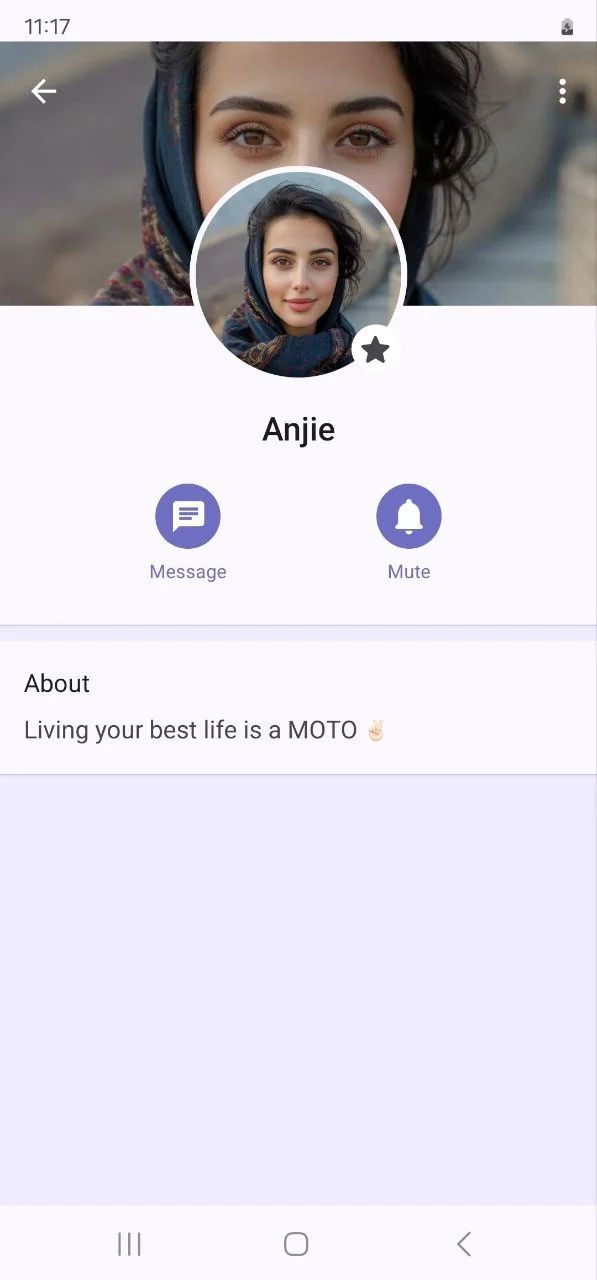
A profile view that shows the user's basic information.
- Video Trimming
A video editor for trimming videos for a previously recorded clip and enabling re-encoding it to lower quality (compressing) with a caption

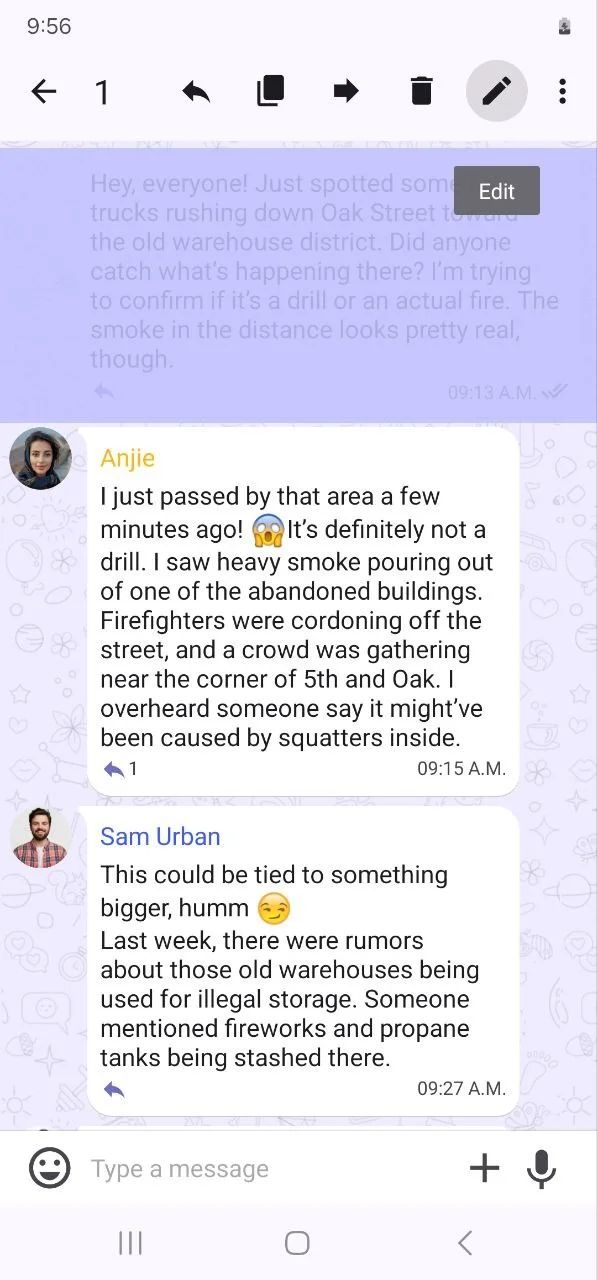
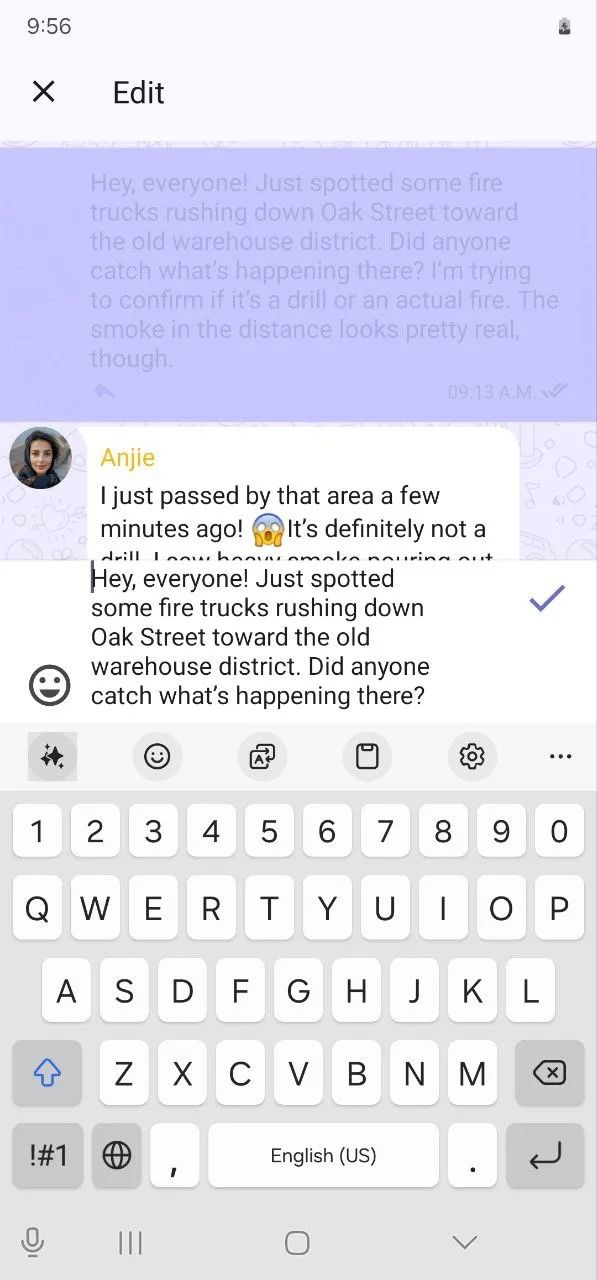
- Edit Messages
For users to edit their messages after they are sent. The edited messages will be amended accordingly at the users' end.
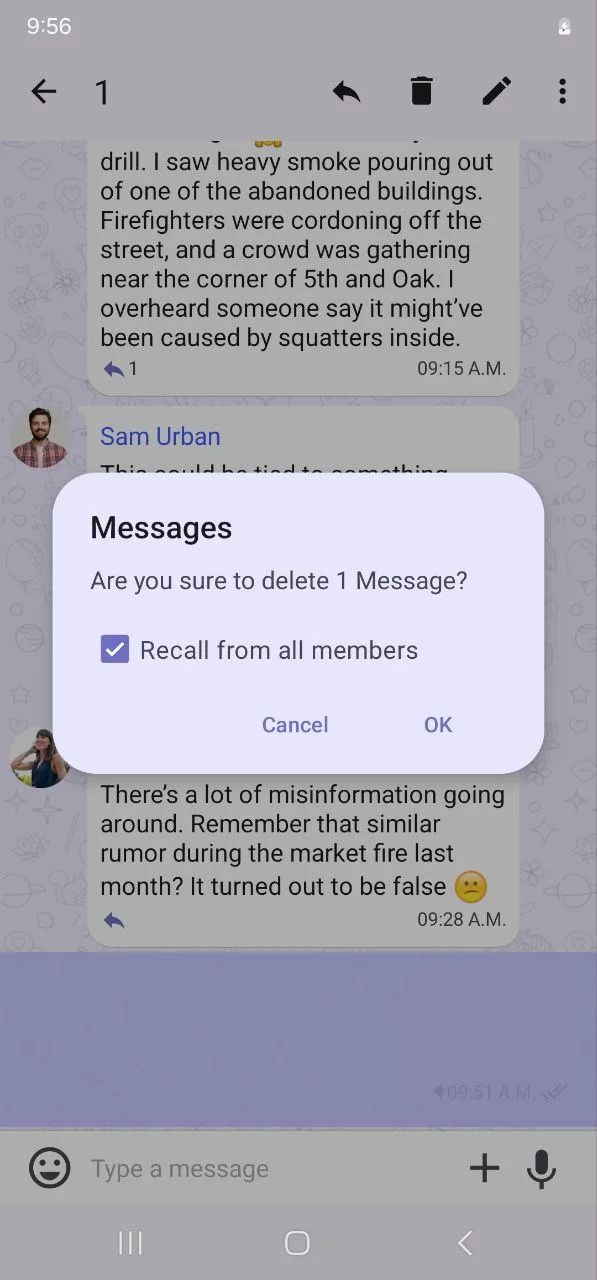
- Recall Messages
Users can delete their sent messages without a time limit, recall their messages anytime, or choose to have them deleted from all members.
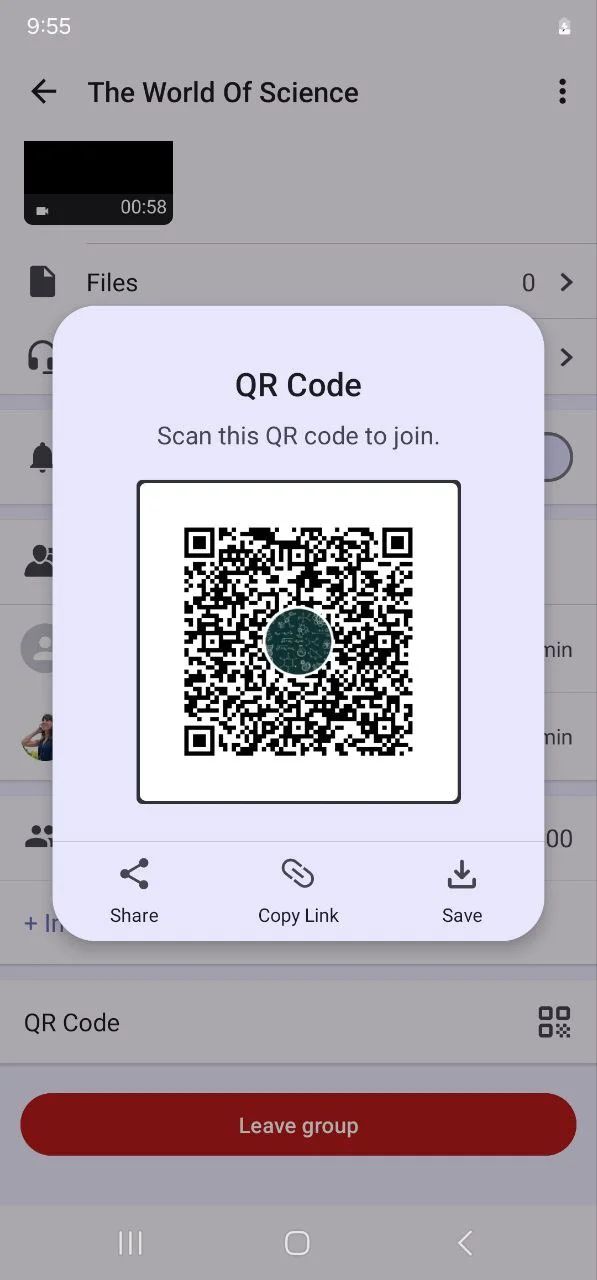
- Invitation QR Codes
For users to join groups on your app by scanning QR codes.
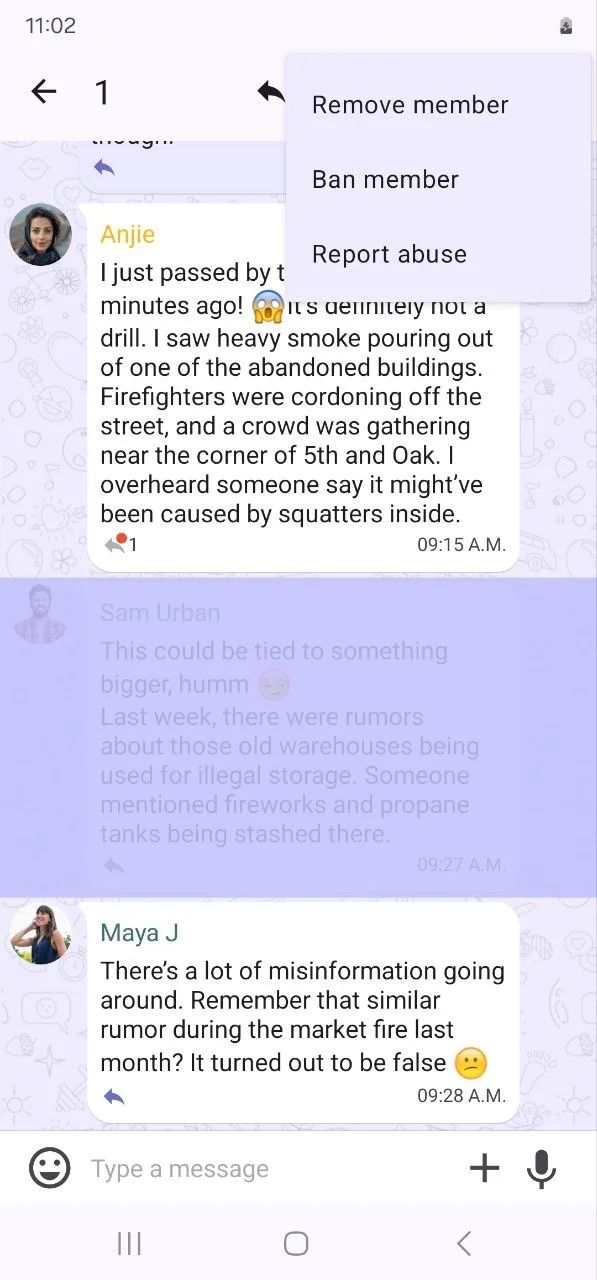
- Ban Users
Allows super administrators to kick out specific users from groups created on your app.
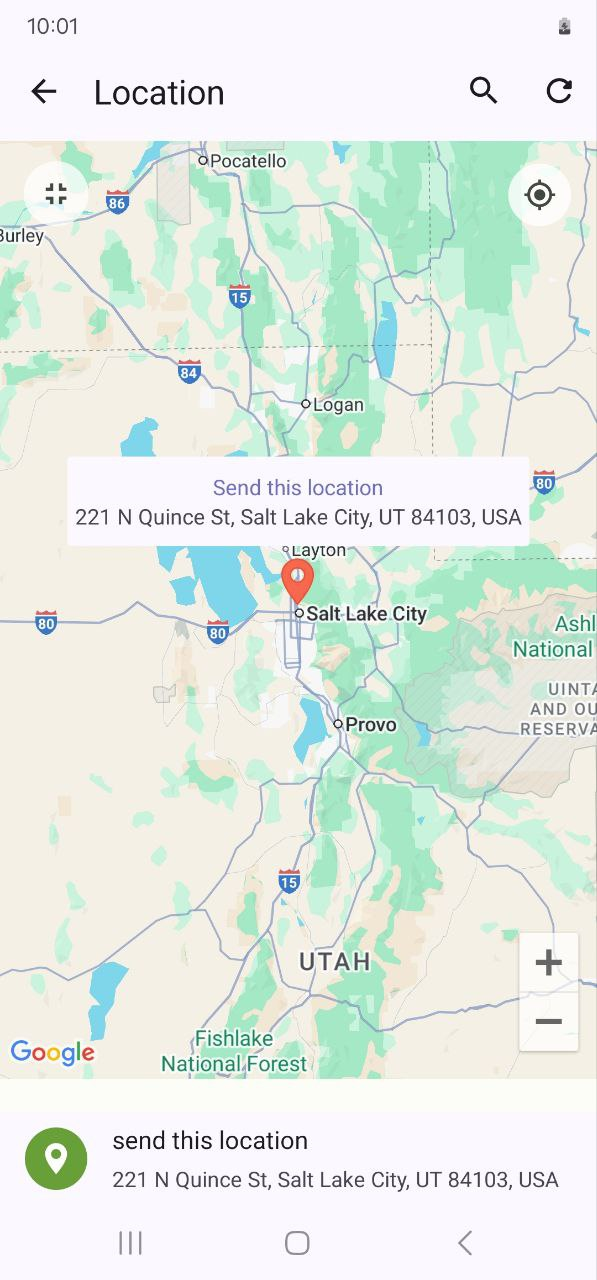
- Current Location Sharing
For users to share their current locations with other users within your app.
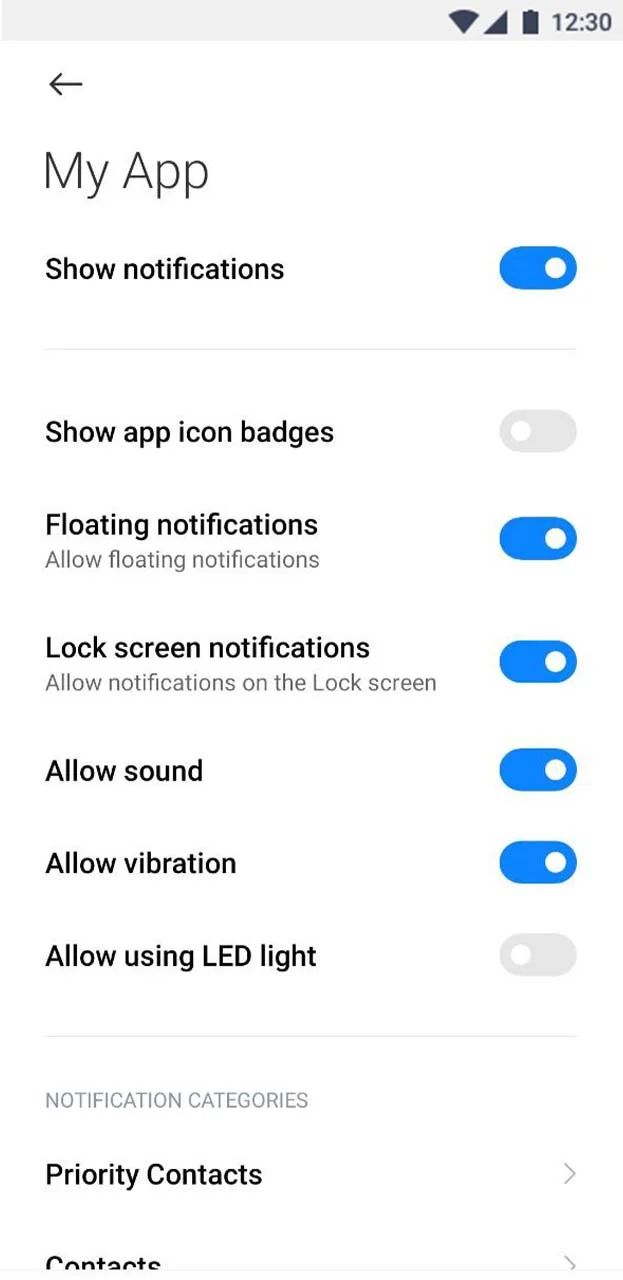
- In-App Sounds & Vibrations
For users to customize app sounds, vibrations, and notification tones.
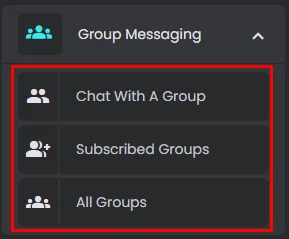
Components
- Chat With A Group: Opens a certain chat group of your choice, where members of the group can interact with each other.
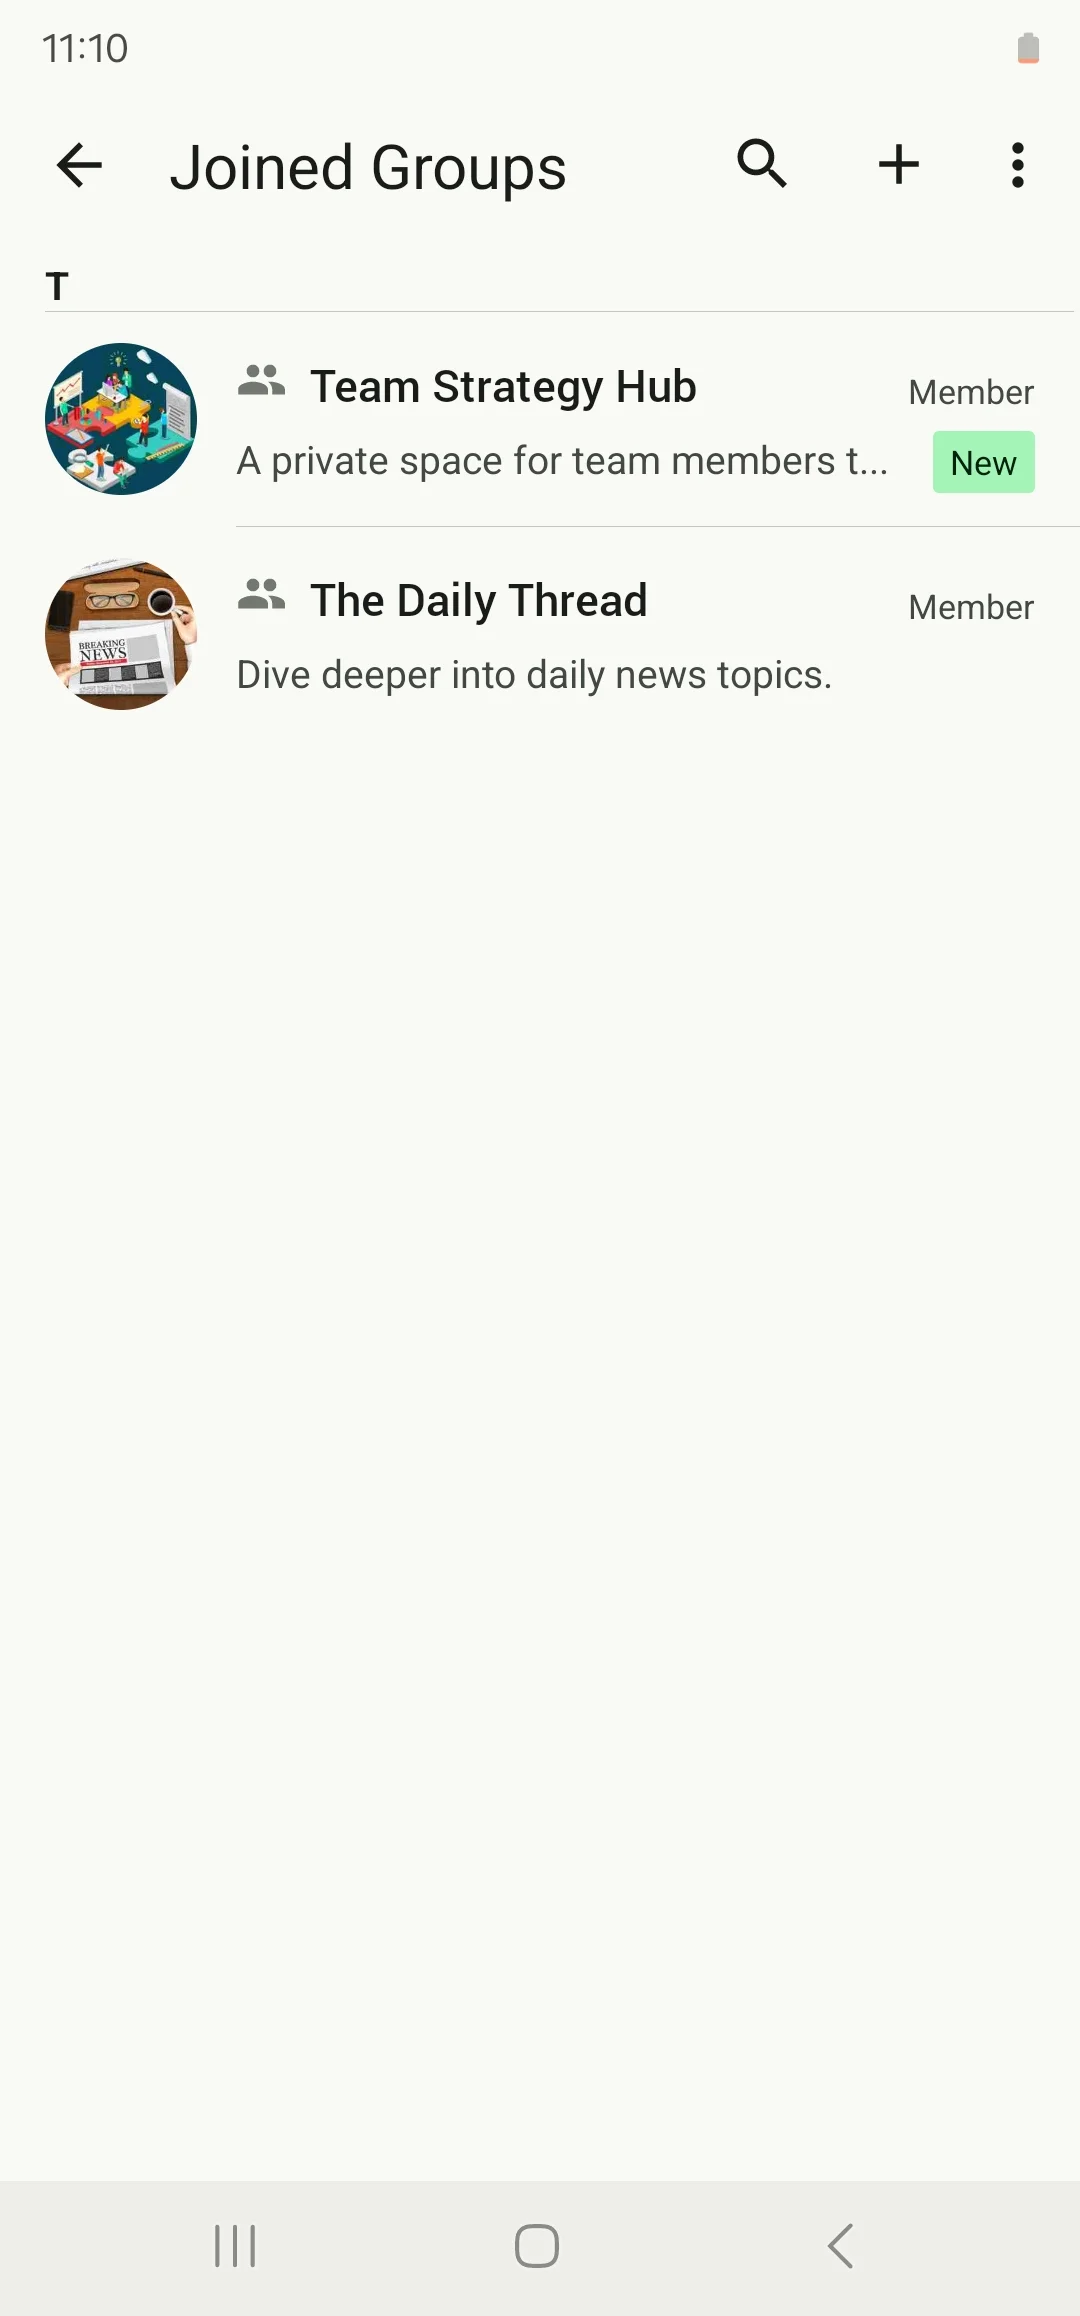
- Subscribed Groups: Show the groups that the user has joined.
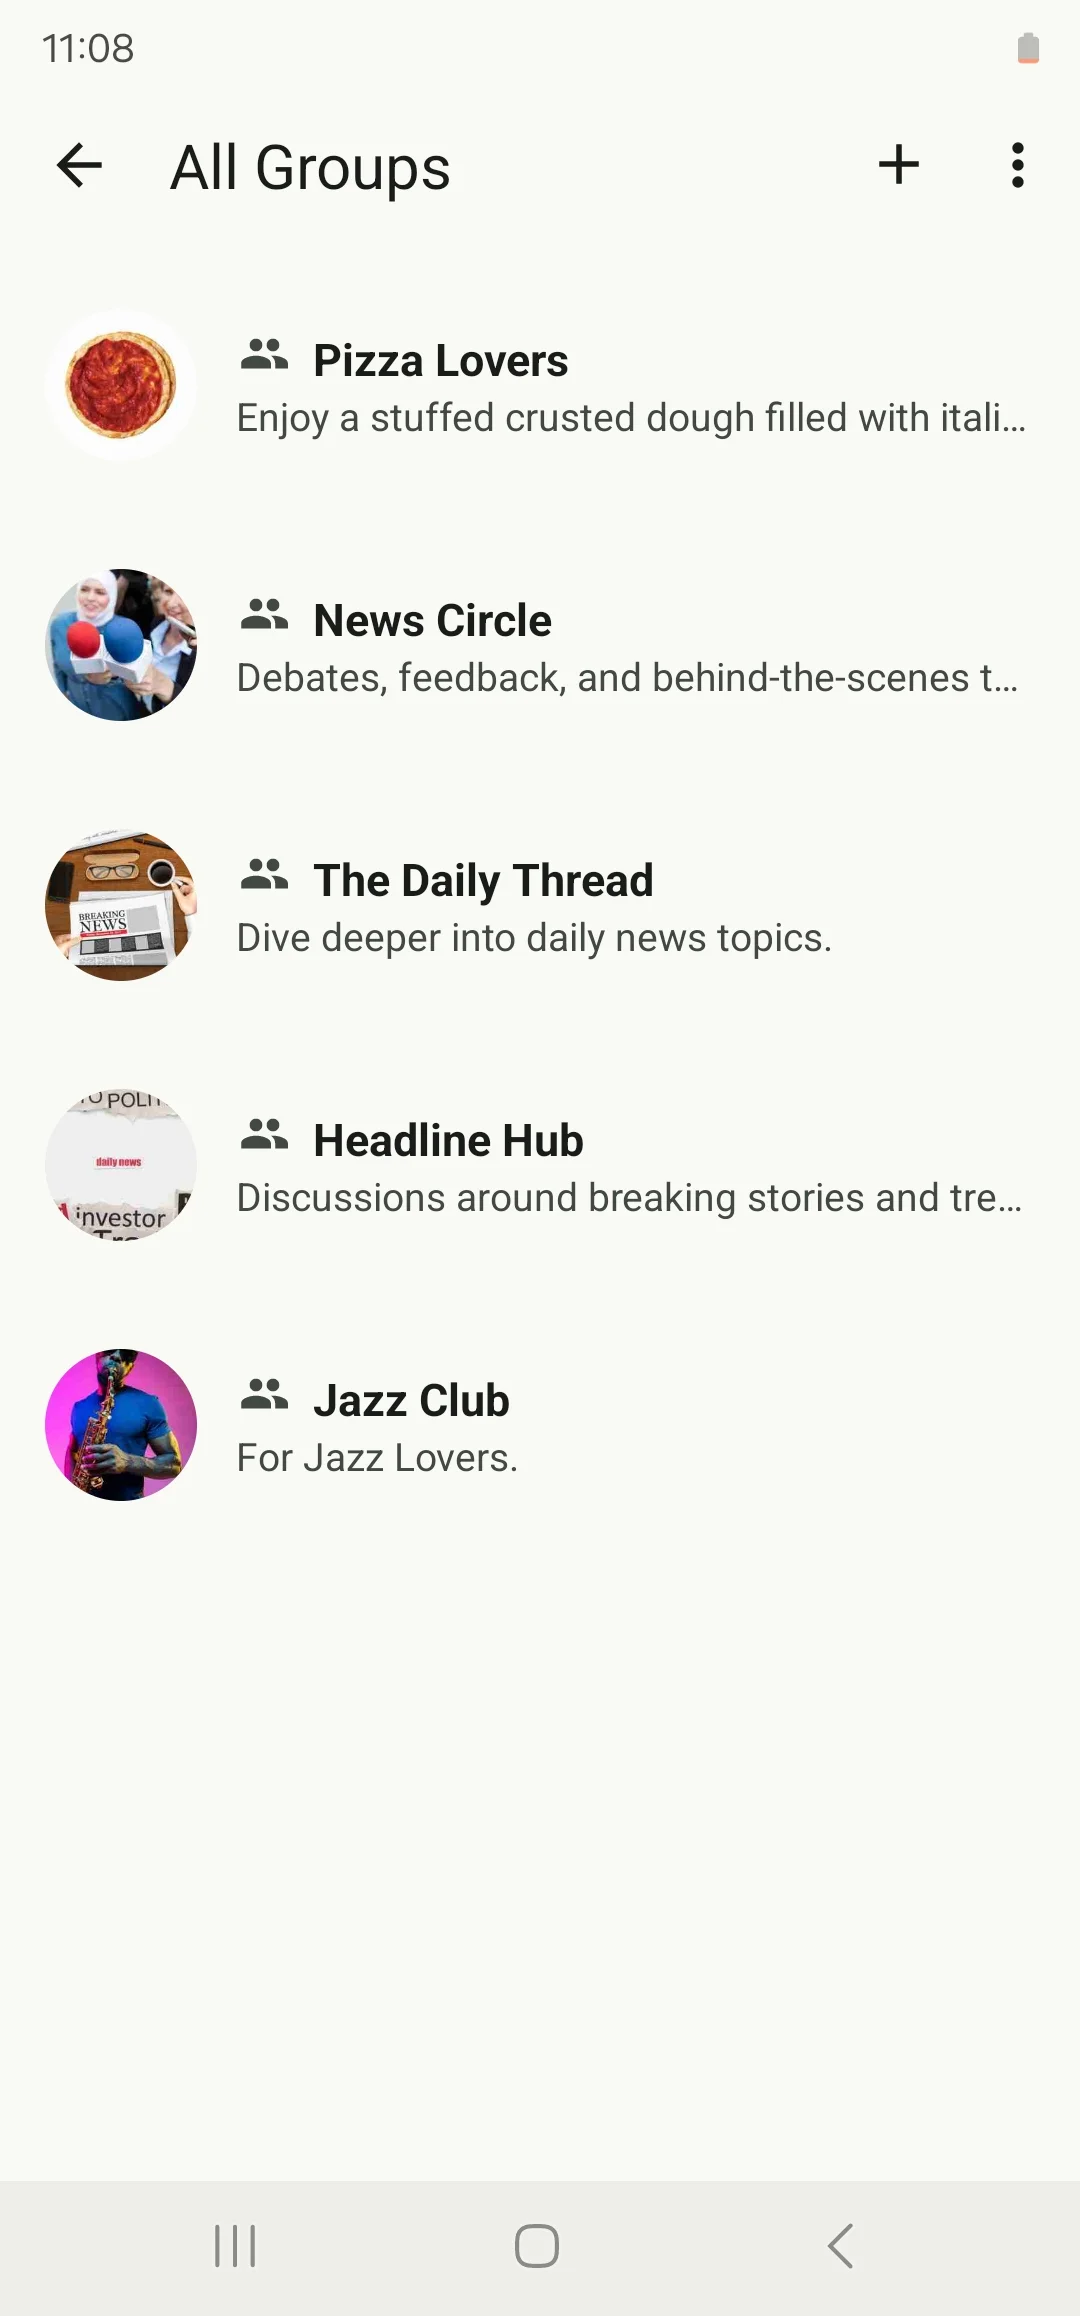
- All Groups: Displays the list of all groups that are available on the app.
Once you create a group, it will appear in the groups, and users will be able to join it. Once they do, it will appear to them in the user group.
How To Install The Component
These components can be installed in:
- App's Navigation Page ✓
- App's Side Menu ✓
You can find the group components in the Group Messaging section. Click or drag and drop one of the components into your navigation or side menu to install them.
How To Configure The Component
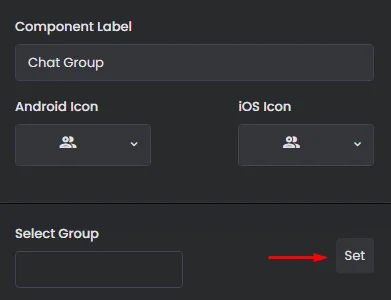
- Chat With A Group:
Click the gear icon to configure the component settings.
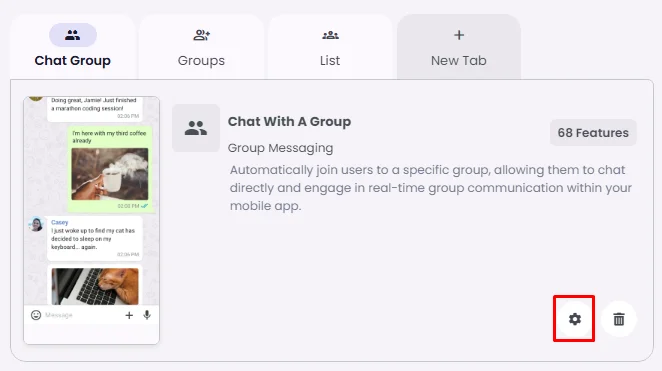
Rename the component and choose an Android and an iOS icon for it.
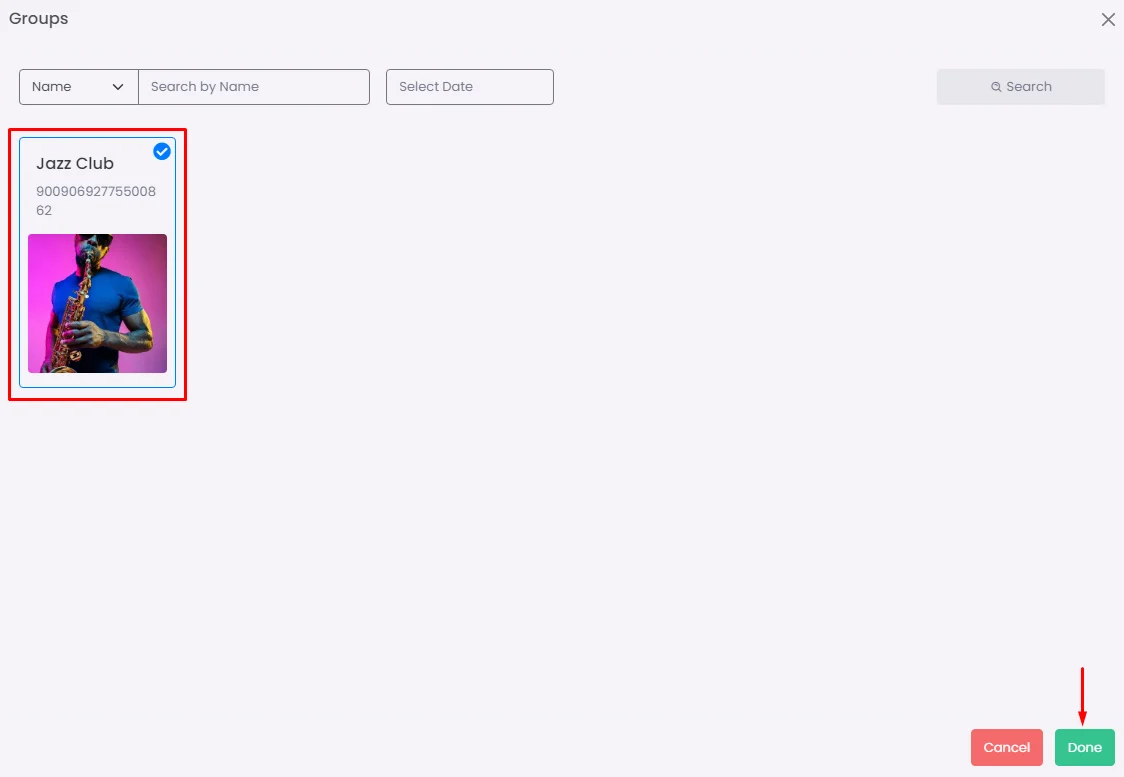
When you create a specific group that you want to set to this component, click ‘Set’.
Choose the desired group and click ‘Add’.
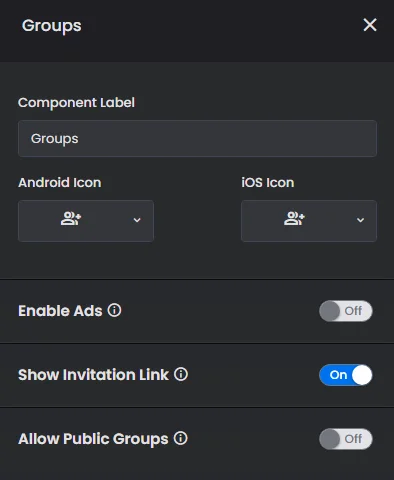
- Subscribed Groups:
You must have this component in order to be able to create groups on your mobile device!
When you click the gear icon, rename the component and choose an Android and an iOS icon for it.
You also have the option to include ads in your app, hide invitational links to be shown to users and choose whether you want users to create public groups or not.
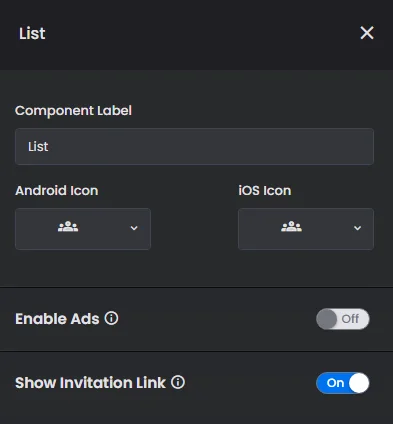
- App Group List:
When you click the gear icon, rename the component and choose an Android and an iOS icon for it. You have the option to include ads in your app and hide invitational links to be shown to users.
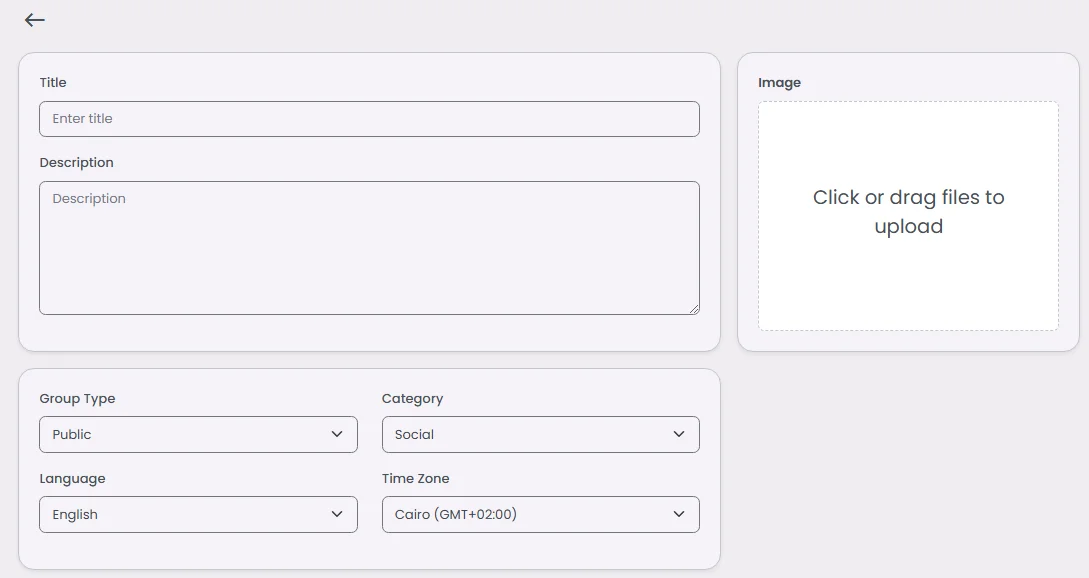
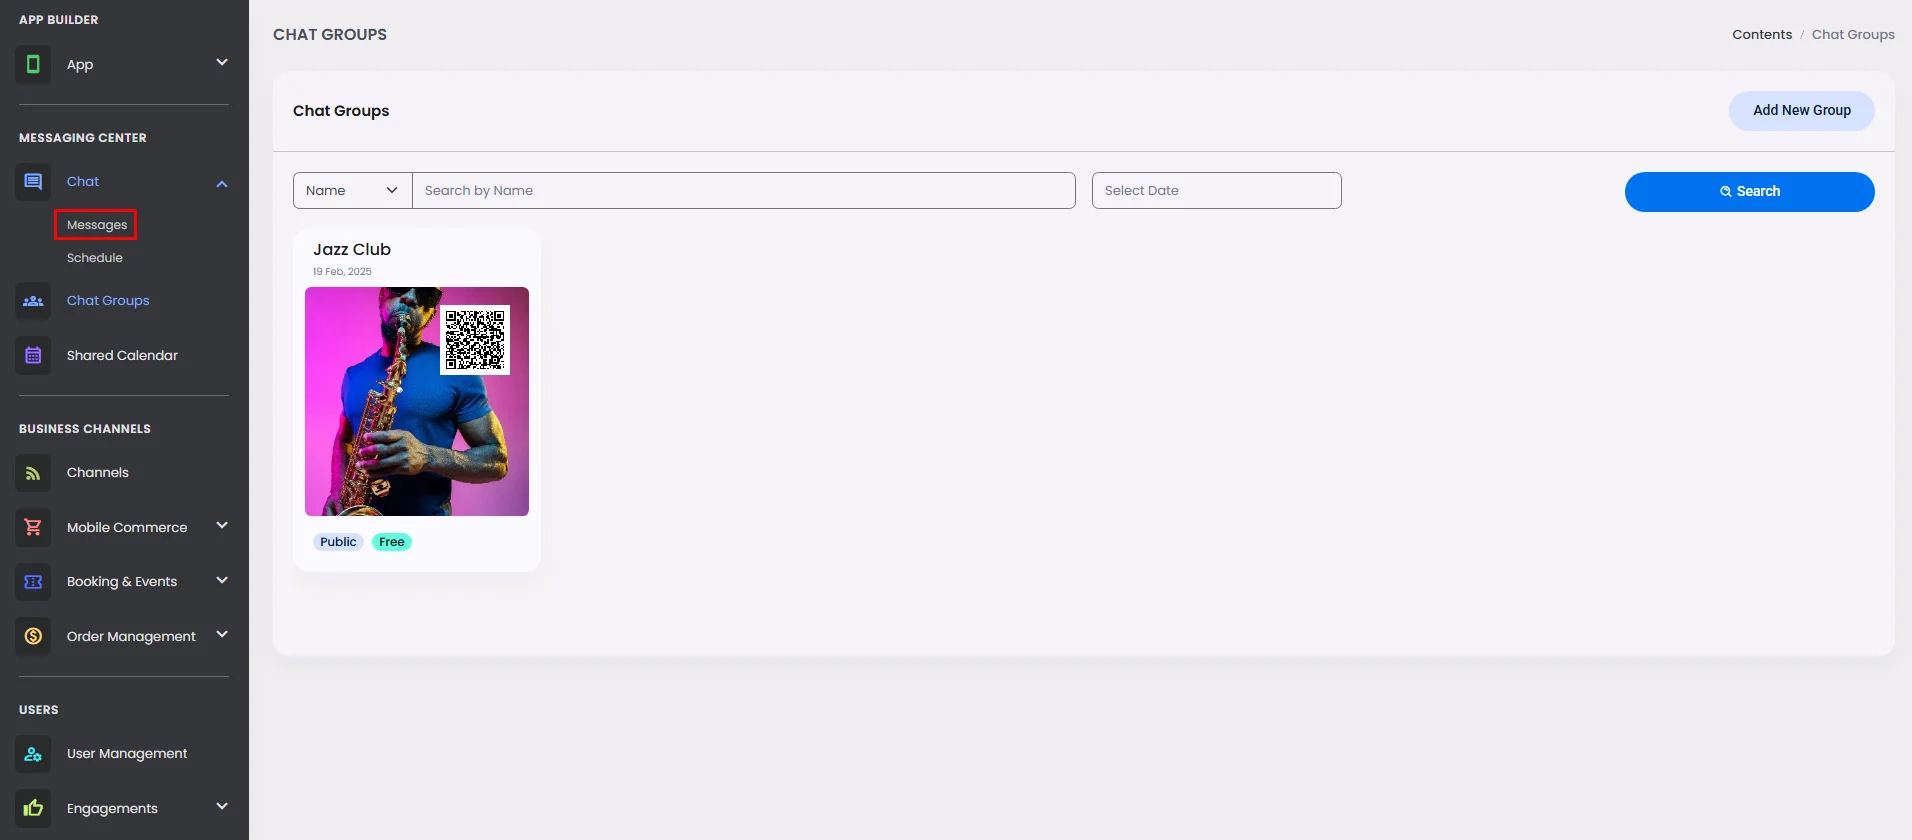
Create A Chat Group
- From the admin menu, click ‘Chat Groups.’
- Click ‘Add New Group.’

- A window will appear where you can enter your group name and description, image, type, category, language used and time zone.
- Splash Screen:
You can add a splash screen to your chat group by turning the toggle on, which includes an image, title, and description. You can also change the button text and colors associated with it.
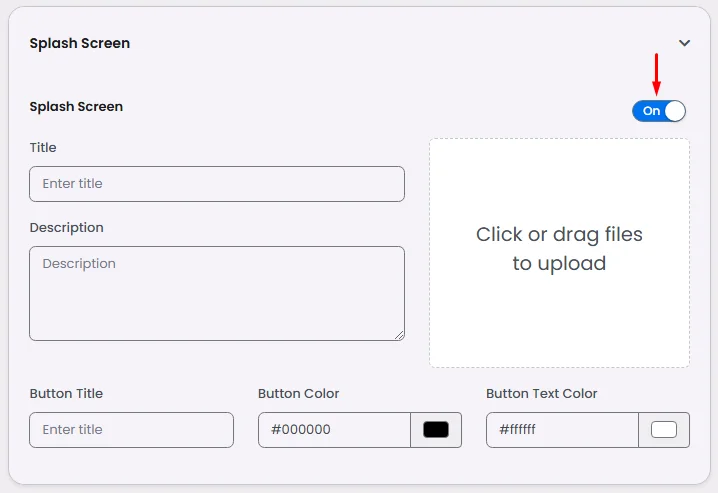
A splash screen is an introductory graphical screen that shows an explanatory message when you first install an app. It can also be displayed when a user first enters a group.
Which will look something like this:

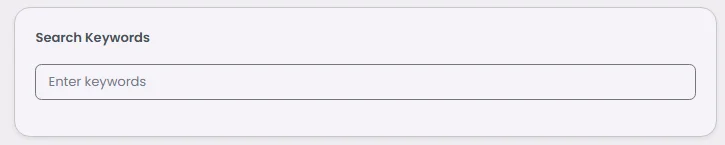
- Search Keywords:
You can give your chat group certain keywords that users can use to find it.
And when you click ‘Create,’ additional options will appear:
- Chat Group Information:
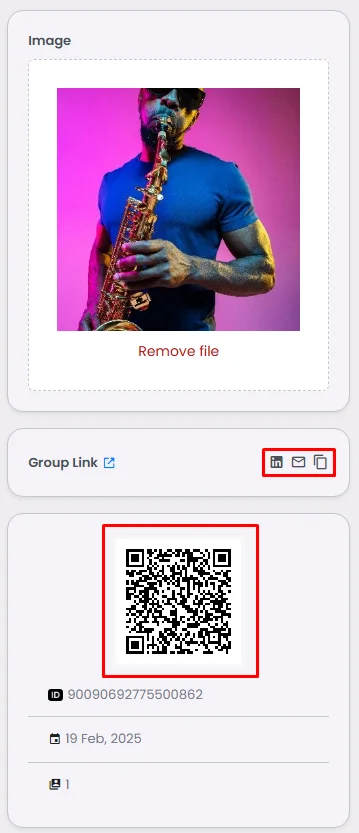
Below the group image, you’ll find the group's invitational links, QR code, group-created ID, date of creation, and number of members in this group.
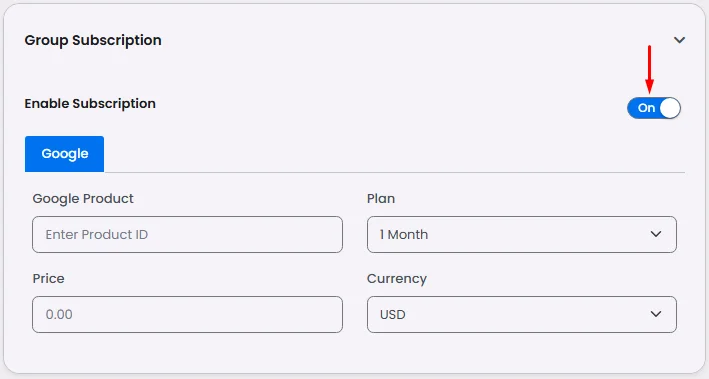
- Enable Subscription:
If you're enabling the subscription feature, this part is for you. Check out our guide for In-App subscriptions configuration.
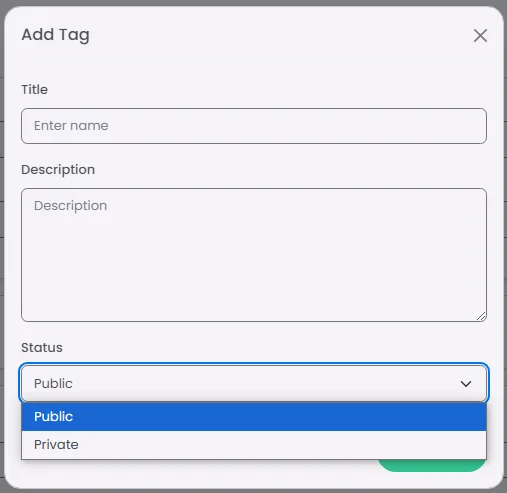
- User Tags
You can add tags related to your group category. Click ‘Add.’

Add the tag's name, description, and status (public or private), and click ‘Add.’
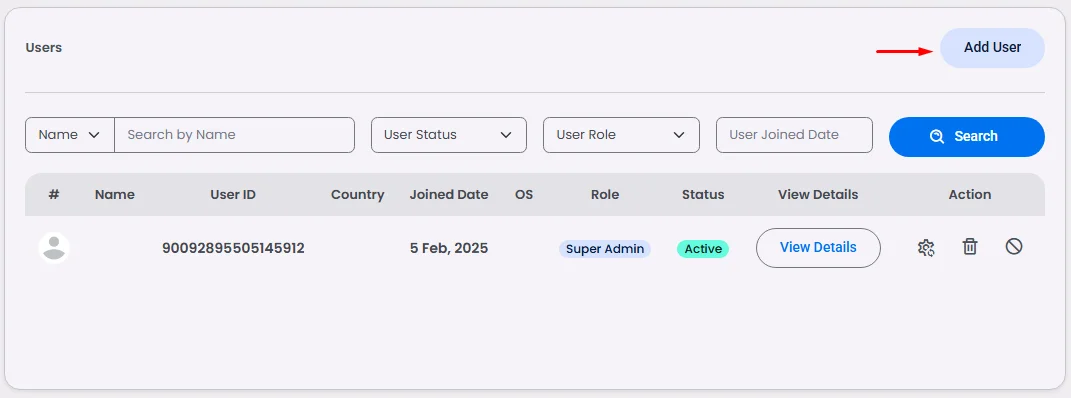
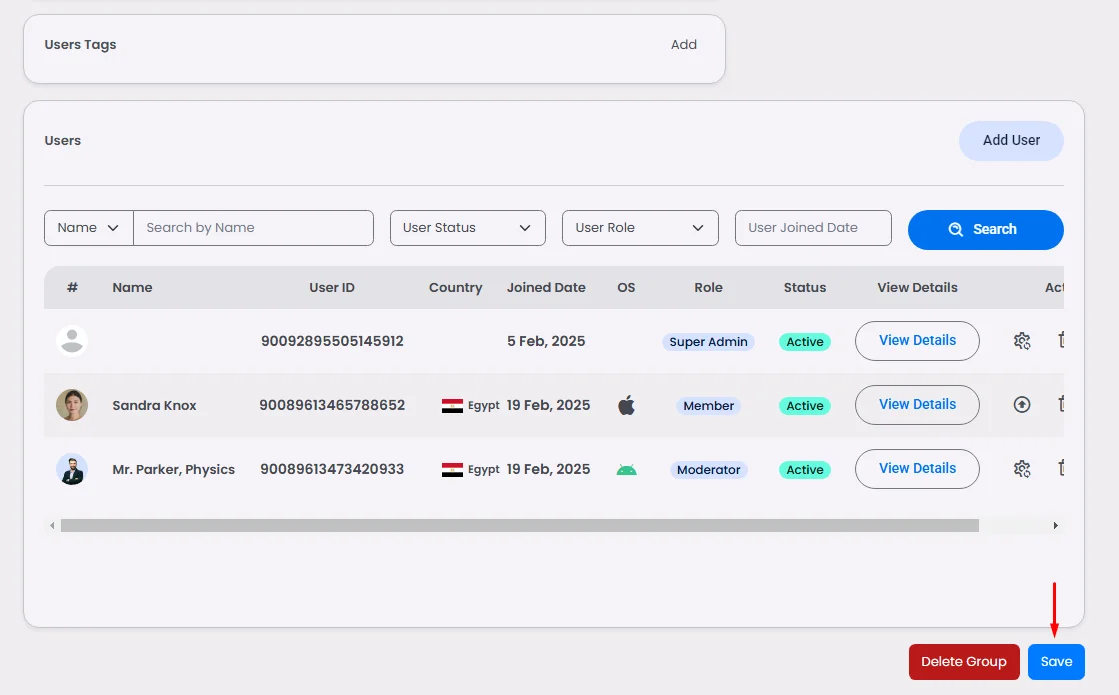
- Users
You can review group members through the Users section and even search for certain members. Also, you can add users to the group from this section.
Click ‘Add User.’
Mark the user and click ‘Done.’
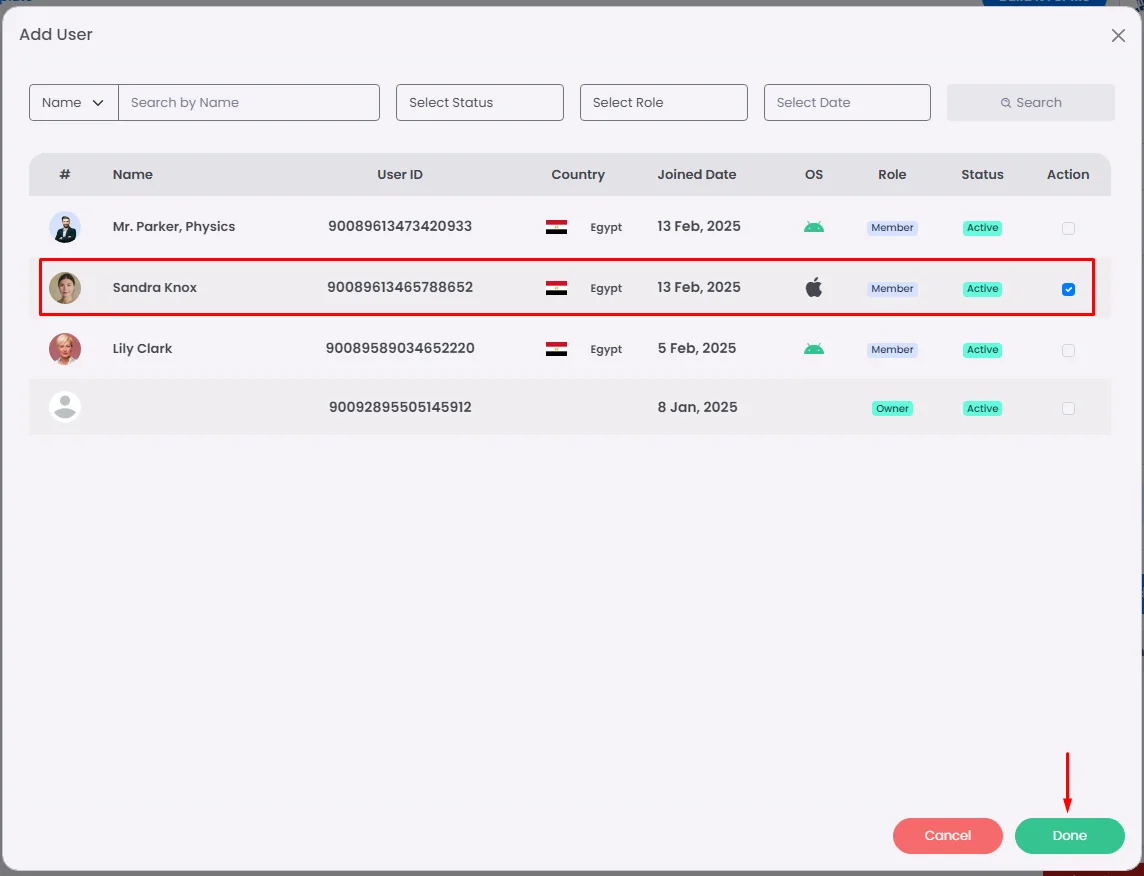
And you will find the user added in the group’s user list.
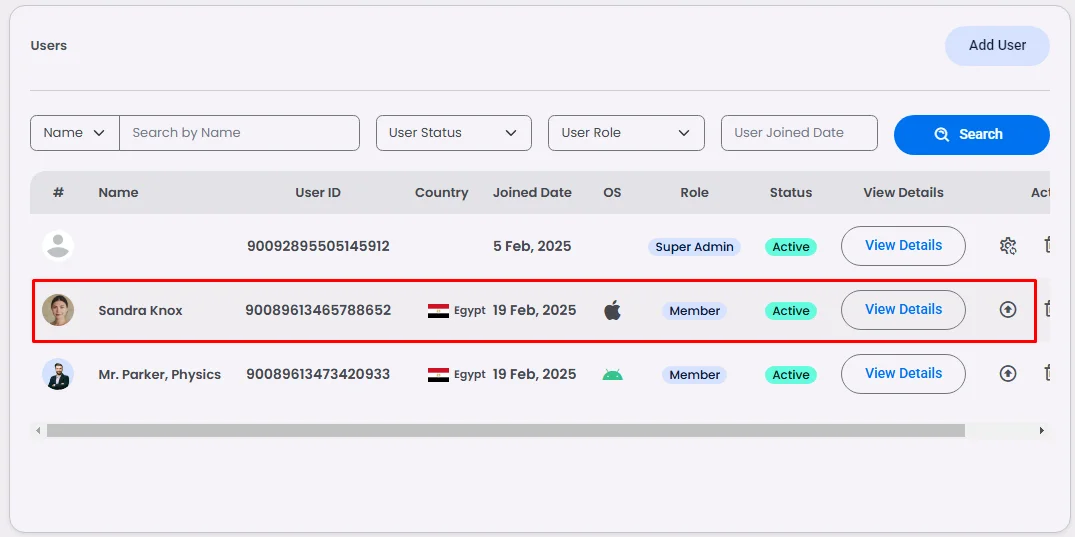
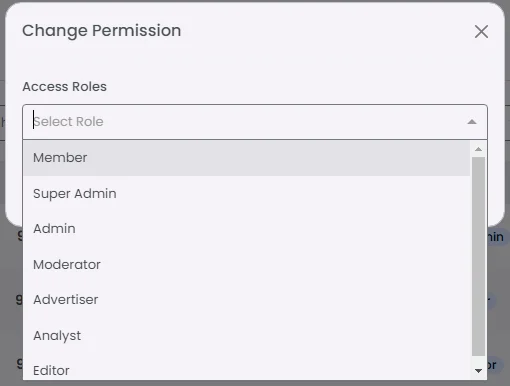
You can upgrade a user role to be admin on the group by clicking the upgrade icon.
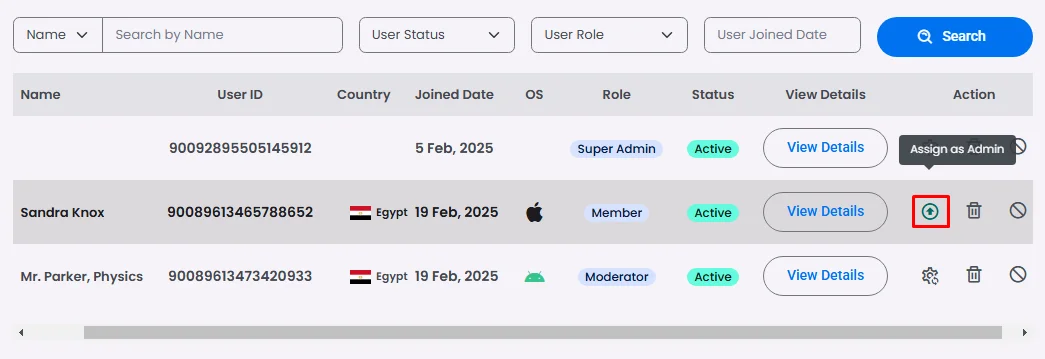
And you can change the admin role later by clicking the gear icon and setting another role for the user.
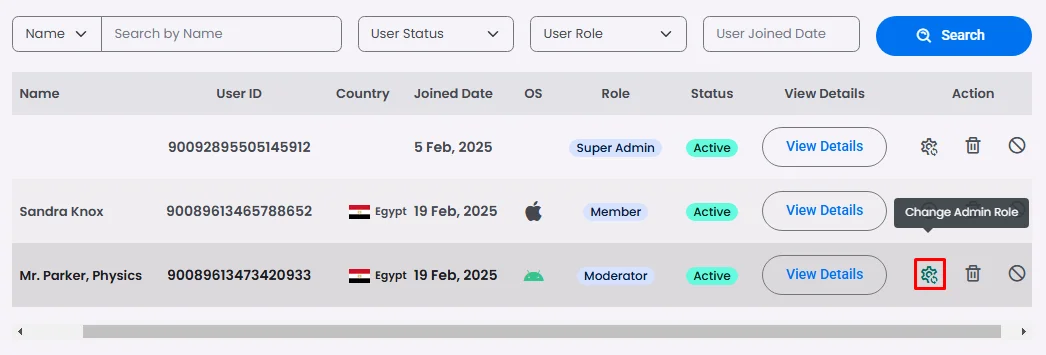
Then click ‘Save.’
Check this document to learn more about user management.
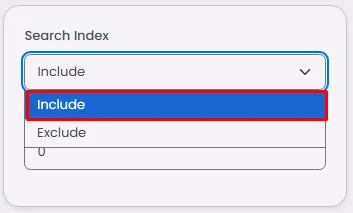
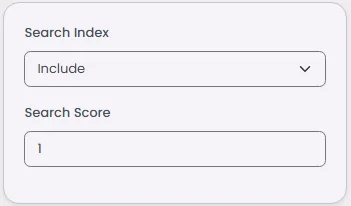
- Search Settings
If you want your chat group to appear in the search, make sure to choose ‘Include.’
The search score determines the order of the chat groups in the search; for example, add 1 to make your chat group the first one to appear.
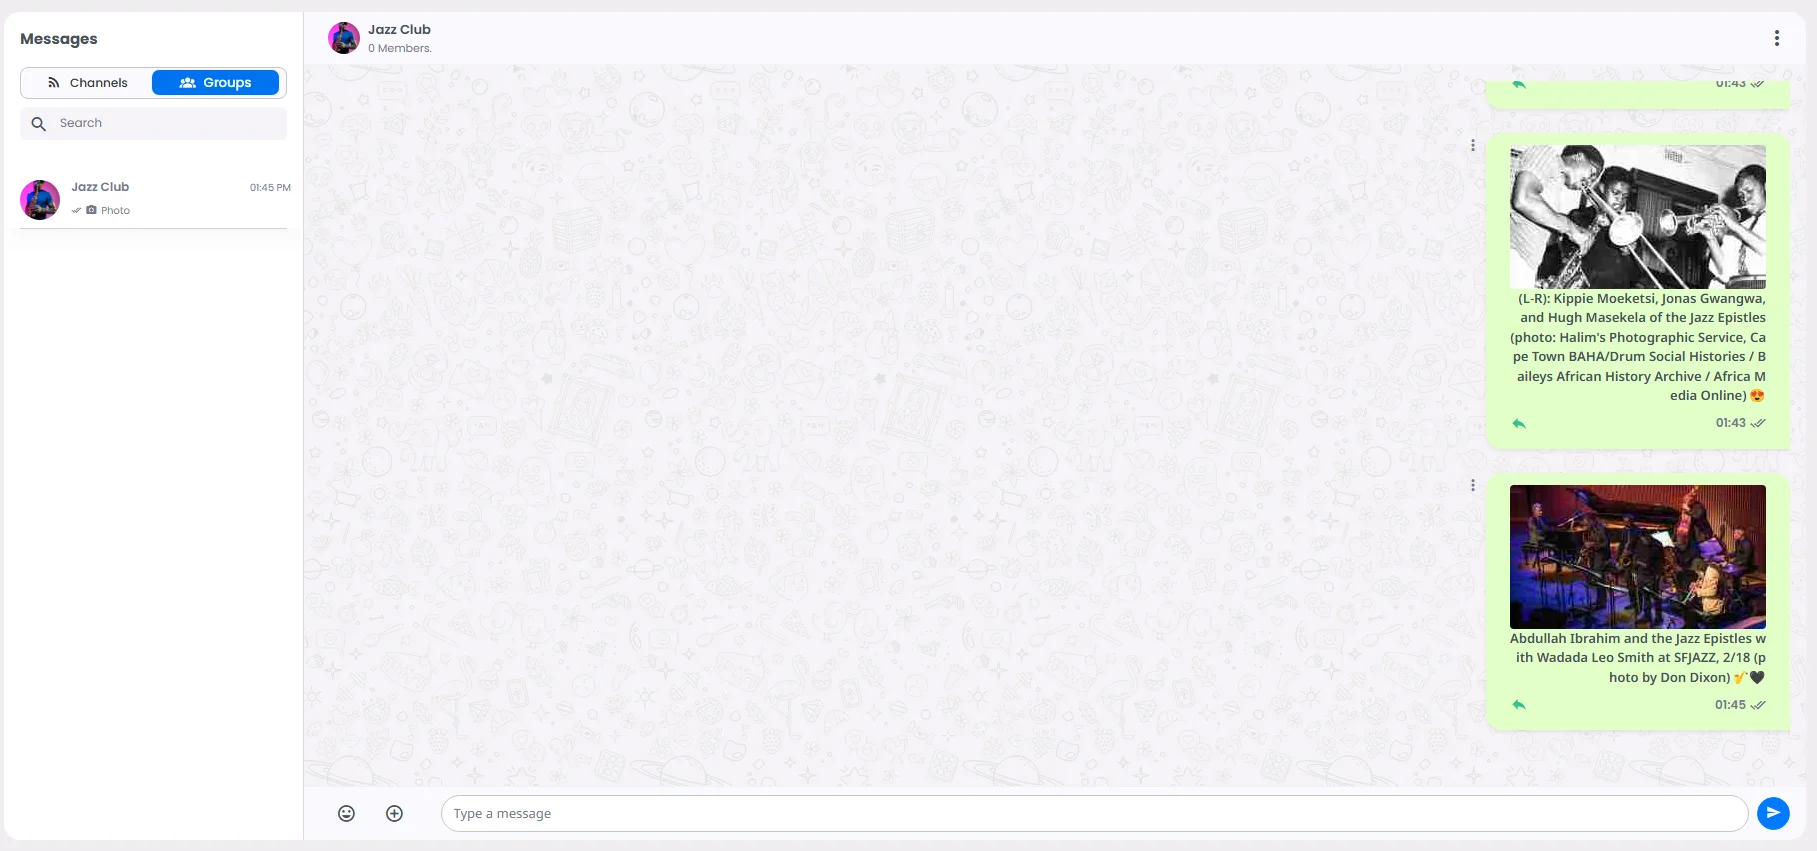
Sending Messages From The App Builder
You can send messages from the app builder directly to a specific group if you want:
- From the admin menu, go to the Chat section and click ‘Messages.’
- In the Groups section, choose the group you want to send a message to, insert your message (text, image, video, etc.), and click the send icon.


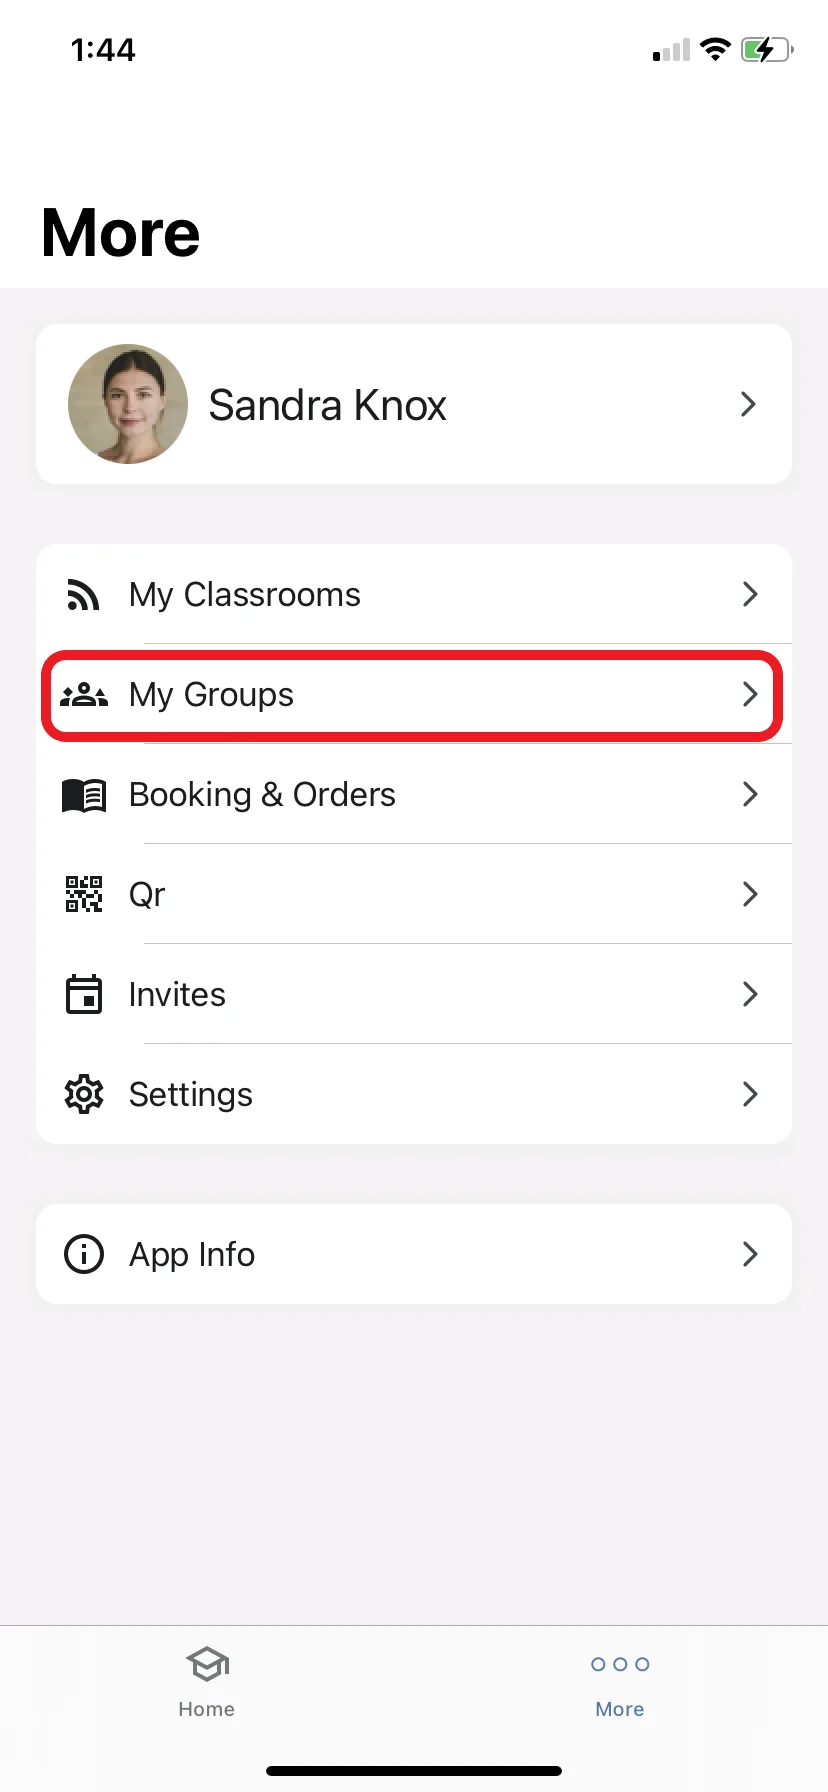
Create a Private Group through Mobile Device
- From your mobile device, click the Subscribed Groups Component tab.
- Tap the ‘+’ icon at the top right-hand side of the screen.
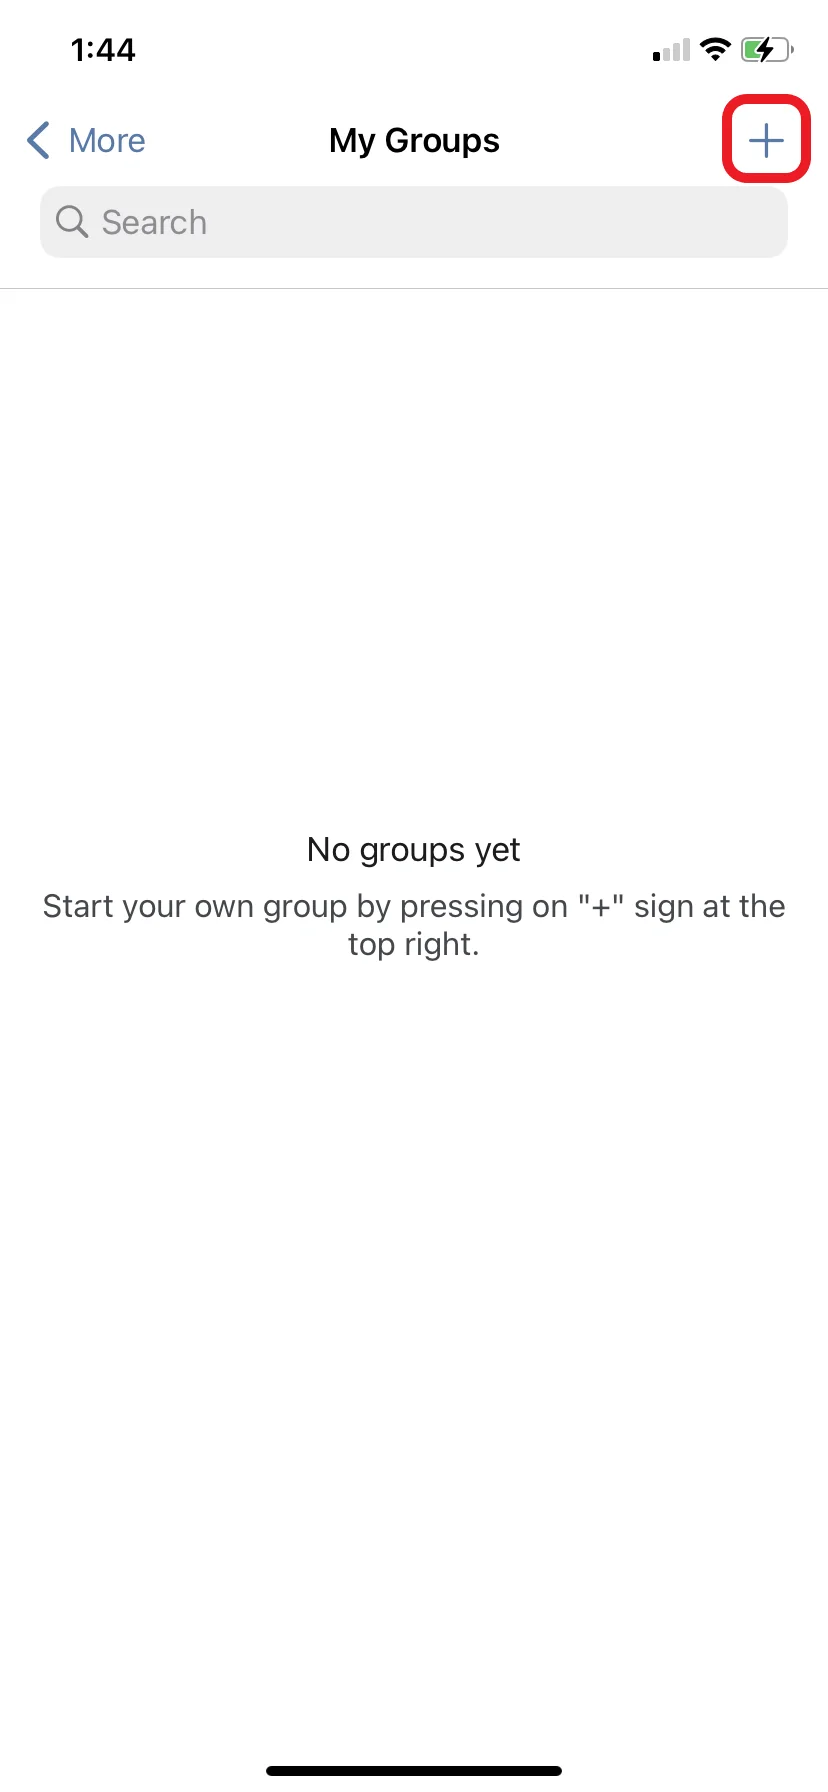
- Enter the group's name and description.
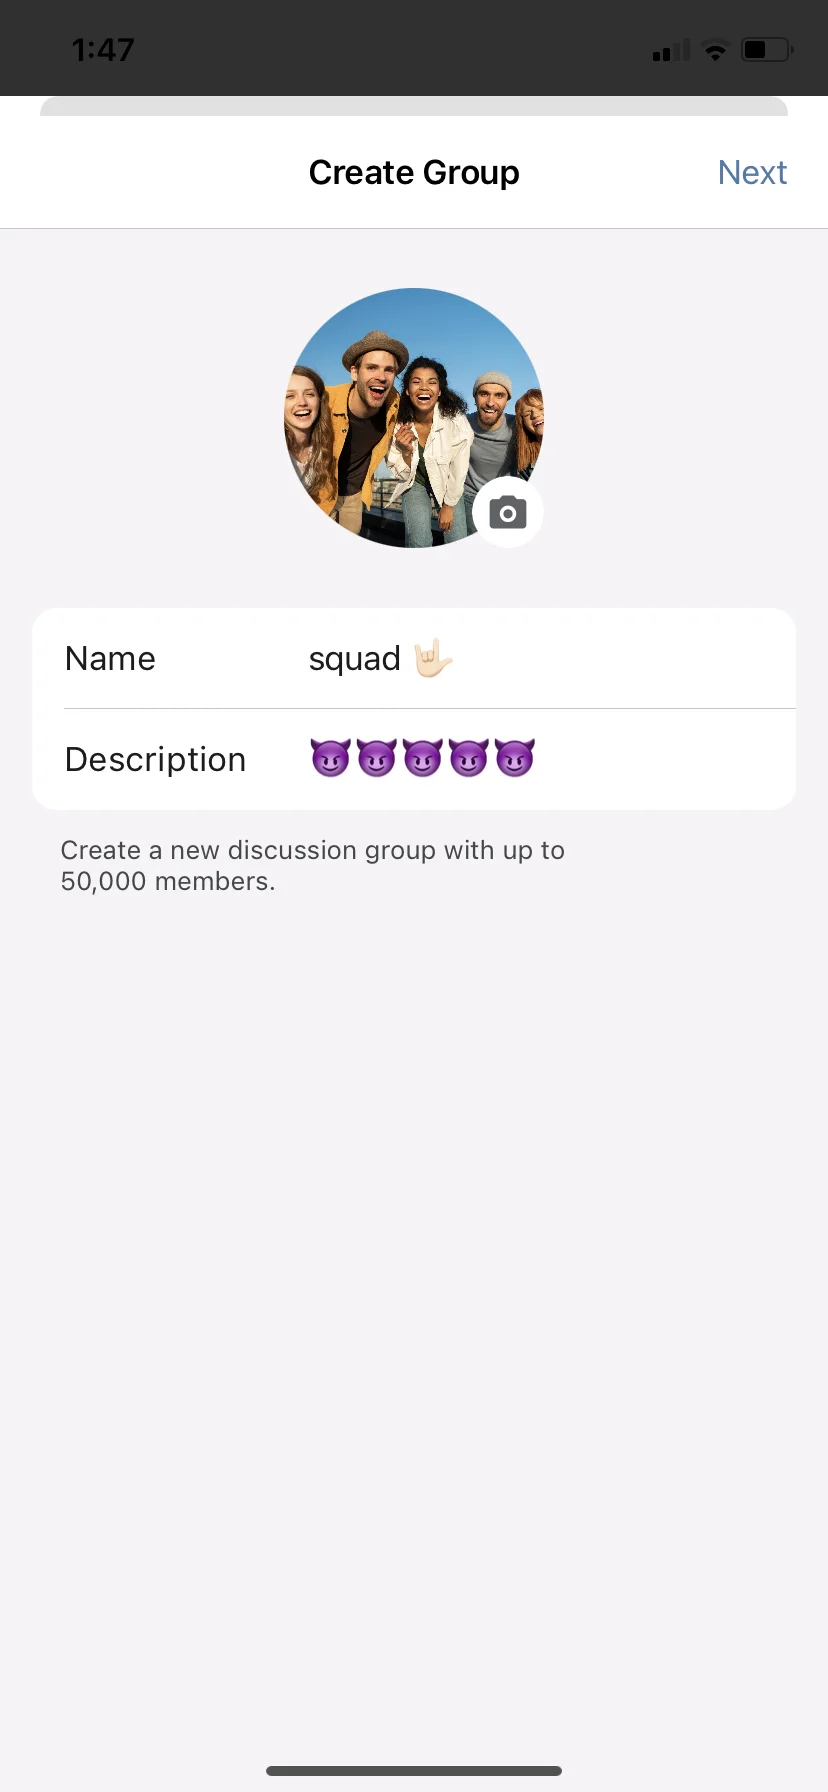
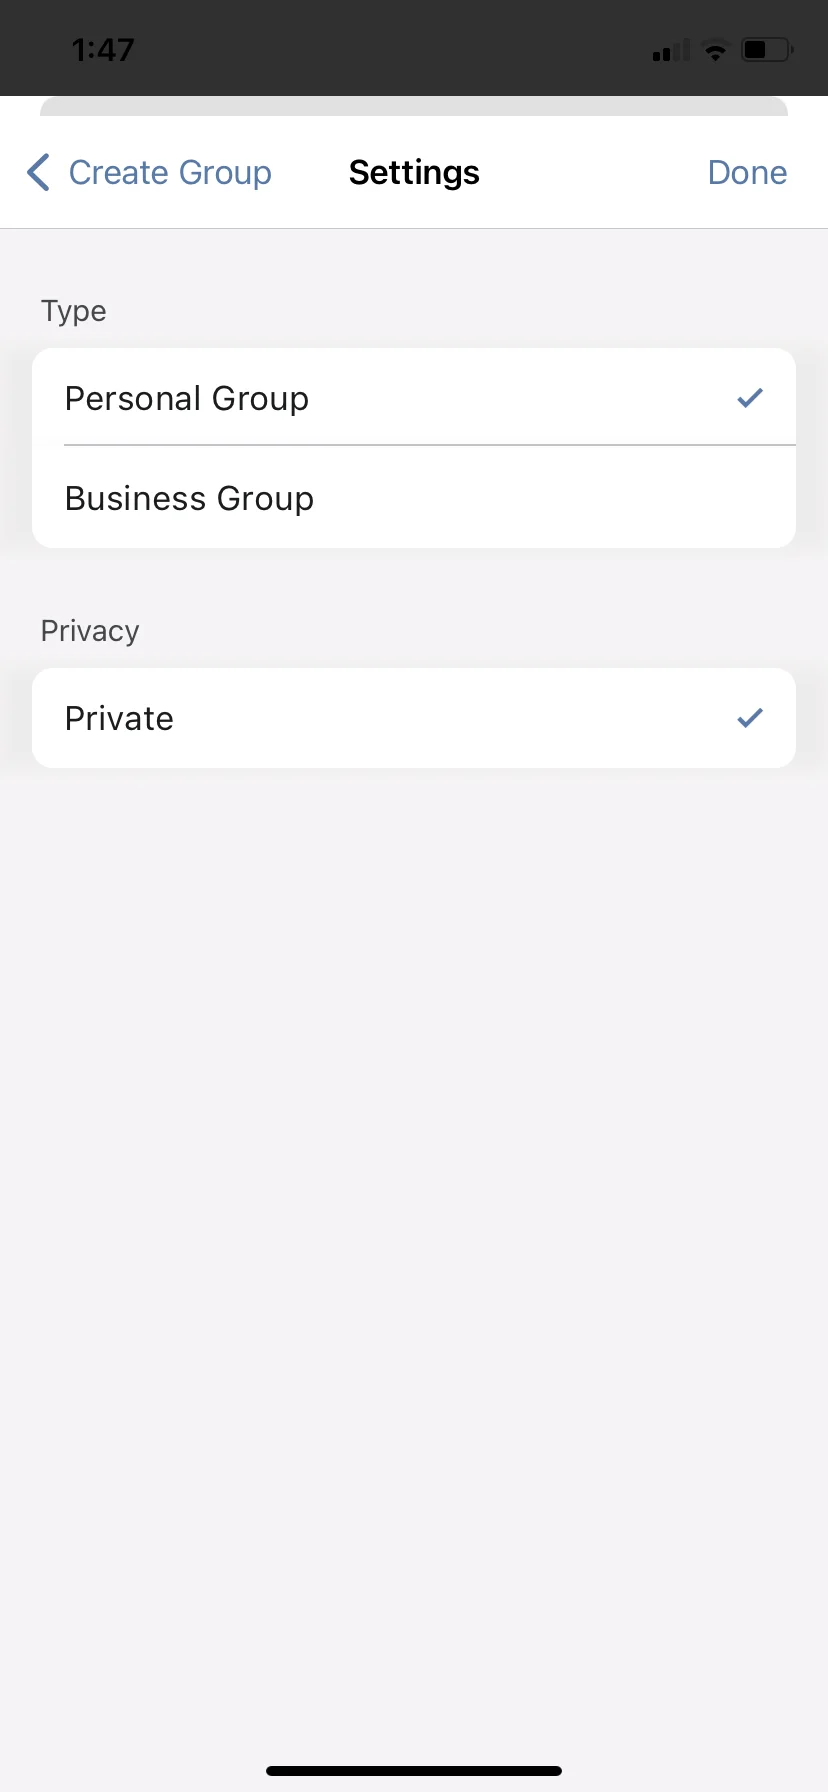
- Select your group type, personal or business, then tap Done.
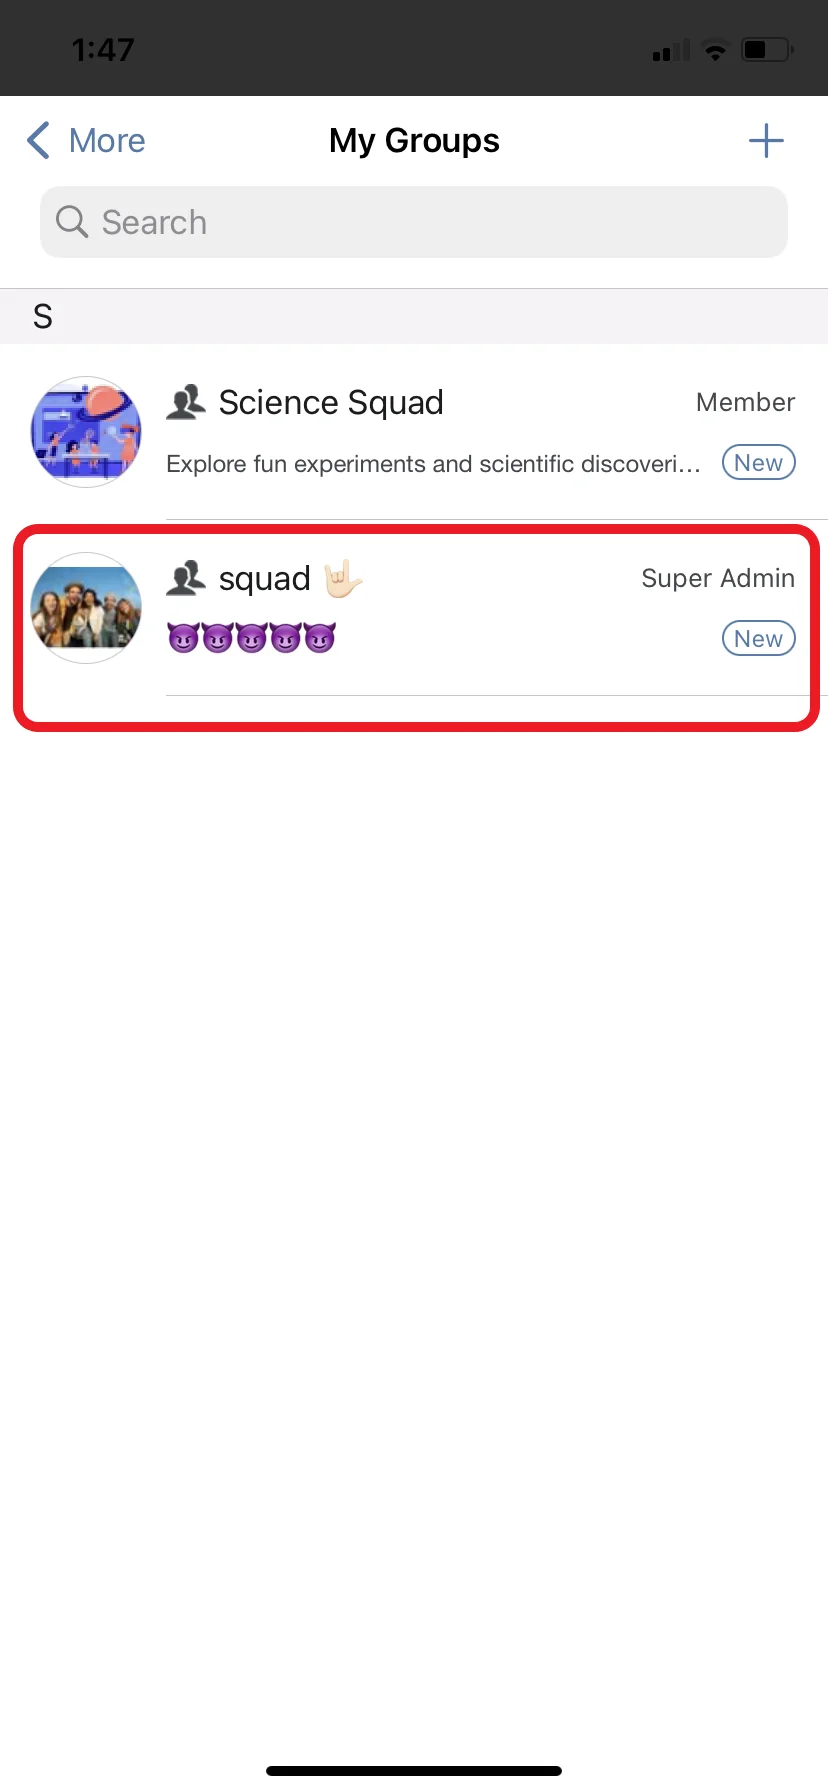
And that's it! You created your group.
How Can Users Join Private Groups
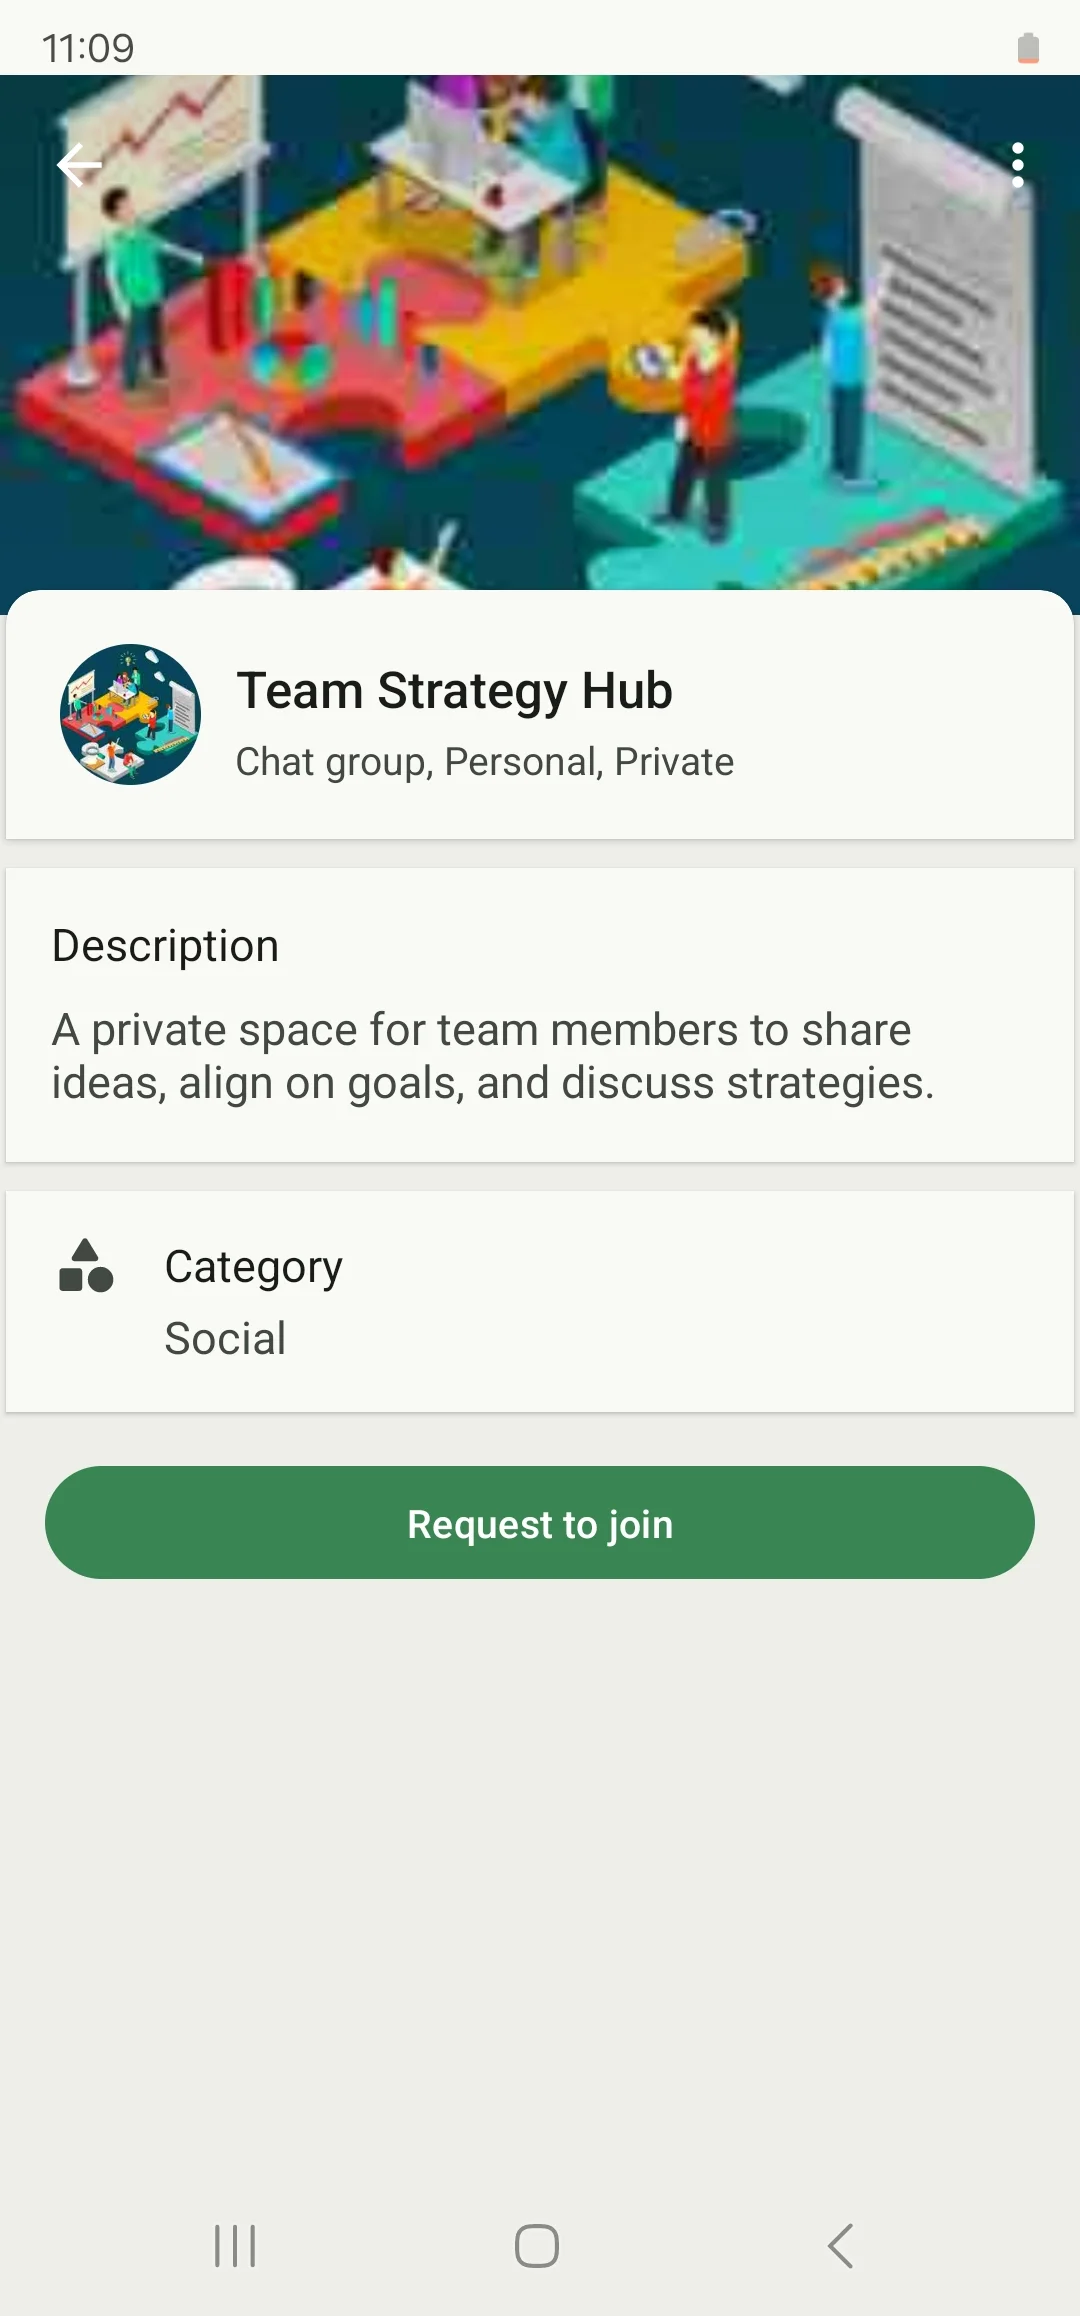
You can now create private groups that don’t appear in the All Groups component. Instead, users can find them in your Search List. When users find a private group there, they’ll see a Request to Join button and can send a join request.
Let’s say that you as an app owner or admin have created a private group called ‘Team Strategy Hub.’ the user wants to find this private group but it’s not listed in the ‘All Groups’ component.

User Perspective
Go to the search tab and search for the group.
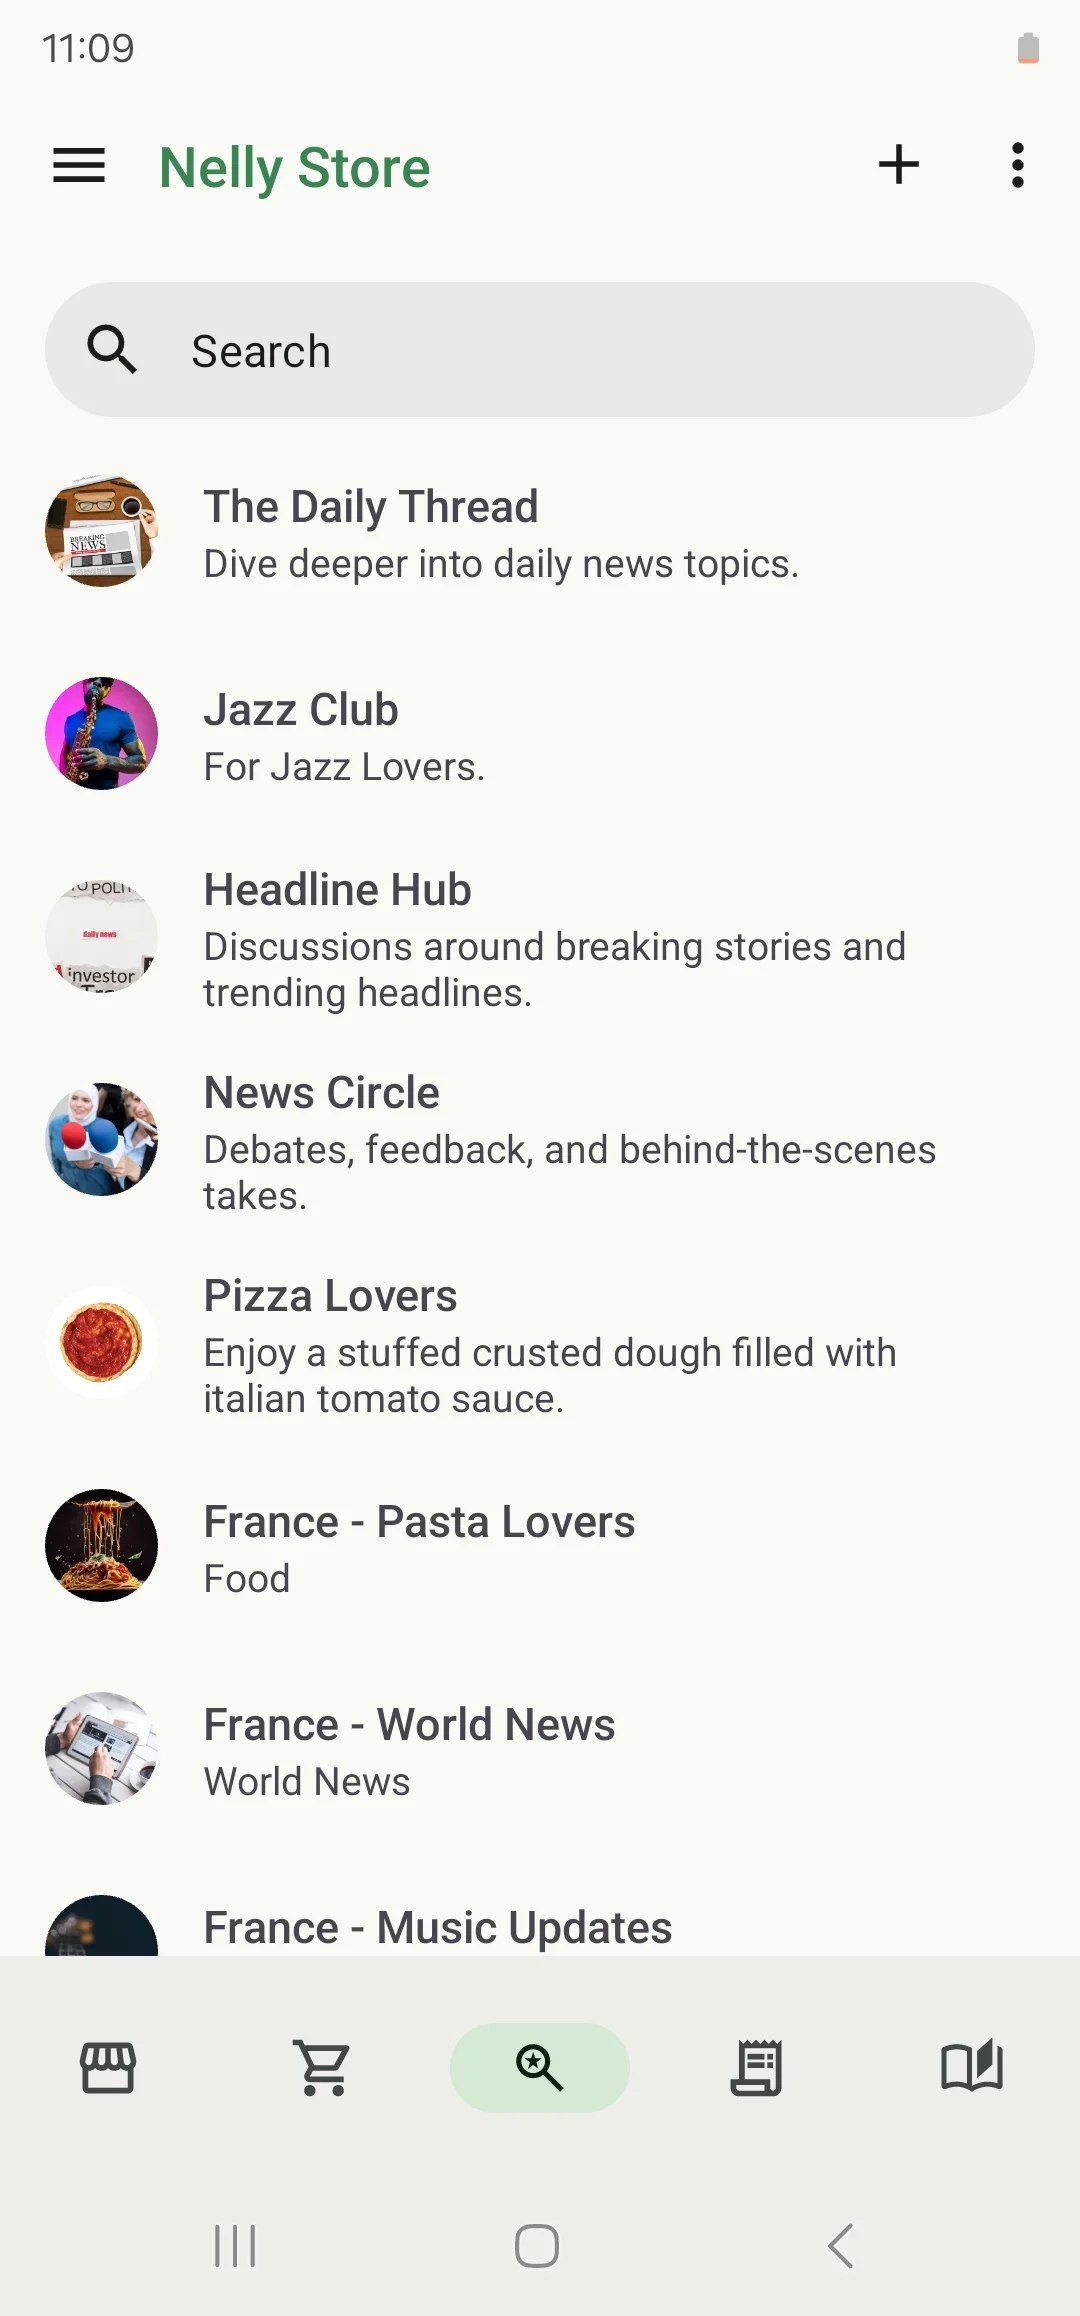
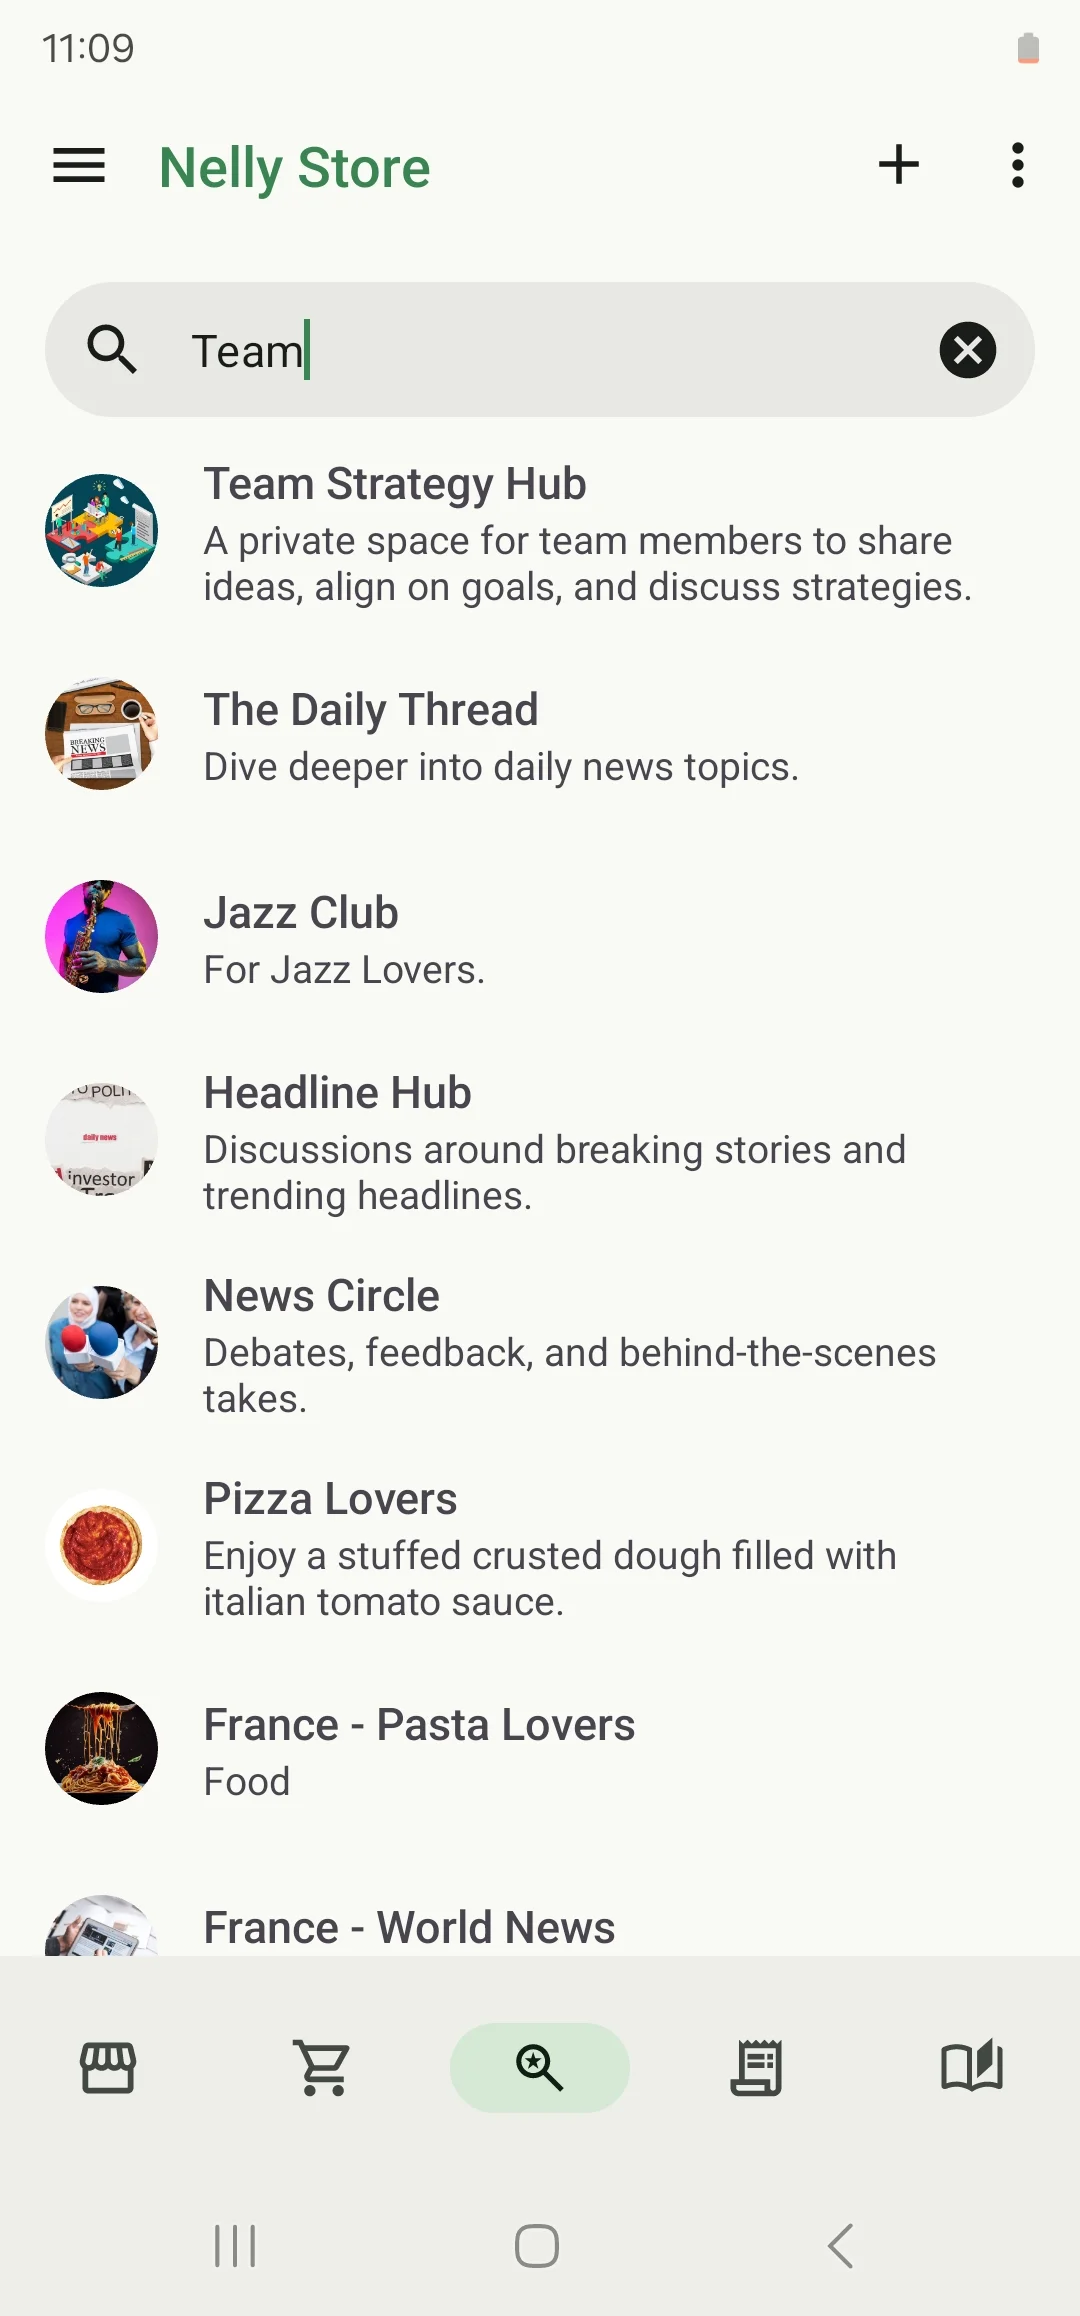
Click ‘Request to join.’
Admin Perspective
Now the group’s admin will receive a request in his invitation tab.
The group admin is the only one who will receive the invitation request by the user to join the group.
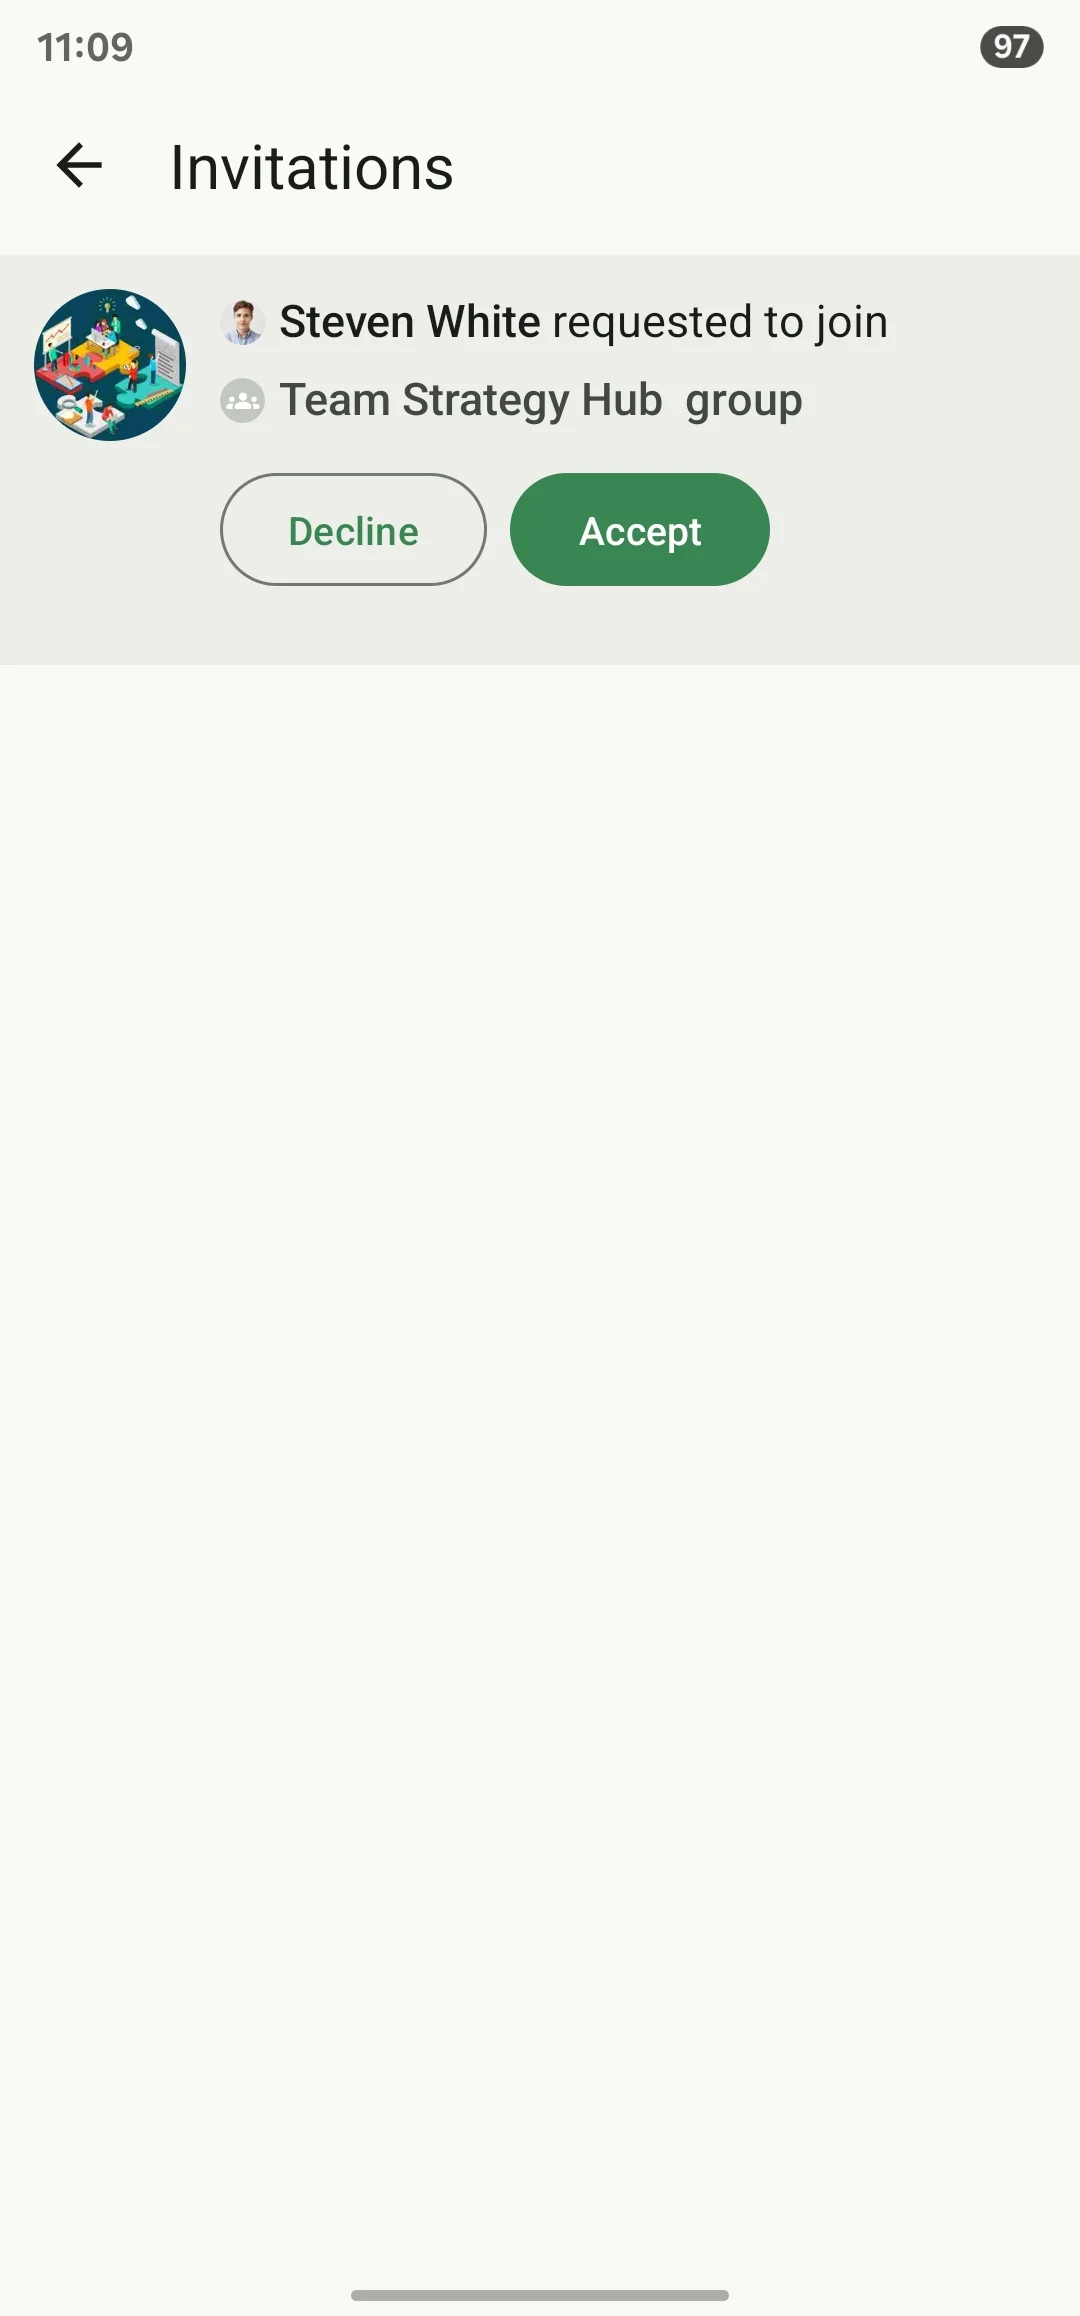
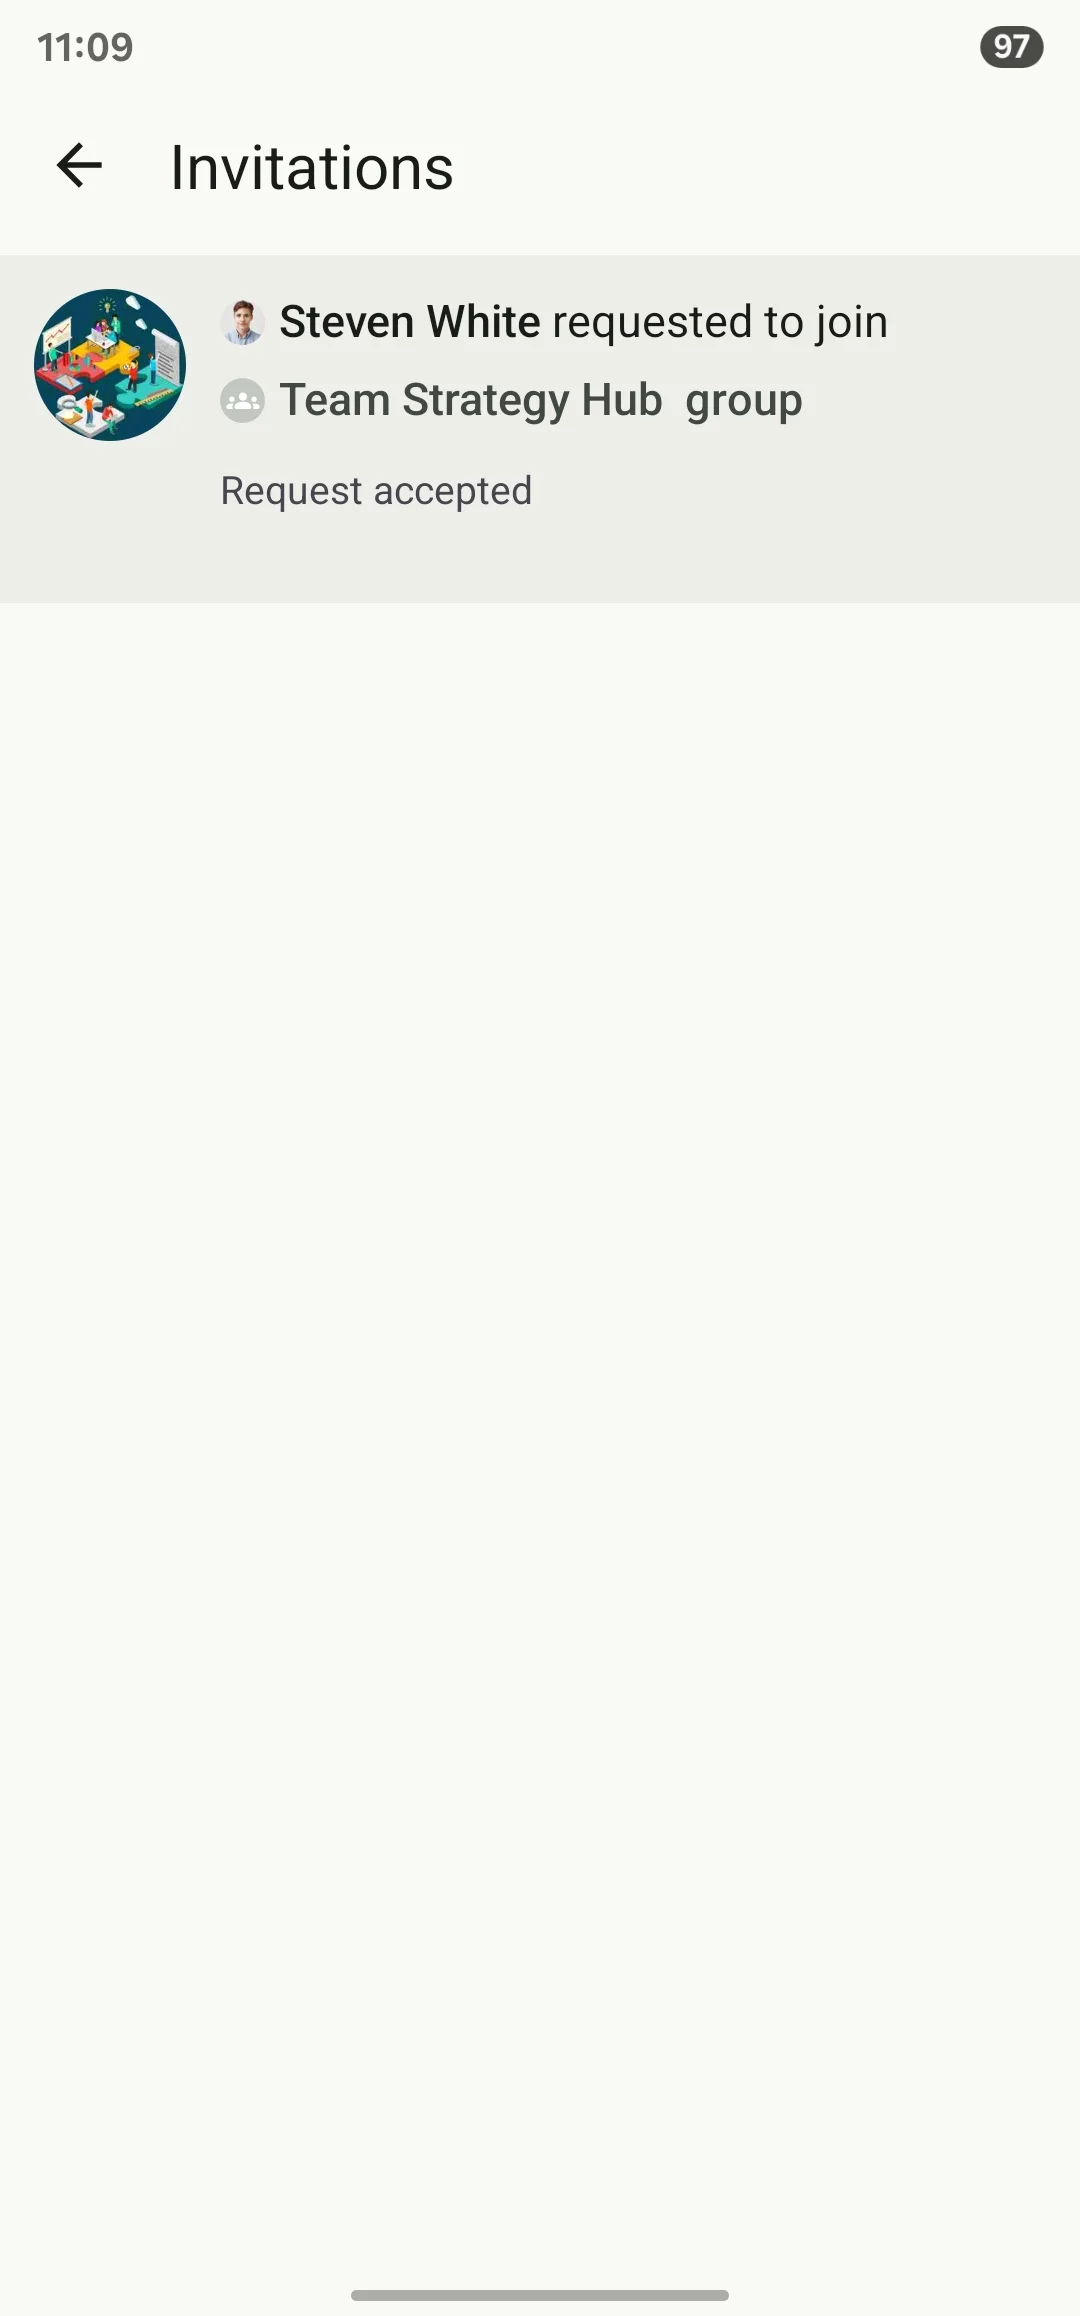
Once accepted, the user will find himself already in the group.
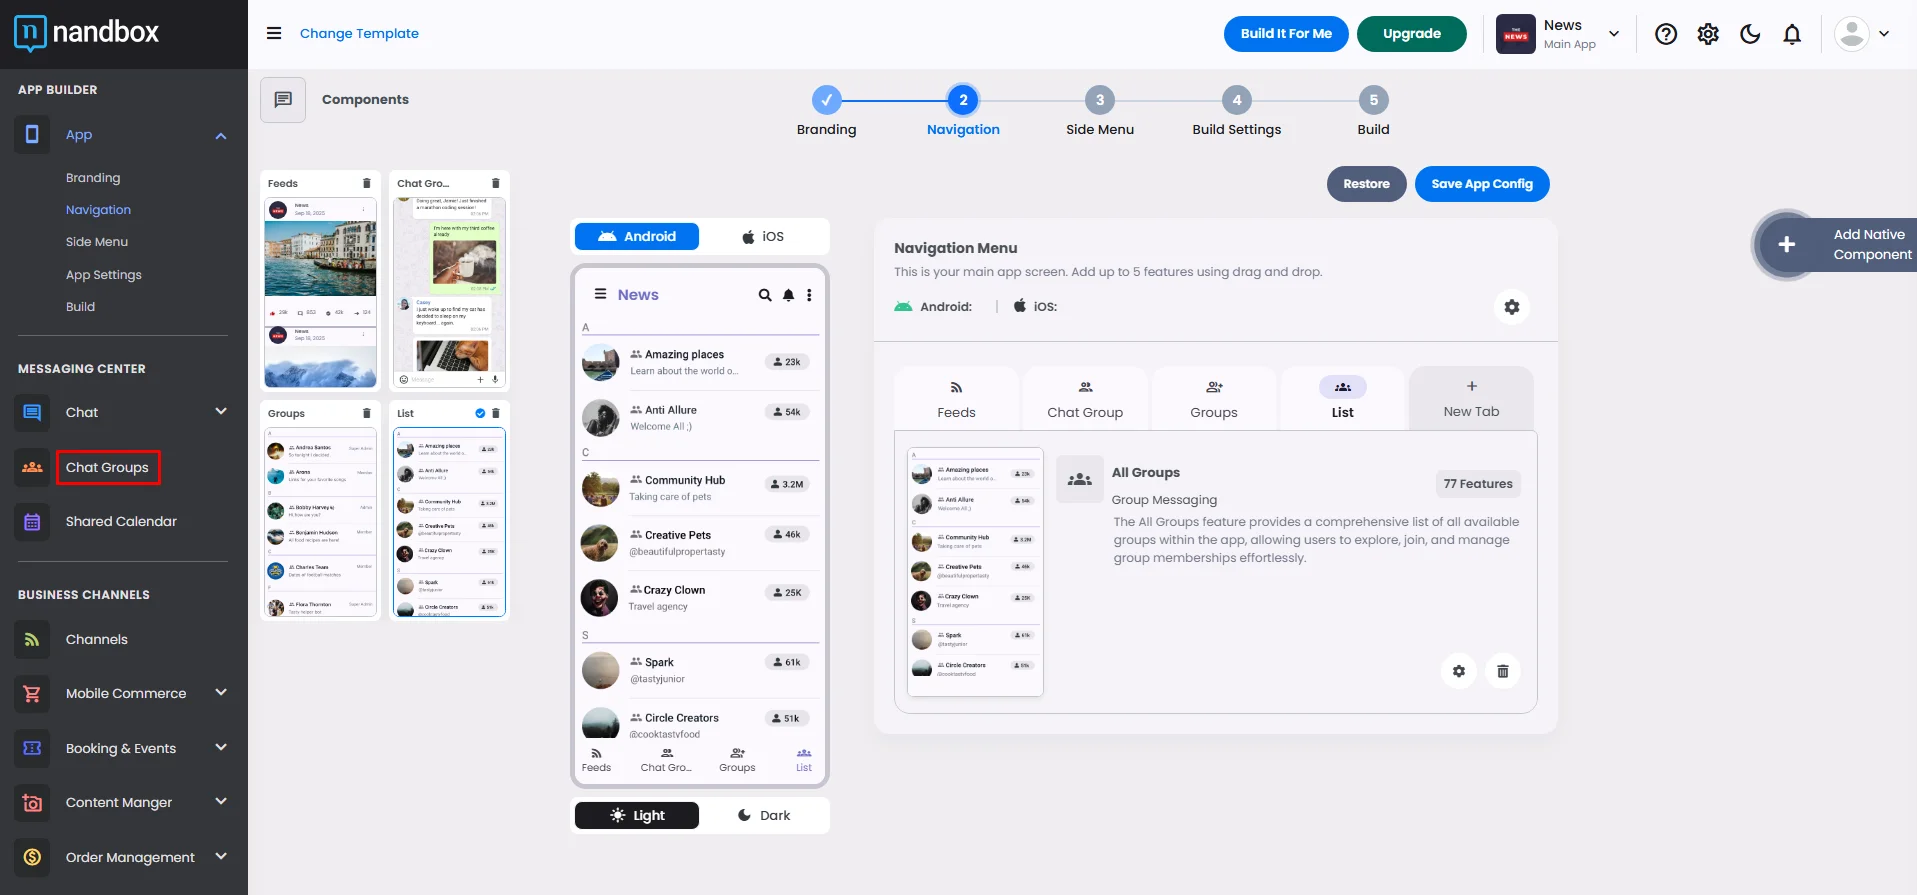
Recommended Components
It’s better to include all group components together in your app as a default, including:
- Contacts Manager: It shows your app users a list of their contacts who also use your app.
- Call Logs: It shows your app users a log of their recent calls.
- All-in-one Messenger: A messenger that allows your users to chat, video & audio call, and send photos, videos, voice notes, and files to each other.
❓ FAQs
Q: How do I let people create group chats in the app without writing any code?
A: With nandbox, you can give your users the ability to create group chats, join conversations, and manage group roles—all without touching a single line of code. Just drag in the Group Messaging components, and users can start chatting in groups instantly.
Q: What features do group chats include?
A:
Group chats come packed with powerful features to keep conversations flowing:
- Support for up to 50,000 members in a single group.
- Classic chat with text, voice notes, and multimedia sharing (photos, videos, documents).
- Edit or recall messages at any time.
- Pin important messages to keep key updates visible.
- Easy joining with QR codes or invite links.
- Manage group members—ban users or promote them to admin roles.
- Share your current location, and customize notification sounds and vibrations.
Q: How do I add group chat to my app?
A:
- In the app builder, go to the Group Messaging section.
- Drag the components you need into your Navigation Bar or Side Menu:
- Chat With A Group—Opens a specific group chat.
- Subscribed Groups—Shows all the groups the user has joined.
- All Groups—Displays every available group in the app.
Q: How do I customize group chat settings?
A:
- Click the gear icon on any group component.
- Rename the tab (e.g., “Groups” or “Community”) and upload your app’s custom icons.
- For “Subscribed Groups” or “All Groups,” you can also:
- Enable invite links and QR codes.
- Turn on AdMob ads if you want to monetize the group section.
Q: How can users create a group chat?
A:
There are two ways:
- From the Admin Panel:
- Go to Chat Groups and click Add New Group.
- Fill in details like the group name, description, image, category, language, and time zone.
- Add an optional splash screen with a title, image, and custom button styles.
- Enter search keywords to make the group easier to find.
- Click Create, then share invite links or QR codes, enable subscriptions, and assign admin roles.
- From the Mobile App (Subscribed Groups tab):
- Tap the + button.
- Enter the group’s name and description.
- Choose whether it’s a personal or business group, then tap Done.
Q: How can I send messages to a group from the builder?
A:
- In the admin panel, go to Chat → Messages.
- Select the group you want to message under Groups.
- Draft your text, image, or video message and hit Send—it’ll appear in the group chat right away.
Q: How can users join a private group in my app?
A:
Users can:
- Find your private group in the Search tab (it won’t show under All Groups).
- Tap Request to Join to send an invite request.
- Wait for the admin to approve—once accepted, they’ll be added right away.
Q: As an admin, how do I manage join requests for private groups?
A:
Admins can:
- Open the Invitations tab to see pending join requests.
- Approve or decline requests with one click.
- Once approved, the user is instantly part of the group.