
Stripe is one of the most popular platforms for online enterprises. It can serve as a payment gateway where users can conveniently make payments in your store, channel, chat group, bot, events, etc.

This payment method is the best for e-commerce apps.
Included Features
Stripe is a payment gateway that users can use to pay for items in your store, subscriptions on your channel, or any in-app purchases using a secure internet connection.
Users have to have a Stripe account in order to be able to finish the online transaction and link it to the nandbox app builder.
How to Activate Stripe
From the App Settings page, go to the Payment Methods section, turn Credit Card (Stripe)’s toggle on and click the gear icon to configure settings.
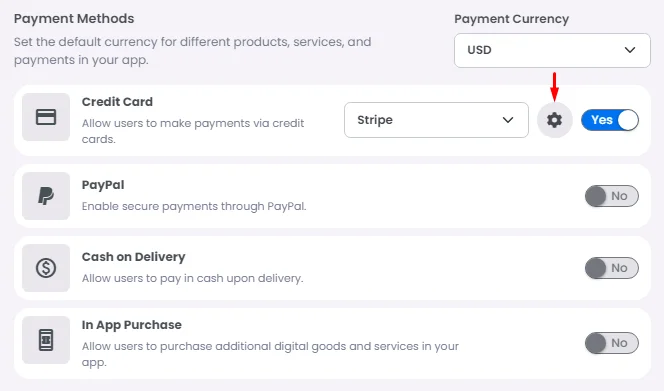
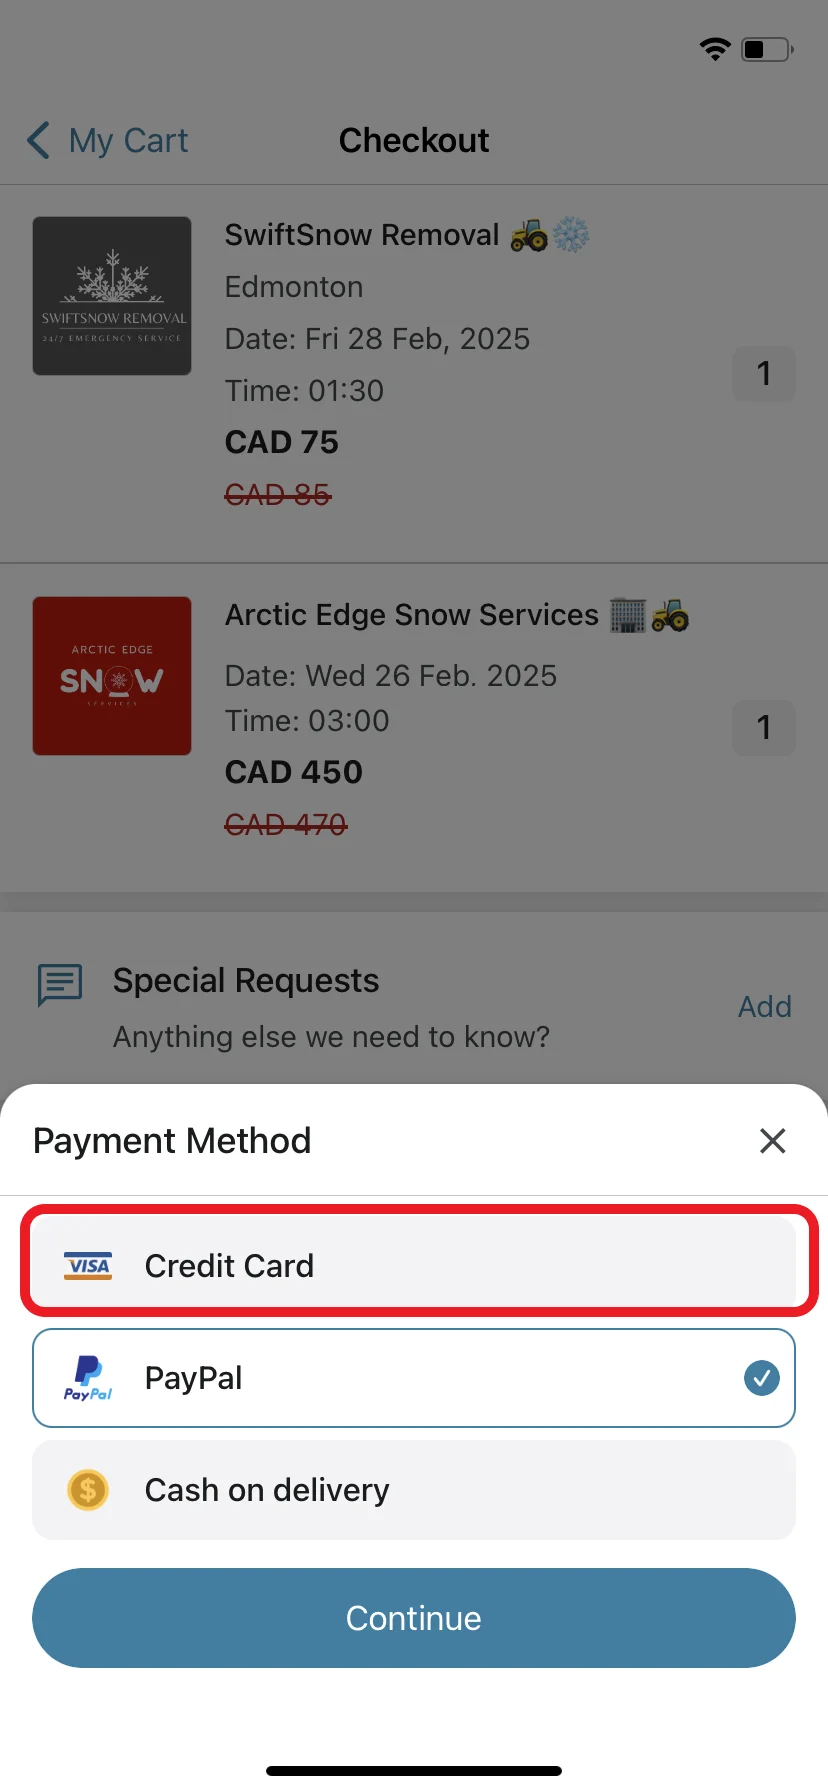
Once you enable Stripe in your app, it will be automatically integrated as the main payment gateway if you did not install any other payment gateway; if you did, it will give the user the option to choose which payment gateway to proceed with as follows:
How to Configure Stripe
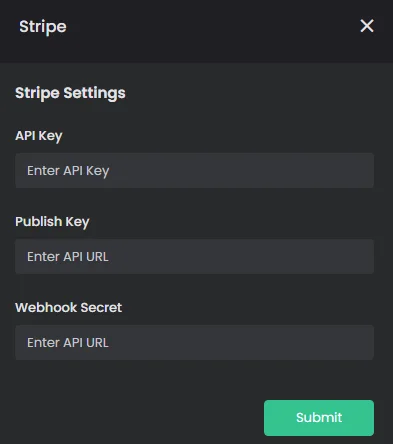
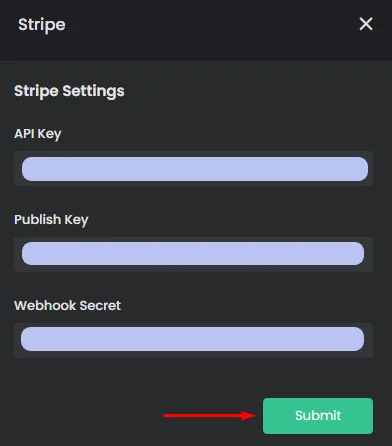
You will find three pieces of information are required to complete your payment integration process:
- API Key
- Publish Key
- Webhook Secret
This data is accessible from your Stripe account.
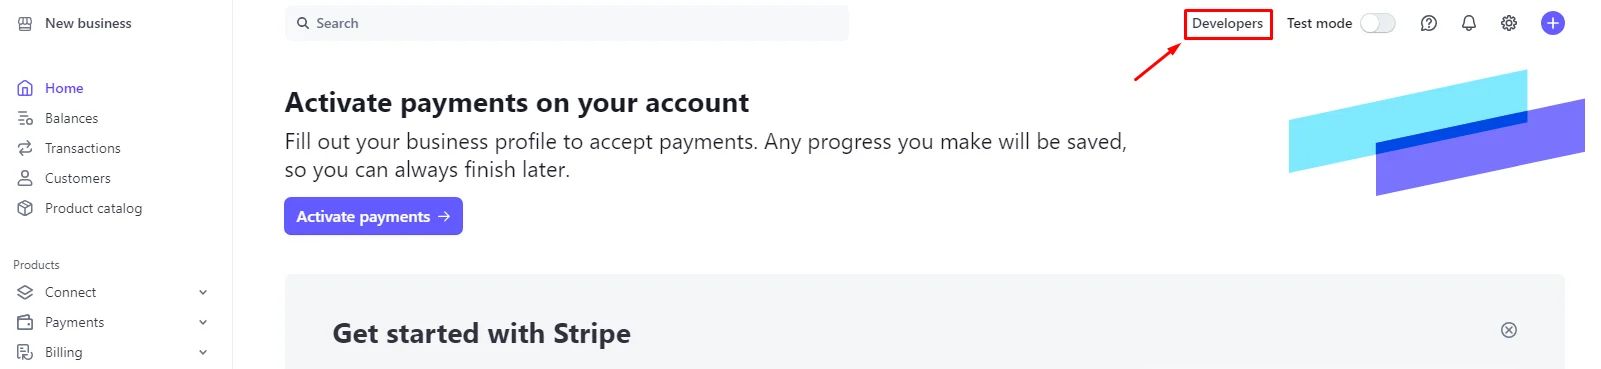
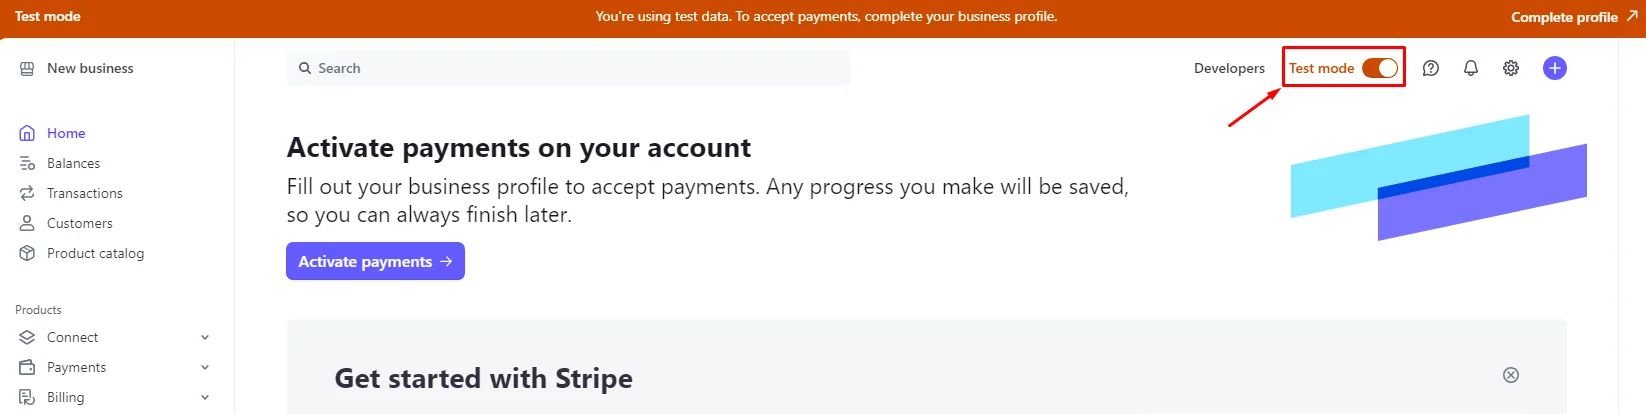
Go to your Stripe account and click ‘Developers’ from your dashboard.
Note that you can enable the Test mode toggle for testing your payments, and disable it for Live mode if you’re ready to launch your app.
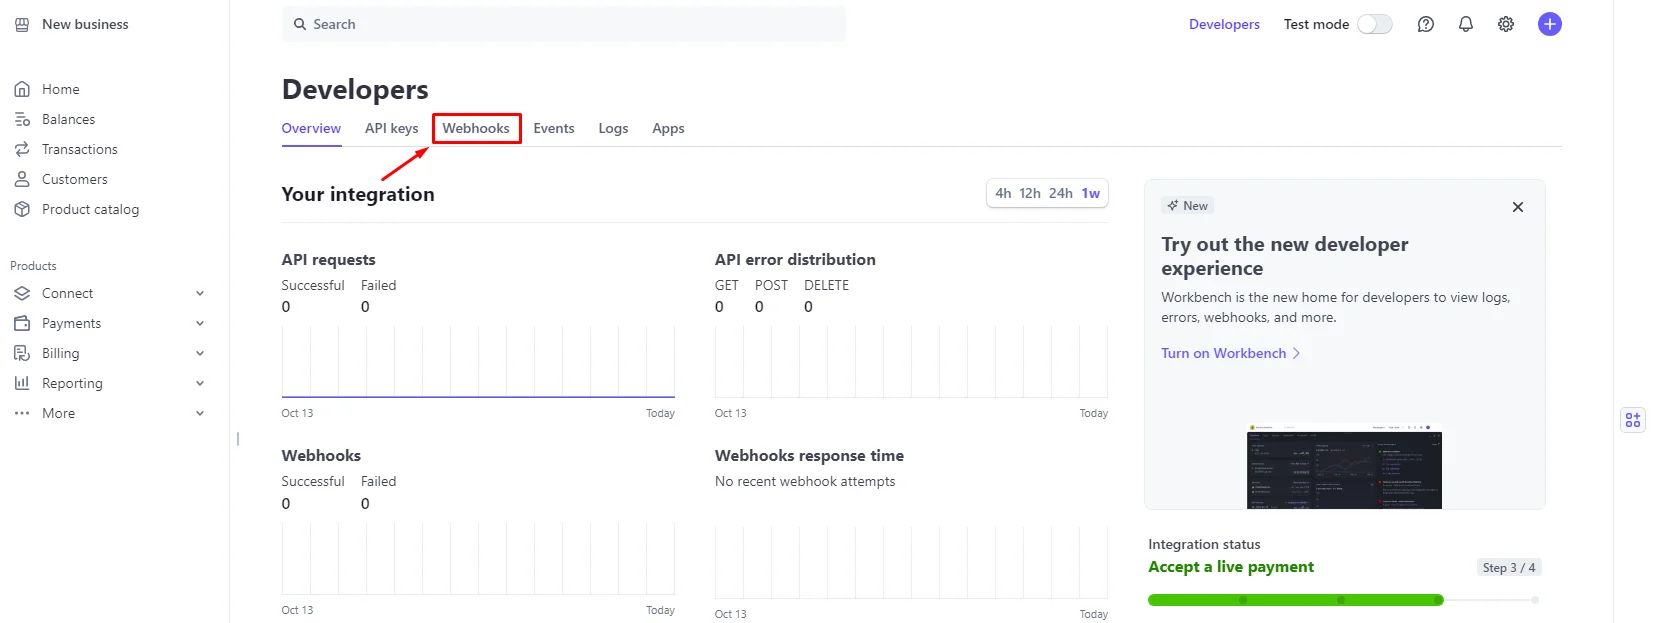
Click ‘Webhooks’
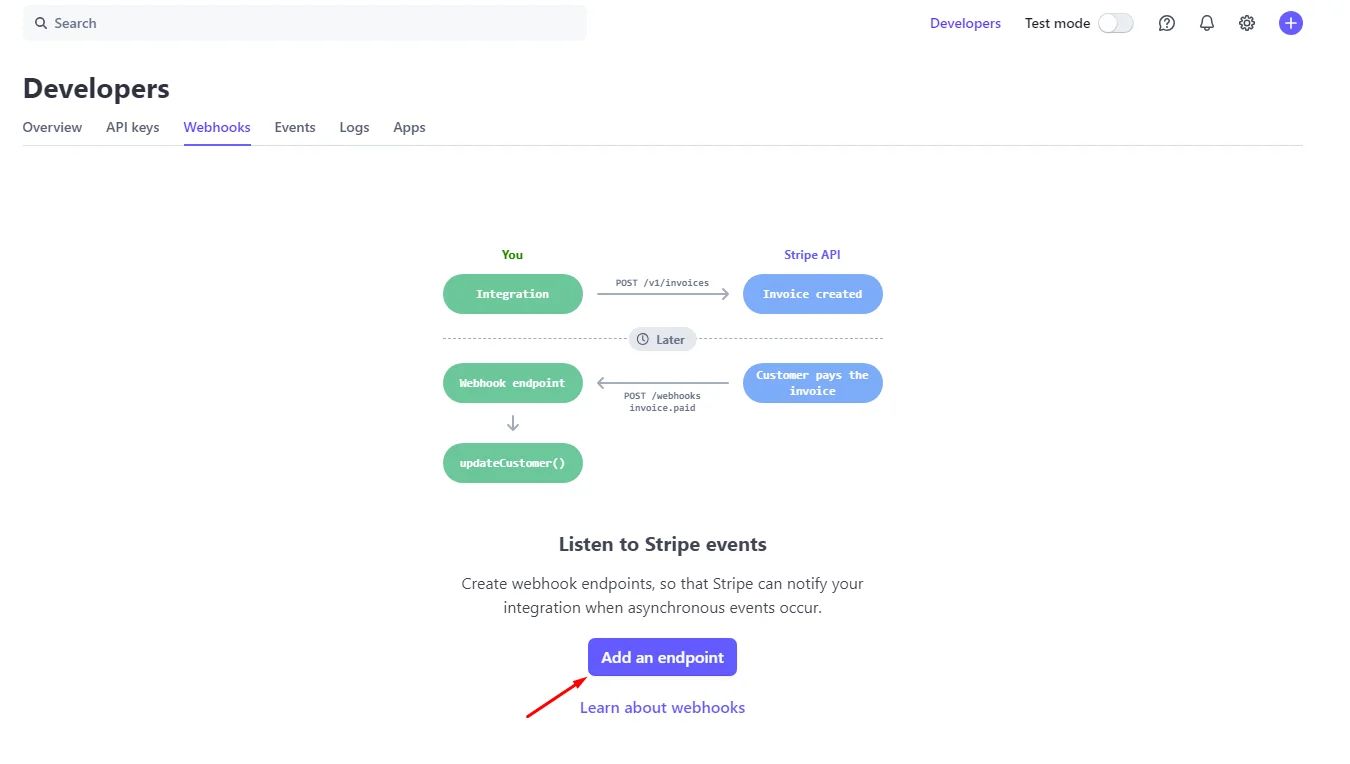
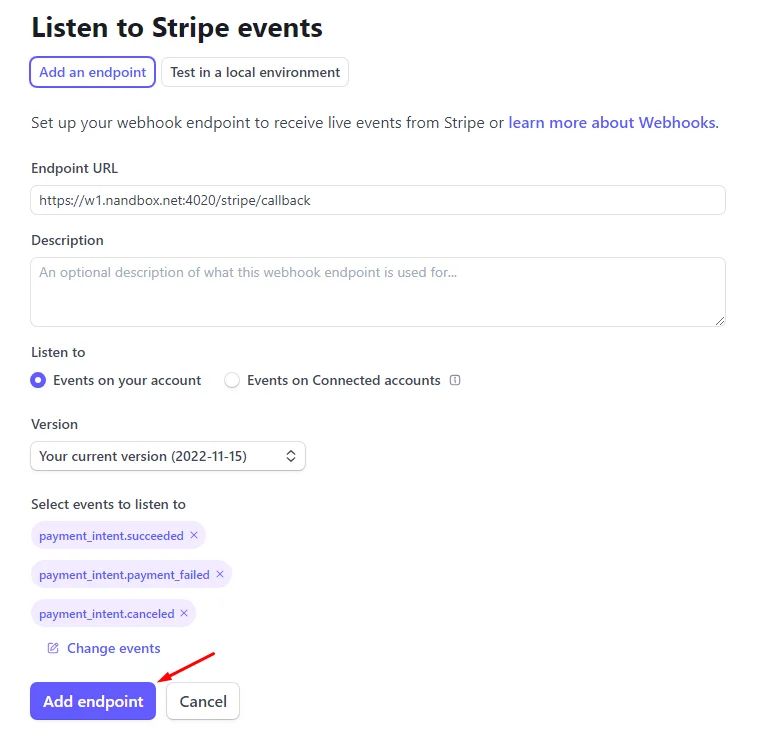
Then click ‘Add an endpoint’.
A screen will pop up with the required information:
- Endpoint URL
- Select events
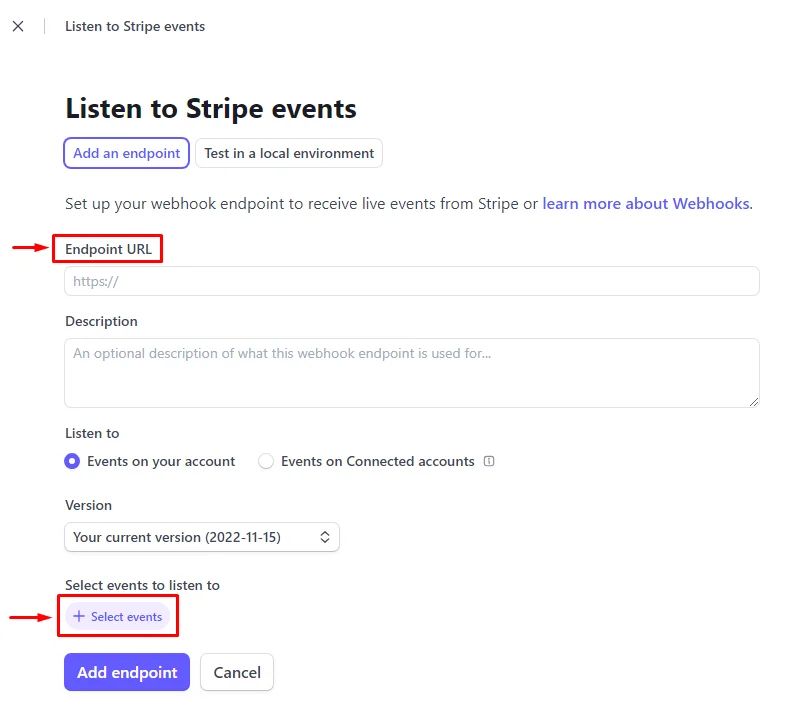
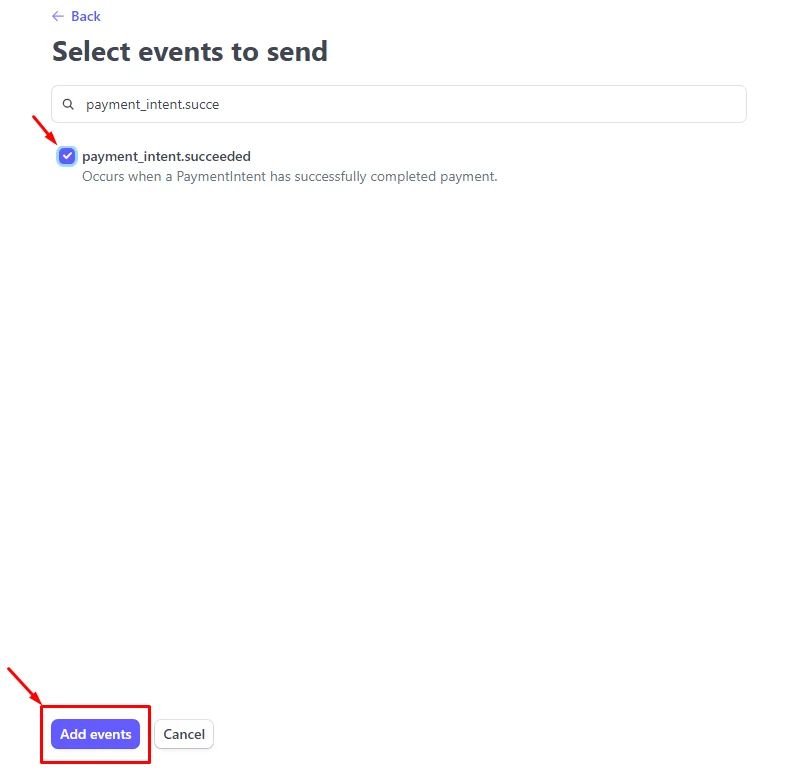
Paste this endpoint URL: https://w1.nandbox.net:4020/stripe/callback and add these three events to its event details:
- payment_intent.succeeded
- payment_intent.payment_failed
- payment_intent.canceled
Then click ‘Add endpoint’
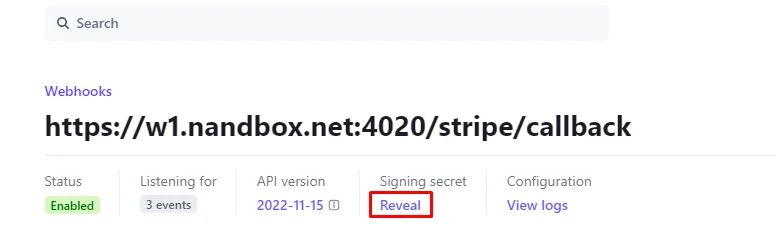
Once endpoint added, click ’Reveal’ the signing secret in order to get your ’Webhook Secret’.
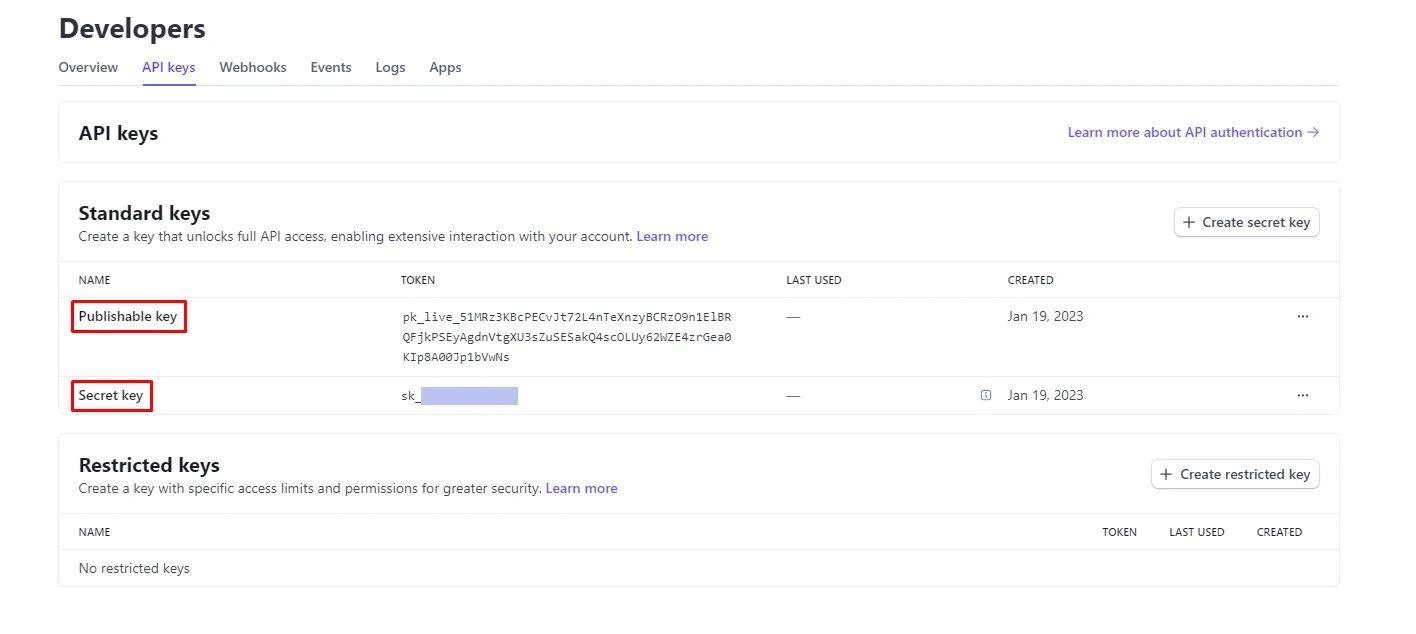
Now go back and click ‘API keys’ to get your Publishable Key and Secret Key.
Copy and paste all of the above into the builder’s Stripe settings and click ‘Submit’.
Recommended Components for PayPal use in
- Commerce/Booking & Events: It allows you to create a full shopping hub where you can display your products or services.
- Channel: Channels allow you to post messages, images, videos, and files. With the option of targeting and segmentation, you can also charge your users for a monthly subscription to your channels.
❓ FAQs
Q: How can I let users pay with credit cards in my app using Stripe—without coding?
A: You can securely accept credit card payments in your nandbox app by connecting Stripe—no coding required. Stripe acts as your payment gateway for:
- In-app purchases in your store
- Booking event tickets or appointments
- Subscriptions in channels or groups
- Payments inside chatbots and workflows
Once enabled, users can pay directly with their credit or debit cards inside your app.
Q: How do I connect Stripe and enable credit card payments?
- Go to your Admin Panel → App Settings → Payment Methods
- Turn on the toggle for Credit Card (Stripe)
- Click the gear icon to open Stripe settings
- Enter the required Stripe credentials (see below)
- Click Submit to activate Stripe in your app
Stripe will be your app’s default payment gateway unless you also add others like PayPal.
Q: What Stripe credentials do I need?
You’ll need three keys from your Stripe Dashboard:
- API Secret Key
- Publishable Key
- Webhook Secret
You can find these under Developers → API Keys and Webhooks in your Stripe account.
Q: How do I set up the webhook for Stripe?
- In Stripe, go to Developers → Webhooks → Add Endpoint
- Enter this URL as your Endpoint URL:
https://w1.nandbox.net:4020/stripe/callback- Under “Events to send,” select:
payment_intent.succeededpayment_intent.payment_failedpayment_intent.canceled
- Click Add Endpoint
- Copy the Signing Secret (you’ll use this as your Webhook Secret)
Q: Where do I enter these details in nandbox?
- Back in your nandbox app builder, open the Stripe configuration panel
- Paste:
- API Secret Key
- Publishable Key
- Webhook Secret
- Click Submit to save
Enable Stripe’s Test Mode to simulate transactions during development and switch to Live Mode when ready to launch.