
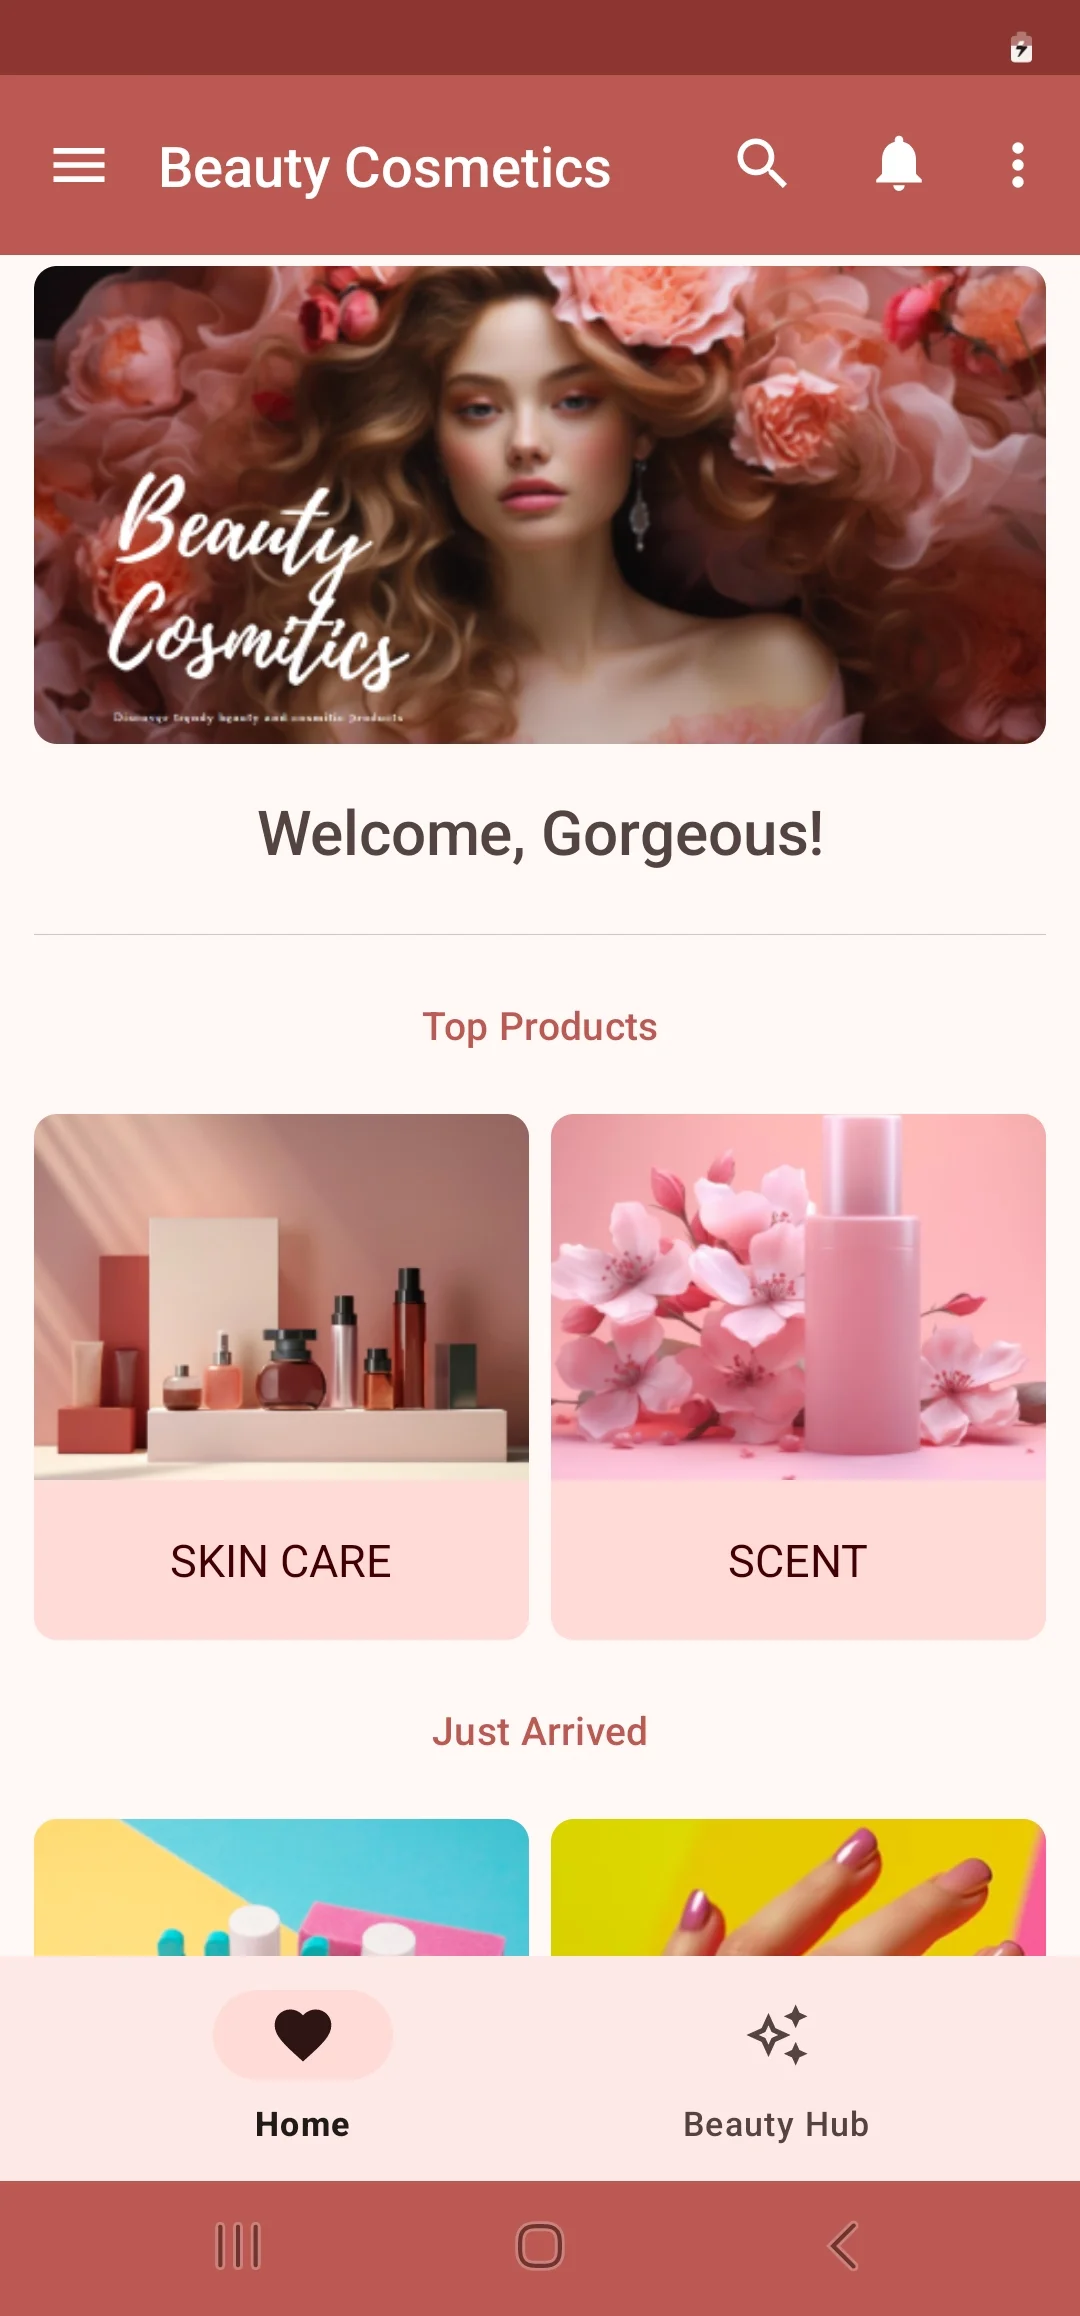
The Shopping Hub components is the central place where your store lives inside the app.
With store area, users can discover collections, browse items, and access the store interface just like a full e-commerce site except it stays inside your app. You’re not just embedding a shop; you’re crafting the shopping experience from navigation, layout, and content to interactions and branding.
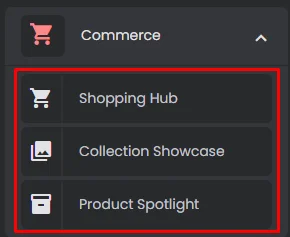
These components are the best for E-commerce Apps
How To Install The Component
This component can be installed in:
- App's Navigation Page ✓
- App's Side Menu ✓
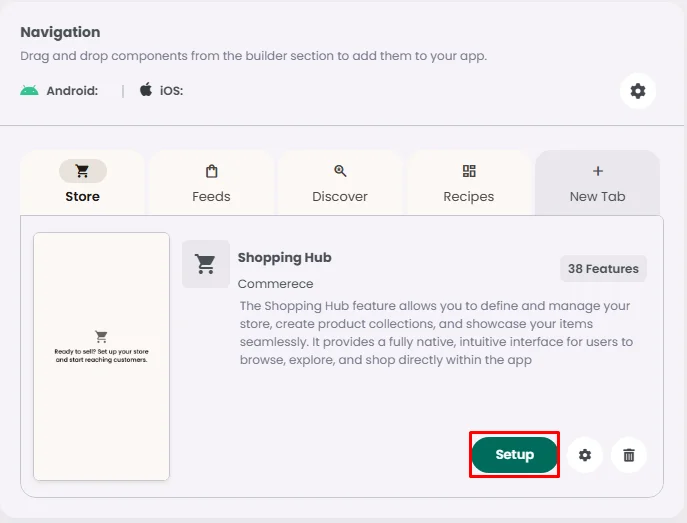
You can find the shopping hub component in the Commerce section. Click or drag and drop the component into your navigation or side menu to install it.
How To Configure The Component
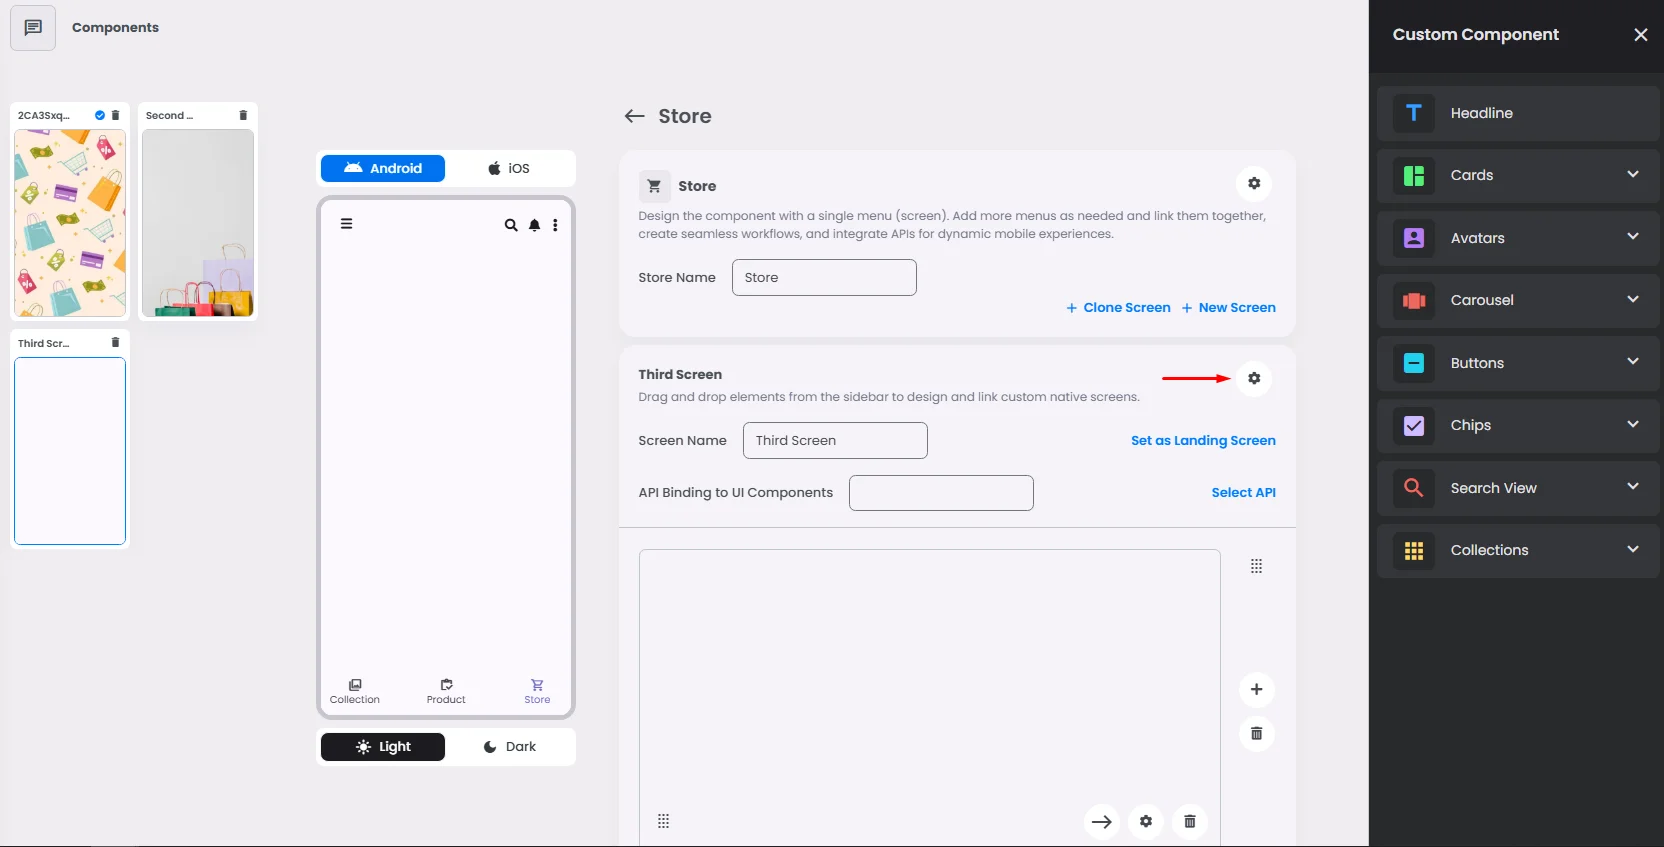
The Shopping hub is where you show your collections and products.
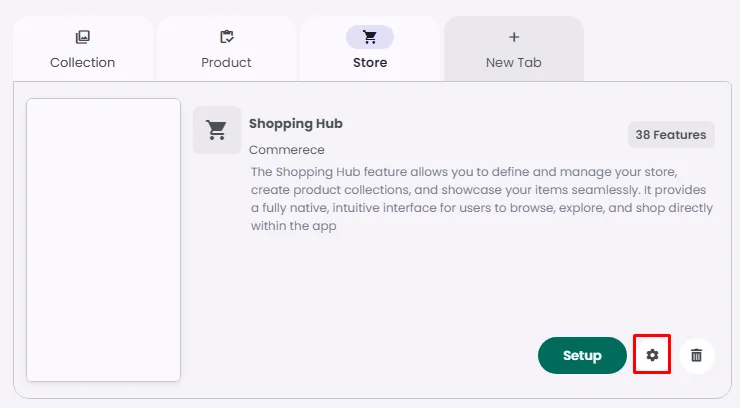
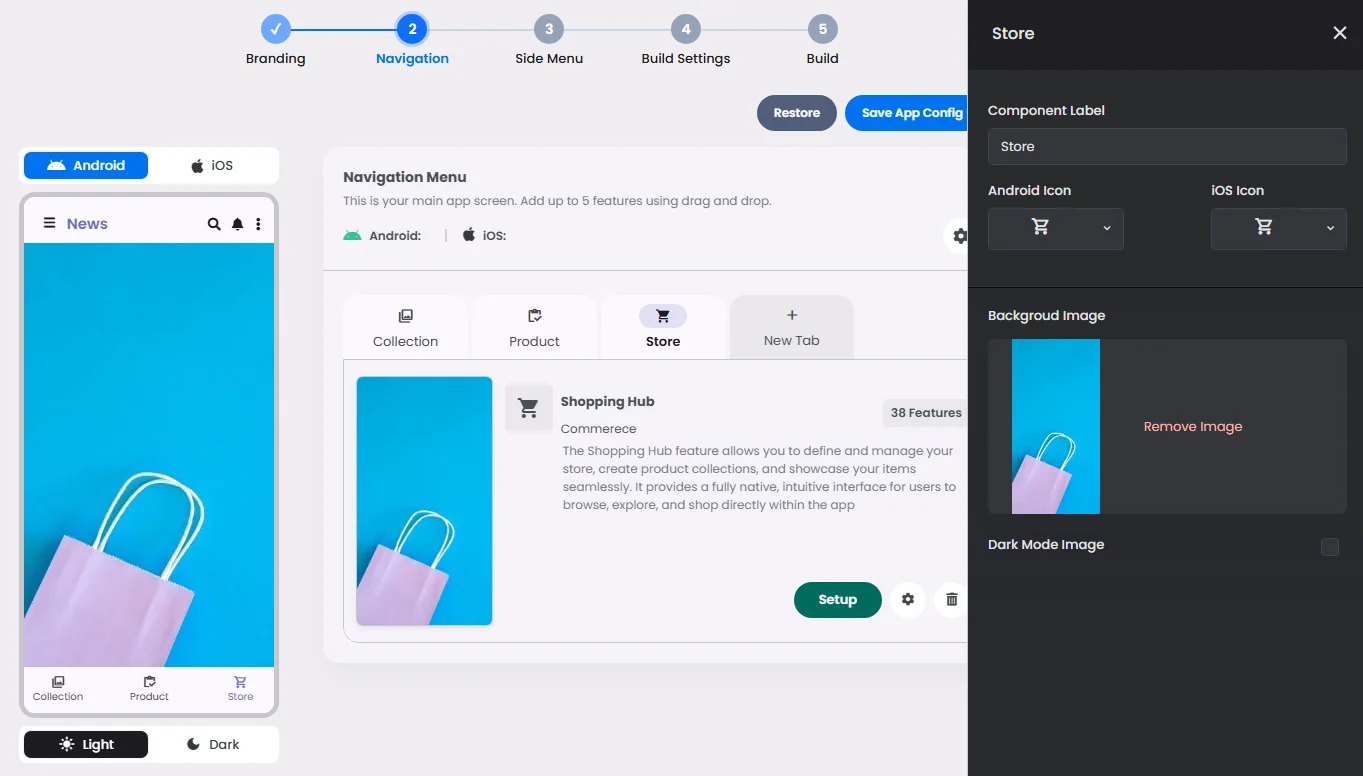
Click the gear icon to configure the component settings.
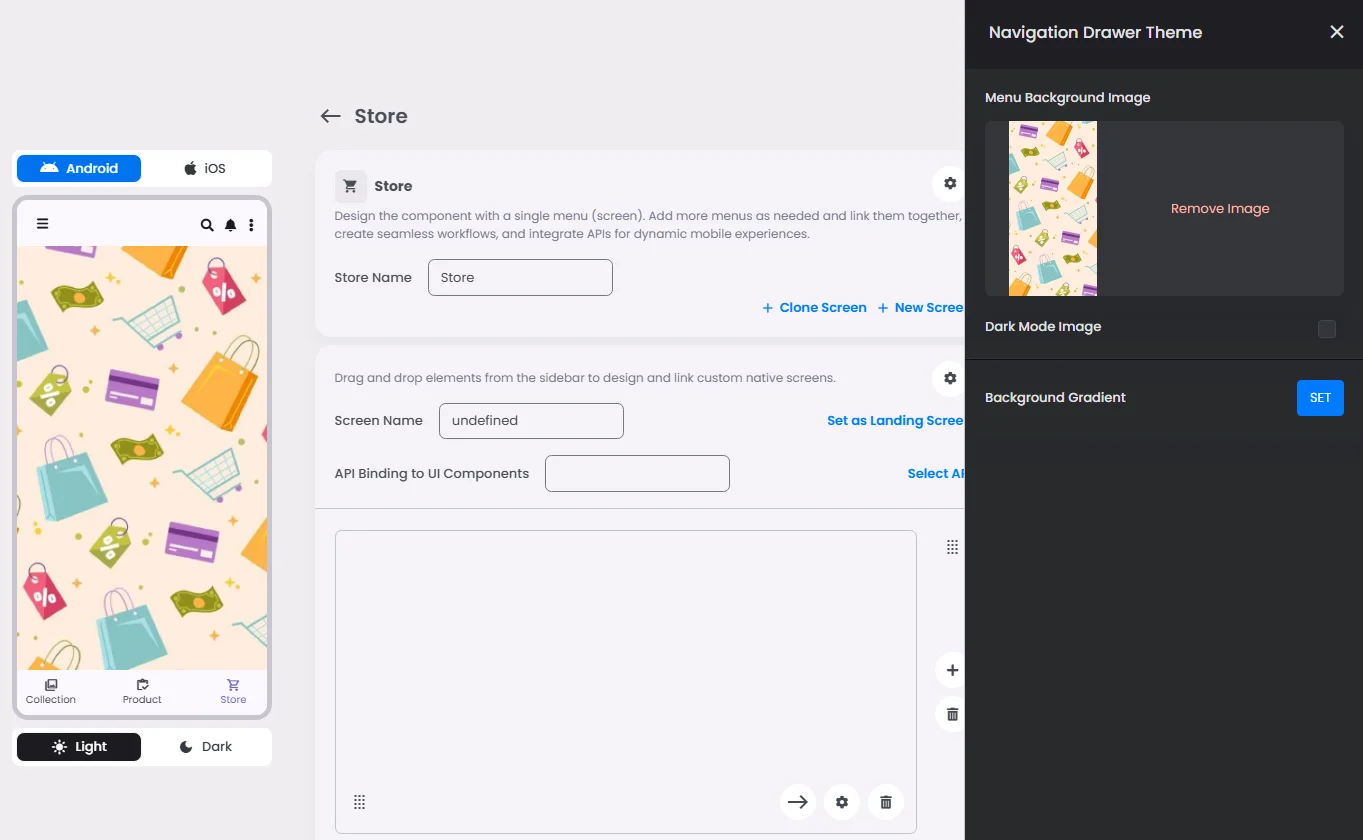
Background Menu Screens
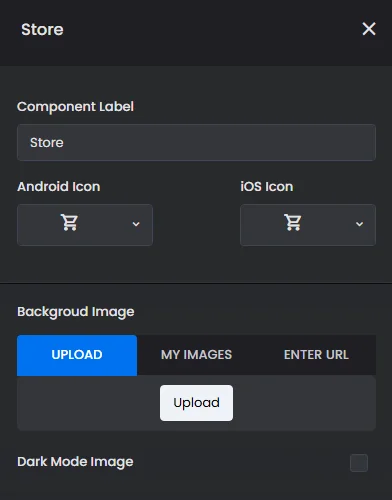
Rename the component and choose an Android and an iOS icon for it.
- Upload a background image for all your store menu screens.
Click ‘Setup’ to set up your component design.
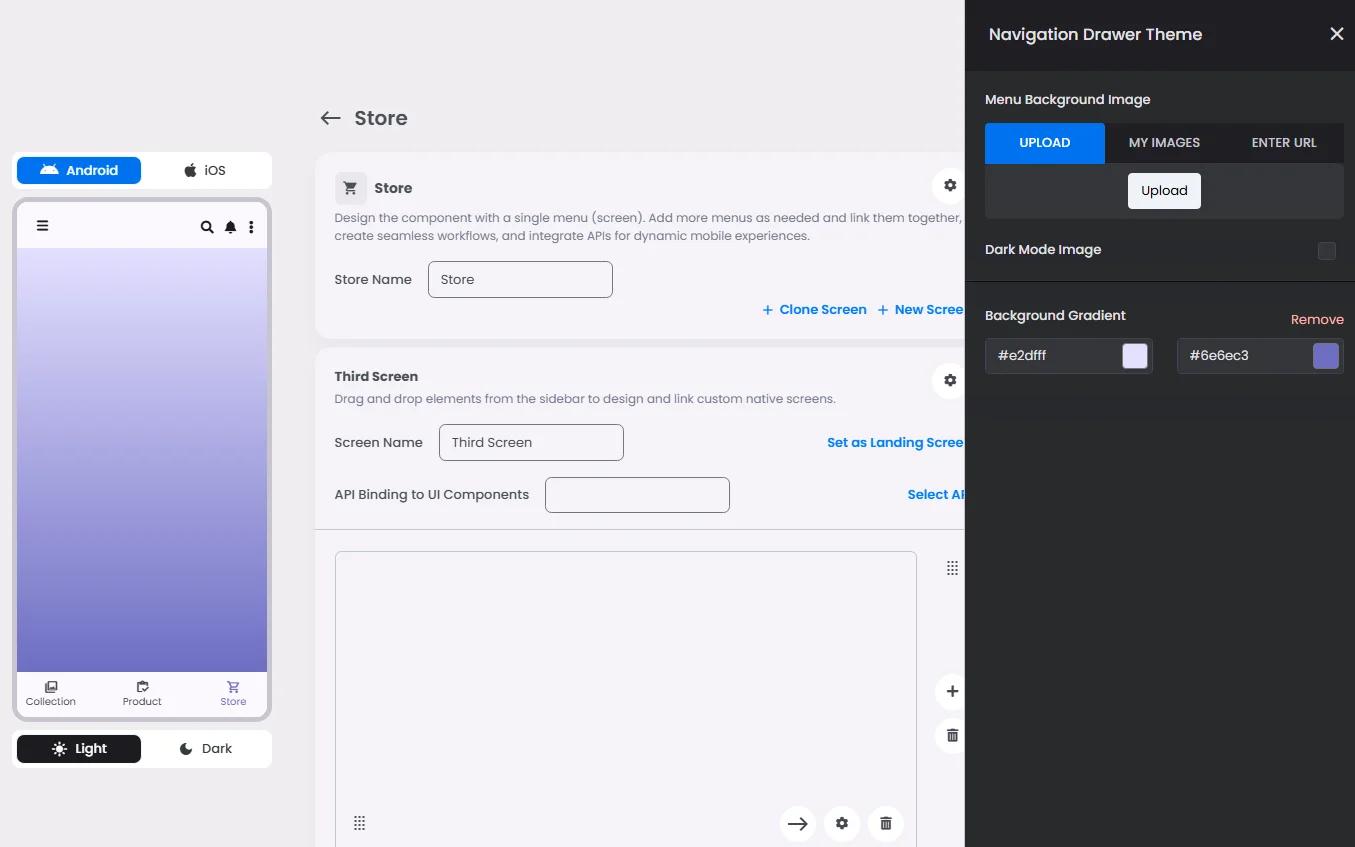
- Upload a background image for a single menu screen. If you have multiple menus, select your chosen one and click the cog gear icon to open the menu background settings.
You have the option to upload an image or add a gradient background color.
Must-Have Components
You must include all your payment components:
- Order Manager Spotlight: It shows all orders created by the user, including all the order details (date & time of created order, payment method type, status, etc.).
- Shopping Cart Spotlight: It allows users to add, review, and manage selected products before proceeding to checkout.
❓ FAQs
Q: How can I add a shopping hub or product catalog in my app without writing any code?
A: With nandbox’s Shopping Hub, you can easily create a full shopping experience in your app—no coding required. Add a store section, showcase your products, and even enable payments, all through a visual drag-and-drop setup.
Q: How do I set up a store and product listings?
A:
- In your app builder, drag the Shopping Hub component into your layout.
- Click Setup or go to Admin → Stores → Add New Store to create your store.
- Enter your store name, choose a store tab layout that fits your design, and click Save App Config.
- Add Collections (product groups) by selecting card styles for each category.
- Use Create Product to upload images, add product names, prices, and detailed descriptions.
This gives you a professional storefront ready for your customers to browse.
Q: How do I enable payments and checkout?
A:
- Go to App Settings → Payment Gateways in your admin panel.
- Turn on payment options like Stripe, PayPal, or Cash on Delivery.
- Enter your account credentials for these gateways so users can securely complete purchases inside your app.
To keep from getting lost, you need to do these steps in order.