
Here, you can create your shop layout and start assigning your collections. You can have one main shop within one tab, as well as many customized elements.
When you create your store inside the app, you’re not just turning on a catalog, you’re building a living, interactive space where your users can browse, filter, and buy without ever leaving the app. The store acts as the gateway between your brand and your customers: it’s where collections, product pages, and checkout all converge. By carefully crafting its layout, navigation, and elements, you ensure users feel confident, find what they want easily, and stay engaged.
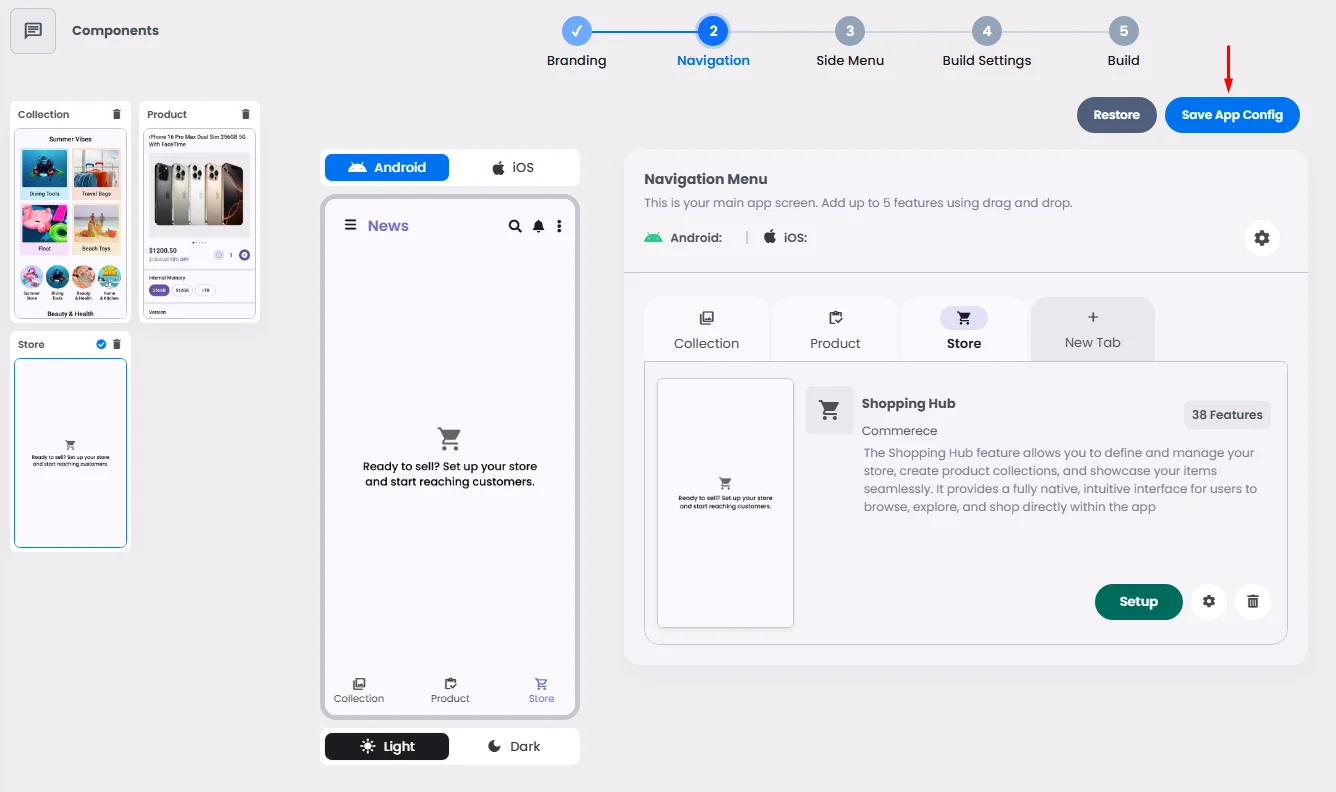
You have two ways to launch your store hub: via the Store builder interface or by enabling it directly in the shopping hub Center component. Both paths lead to a flexible layout where you control how products are presented, ensuring your app’s look and feel stays consistent with your brand.
🛠️ Implementation
You can use two methods to do so:
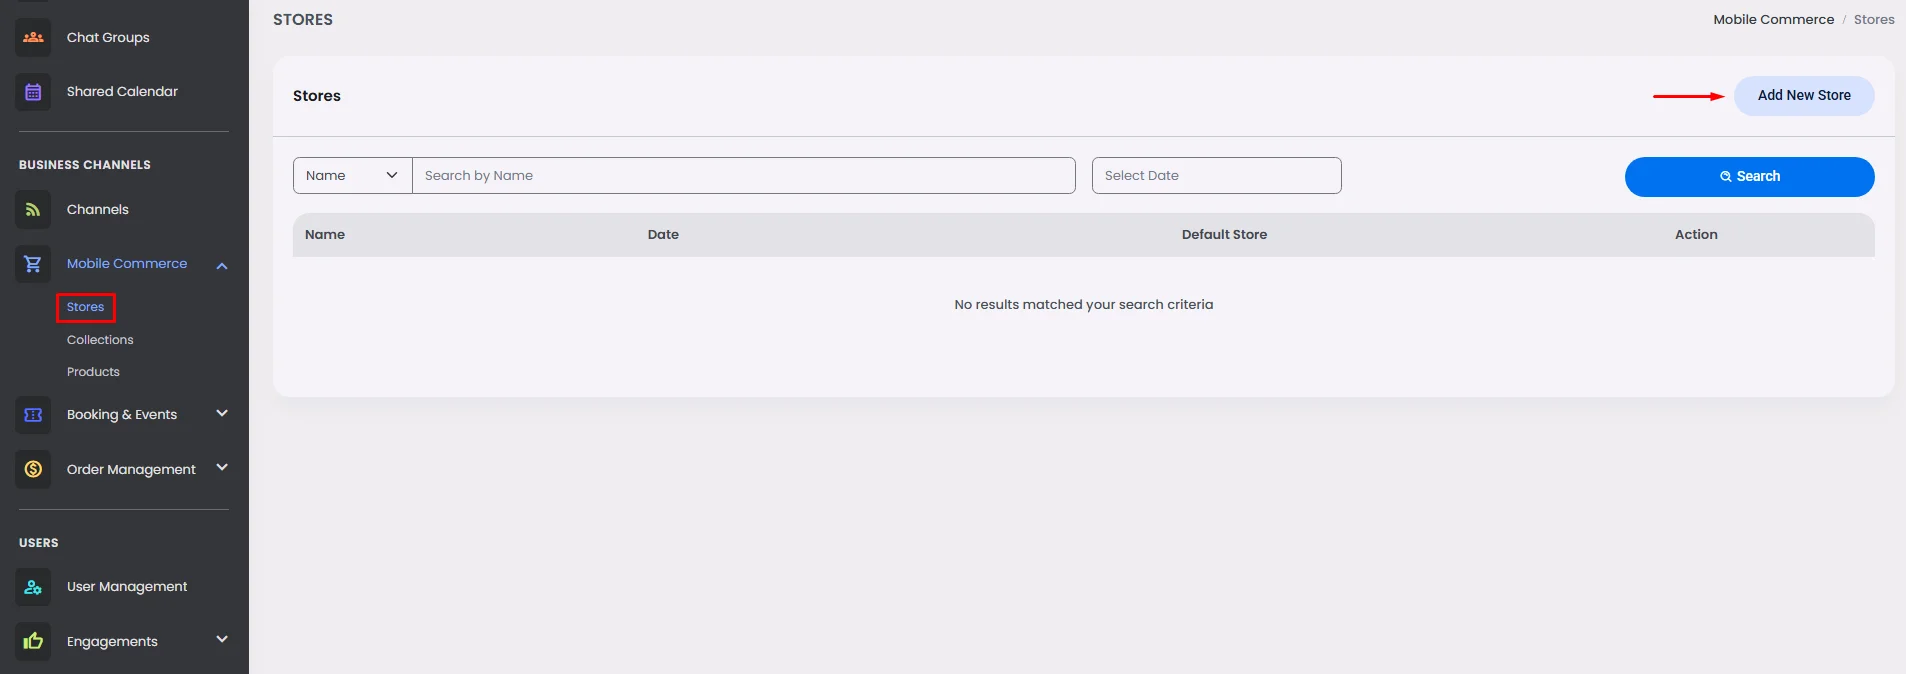
- You can access the stores section from the admin menu, click ‘Add New Store,’ and start designing your marketplace.
- Or, you can go back to the Mobile Store component and click ‘Setup.’
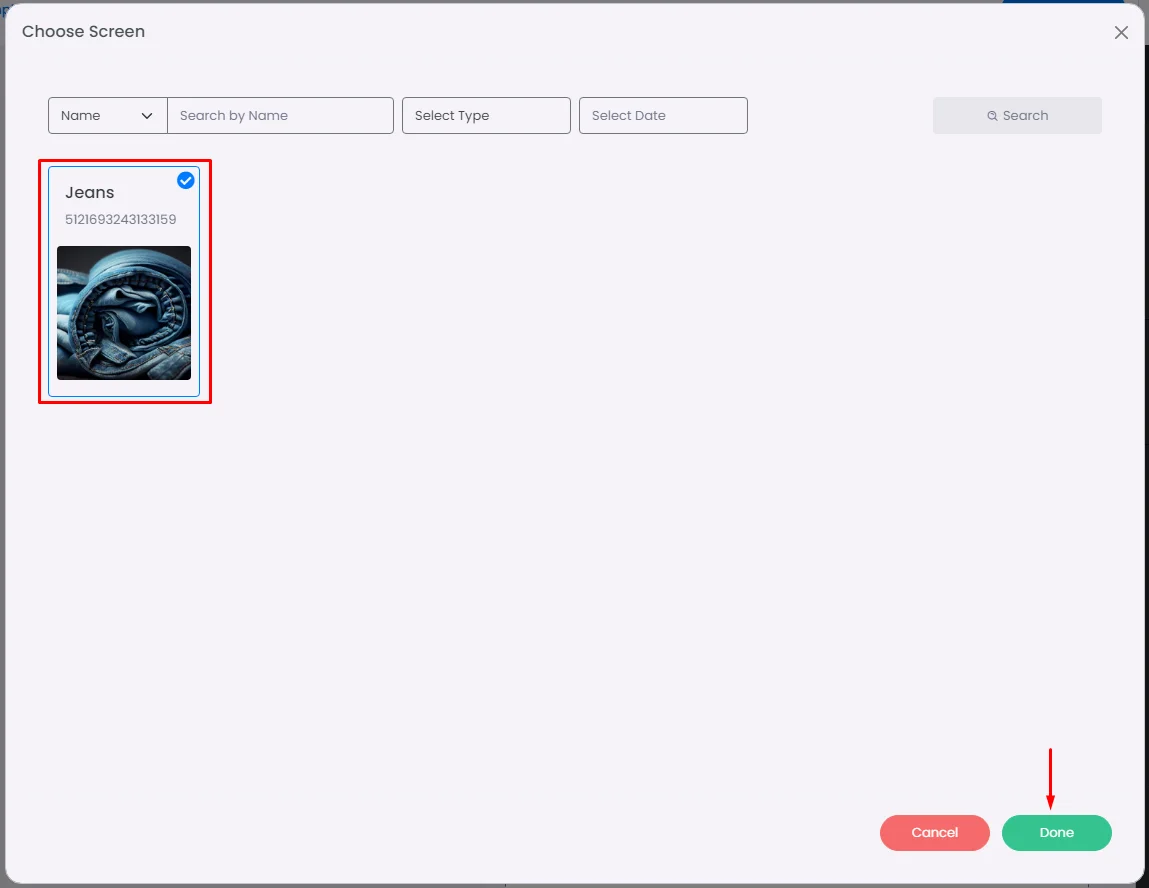
When you’re done choosing your preferred cards, tap ‘Select.’
And assign the card’s collection, and click ‘Done’.
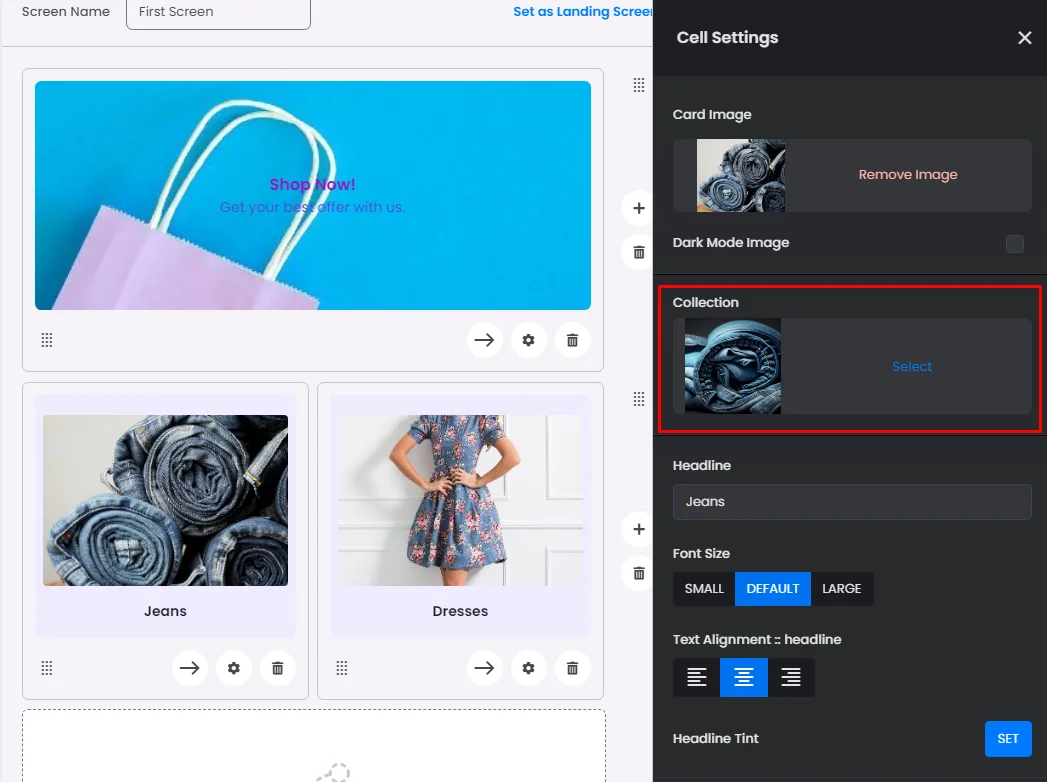
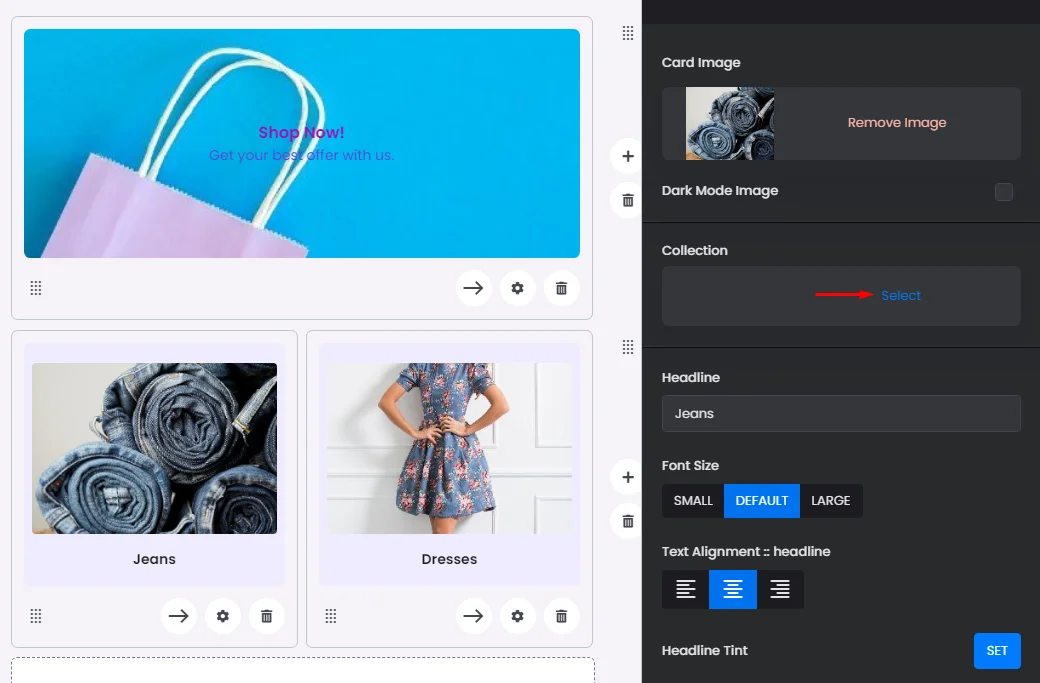
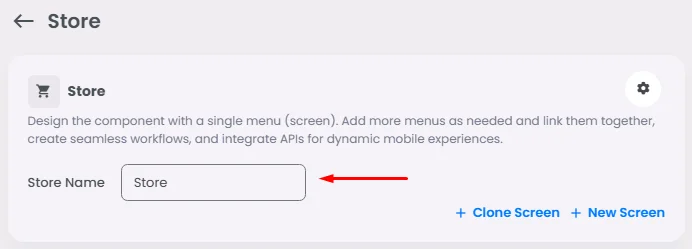
And don’t forget to add your store name.
Use Cases
- Local retailers: Launch a branded digital store to showcase products and reach customers directly inside your app.
- Community marketplaces: Bring together multiple vendors under one hub with collections for easy browsing.
- Content creators: Sell digital goods like e-books, templates, or courses seamlessly inside your branded app.
- Event organizers: Set up a merchandise shop for concerts, festivals, or expos with themed collections.
- Service providers: Bundle physical products with services (e.g., fitness gear plus training plans) in one storefront.
These scenarios highlight how flexible the store feature is, from small businesses to large communities, you can create a sleek shopping experience in minutes.
❓ FAQs
How can I launch my app store and let users shop—without writing a single line of code?
A: With nandbox’s Shopping Hub, you can set up a fully functional in-app store—no coding or technical skills needed. Just add the Shopping Hub tab from the Tabs section in your admin panel, and you’ll give users instant access to your collections, product categories, and storefront—all built visually.
How do I configure my store settings and add branding?
A:
Once you’ve added the Shopping Hub tab:
- Click on the tab to open your store’s settings.
- Fill in your Store Name and Description to tell users what your shop offers.
- Upload a Store Background Image (and optional dark mode image for a polished look).
These simple tools let you design a polished, professional storefront—no design or coding experience required.
How do I build my store page without coding?
A:
With nandbox’s admin panel, you build your store visually:
- After customizing your Shopping Hub, your app will automatically display your storefront with all product categories and collections.
- Users can browse, search, and view items in a native shopping interface that feels seamless.
- All your updates instantly appear in the app simulator—no need to manually code or republish.
How do I set up payment options and make my store live?
A:
Once your store design is ready:
- Go to Payment Settings to choose accepted payment methods like PayPal, Stripe, or Cash on Delivery.
- Enter your account details for these payment gateways.
- When everything’s set, click Build to publish your app with your new store included.
Your users will now be able to browse, add items to their cart, and purchase directly from your app using the payment options you’ve enabled.
Store ElementsStore Advanced Settings