

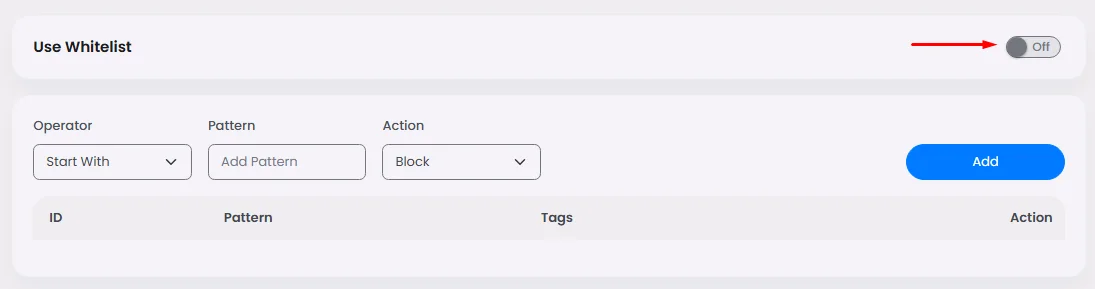
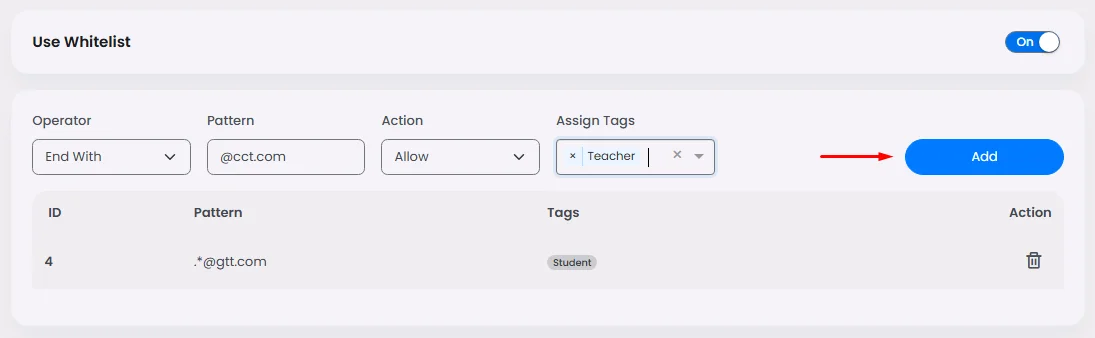
Turn the toggle on to activate your whitelist
Creating Whitelist & Blacklist via SignUp Patterns
Now it's time to add the signup pattern that allows your app to figure out who can access it by specific patterns in the user’s signup ID and automatically add this user to the whitelist or blacklist:
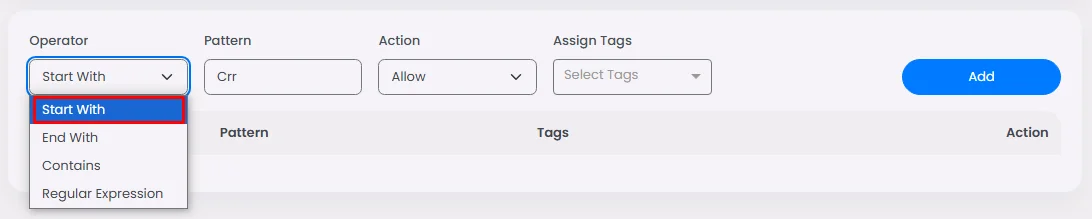
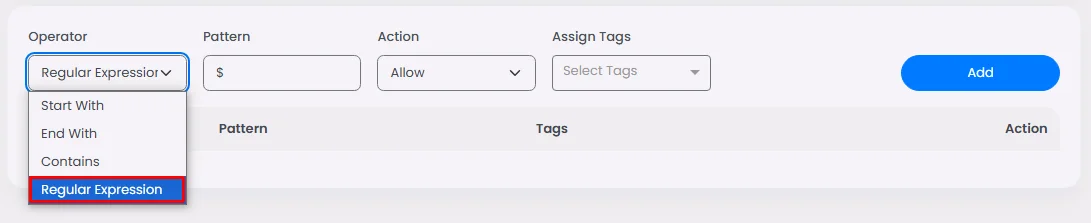
- Select the pattern operator.
- Add the pattern.
If you chose Start With operator and specified the pattern to be the word 'crr', that means any signup ID beginning with the word 'crr' will be automatically whitelisted.
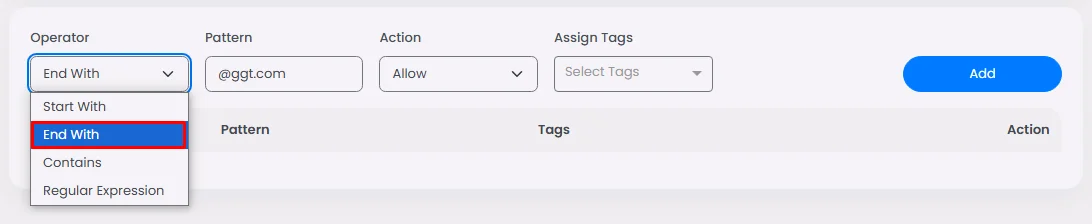
If you chose End With operator and specified the pattern to be the word '@ggt.com', that means any signup ID ending with the word '@ggt.com' will be automatically whitelisted.
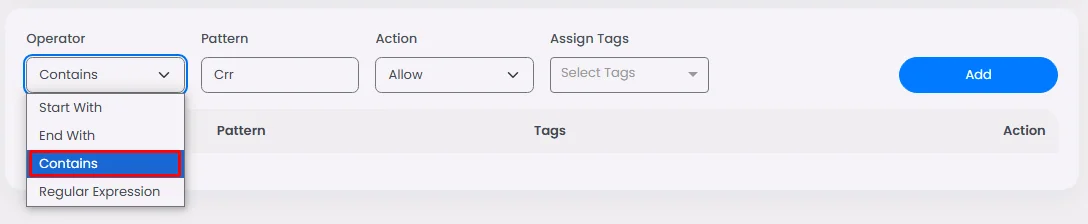
If you chose Contains operator and specified the pattern to be the word 'crr', that means any signup ID containing the word ’crr' will be automatically whitelisted.
Regular Expression is a pattern that matches multiple characters.
If you chose the Regular Expression operator and specified the pattern to be the word '$', that means any signup ID containing the expression '$' will be automatically whitelisted.
- Choose the action:
If you want your pattern choice for whitelisted users, choose ‘Allow’.
If you want your pattern choice for blacklisted users, choose ‘Block’.

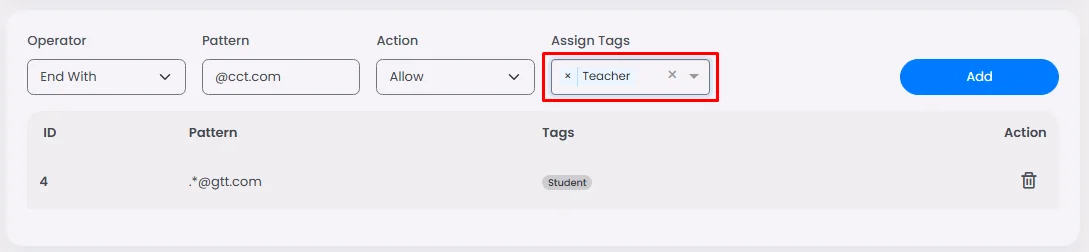
- Assign a tag for this pattern.
You can have multiple patterns, and each one can have a unique tag.
For instance, if you have a school app, users with the pattern ‘@ggt.com’ will have the tag 'Student’, and users with the pattern ‘@cct.com’ will have the tag ‘Teacher’.

Click here to know how to create tags.
Then, click ‘Add’ to see your listed patterns.
❓ FAQs
Q: How can I control who’s allowed to sign up in my app using whitelists, blacklists, or email patterns—without coding?
A: You can easily manage who can register for your app using nandbox’s Signup Filter. This no-code tool lets you create whitelists (to allow specific users) and blacklists (to block others) based on signup patterns.
For example, you can:
- Allow only school emails (like
@school.com)
- Block personal domains (like
@gmail.com)
- Or even use advanced patterns for more control
All of this works visually—no programming required.
Q: How do I turn on signup filtering?
- Open your admin panel and go to Settings → Signup Filter
- Switch the toggle ON to enable whitelist/blacklist filtering
- You can now start adding rules to control who can register
Q: How do I set up a whitelist or blacklist rule?
- Pick a pattern type:
- Start With → Matches the beginning of an ID (e.g.,
abc123) - End With → Matches the end of an email or username (e.g.,
@school.com) - Contains → Matches anywhere in the ID (e.g.,
testuser) - Regular Expression → For advanced matching (e.g., allow all
.edudomains)
- Enter the pattern you want (e.g.,
@ggt.com,student, or.*\.edu)
- Choose the action:
- Allow → Adds users to a whitelist
- Block → Adds users to a blacklist
- (Optional) Assign a user tag to anyone who matches this pattern (e.g., “Student” or “Staff”)
- Click Add to save your rule
You can create multiple rules to combine whitelists, blacklists, and tags for better control.
Q: Can you give me an example?
Sure! Let’s say you’re creating a school app:
- Allow users with emails ending in
@ggt.comand tag them as “Students”
- Allow
@cct.comand tag them as “Teachers”
- Block any other domains (like
@gmail.com) to stop unauthorized signups
This way, only your school community can join, and users are neatly organized with tags from the moment they register.