
Provide products with full details, such as the price, category, and several product images.
When you create a product, you’re building its full profile: name, images, price, inventory, and more. Each piece affects how customers see your item, how it’s found in search, and how smoothly people can buy it. Taking a few extra moments to fill in every detail pays off in trust and conversions.
📋 Steps
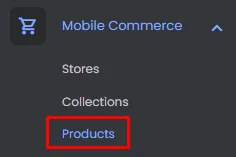
From the admin menu, click 'Products.’
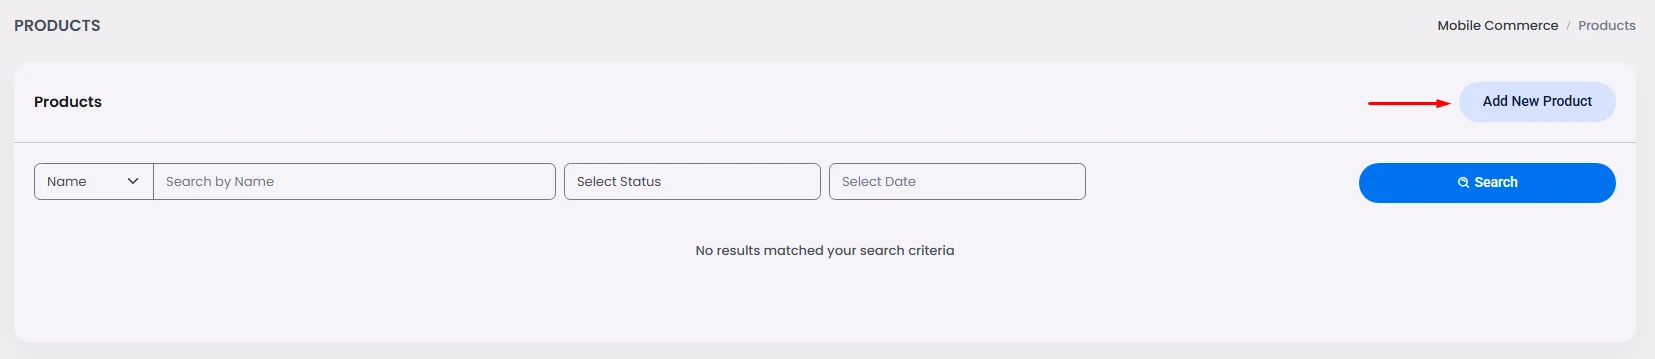
Click ‘Add New Product.’
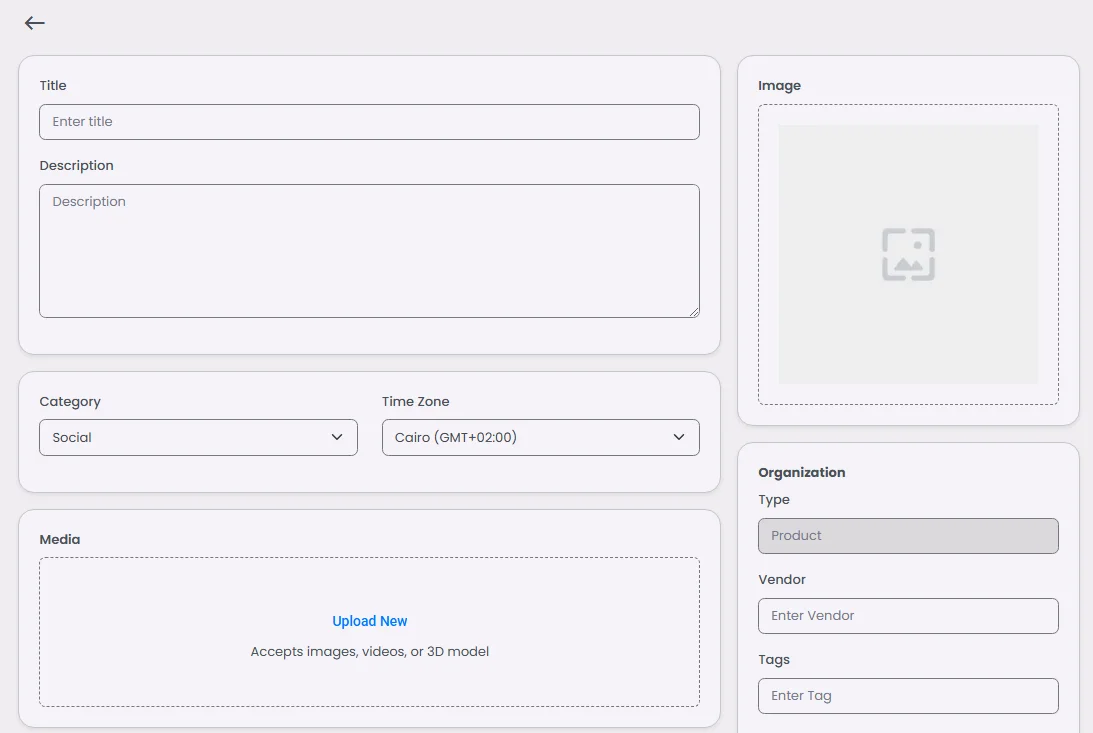
A window will appear where you can enter your product title and description, category, time zone and product images.
Organization
Organization settings help you keep your store structured. Categories, vendors, and tags make products easier for customers to find and easier for you to manage later.
- Add your product vendor.
- Add search tags to connect your product with a search filter or chip.
- The search score determines the order of the products in the search; for example, add 1 to make your product the first one to appear.
- Add a collection
Note that you need to create a collection first!

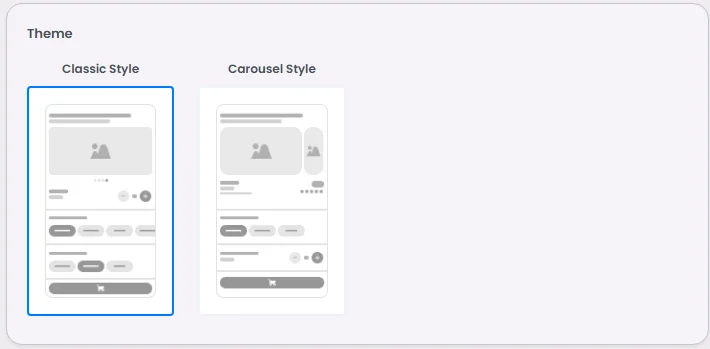
Theme
The theme defines how your product looks inside the store. Choosing the right theme ensures text, images, and layouts stay clear and consistent with your brand style.
A well-designed theme makes your products feel professional, reassuring customers that they’re in the right place.
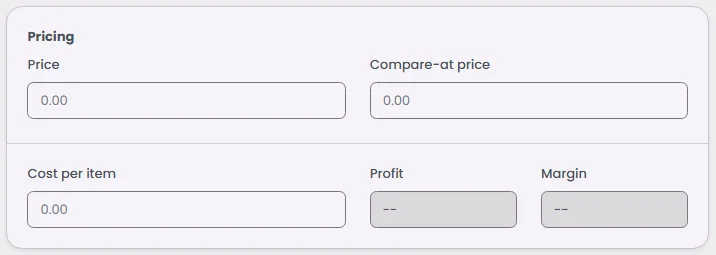
Pricing
Pricing is more than just numbers, it tells customers the value of your product. Setting compare-at prices, discounts, and tax rules helps make offers clear and trustworthy.
- Price: Add the selling price you want to use.
- Compare-at price: This section is for you if you want to examine how your product appears both before and after a discount. Add your product price before the discount. The discounted price will be calculated and displayed to users as a percentage.
- Mark 'Charge tax on this product' if you charge tax.
- Cost per item: Add your product's original price.
- Profit and Margin will be calculated automatically once you add the cost per item.
For instance, if a product costs $85 to produce but costs $100 to sell, the profit and margin will be calculated automatically to demonstrate to the business owner how much progress he has made.
Note that cost per item, Profit, and Margin are only for the business owner, as users won't be able to see these choices as it calculates and tracks how much money you have made with your business.
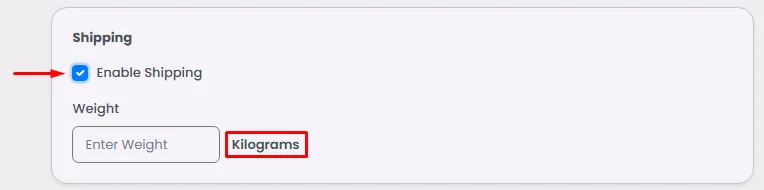
Shipping
Shipping options decide whether your product is treated as a physical item that needs delivery. Weights, rules, and shipping classes ensure orders reach customers correctly.
You can enable shipment. Mark ‘Enable Shipping’ and insert your product weight per kilogram.
Check this document to know how to configure your shipping settings.
And when you click ‘Create,’ additional options will appear:
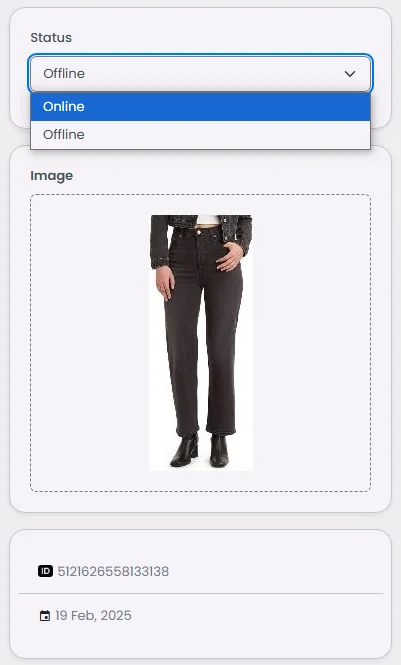
Status & Information
Status and product details control visibility. Use them to manage when a product is available online, track product IDs, and record vendor or creation info.
Above the product image, select the state of your product; if it isn't in stock, select ‘Offline,’ and below, you’ll find the product's created ID and date of creation.
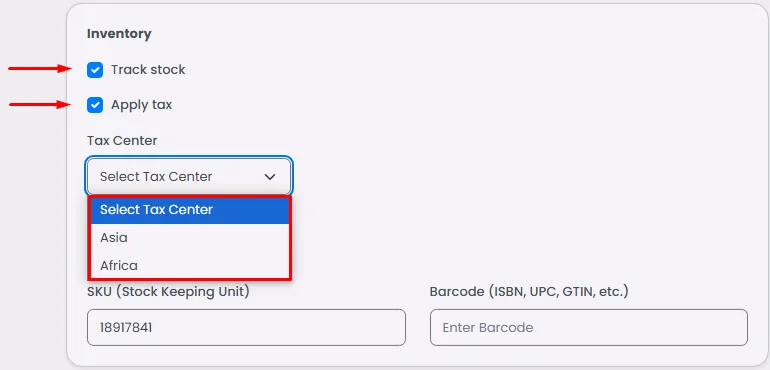
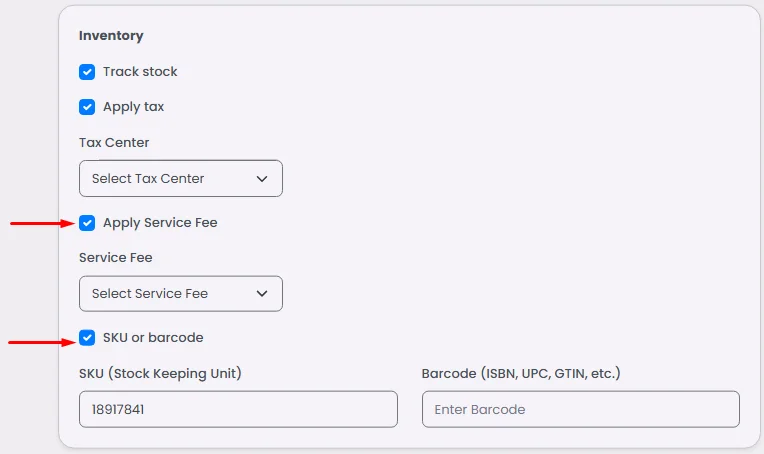
Inventory
Inventory ensures you don’t oversell. By setting stock levels, SKUs, and barcodes, you keep control over availability and help users see what’s in stock.
- By adding the quantity of stocks, you can keep track of it. Additionally, you can update it if your product line grows.
- If you charge tax on this product, select one of your created tax centers.
Learn more about how to create a tax center.
- If you charge a service fee.
Learn more about how to create a service fee.
- If your product has an SKU or barcode.
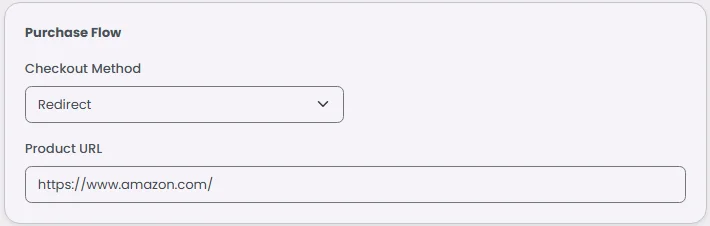
Purchase Flow
Purchase flow defines how the user completes checkout. You can keep the process inside the app for a smooth experience or redirect to an external system when needed.
Here, you can choose your checkout button action:
- Choose ‘In App Checkout’ to forward the user to the Cart or Direct Payment.
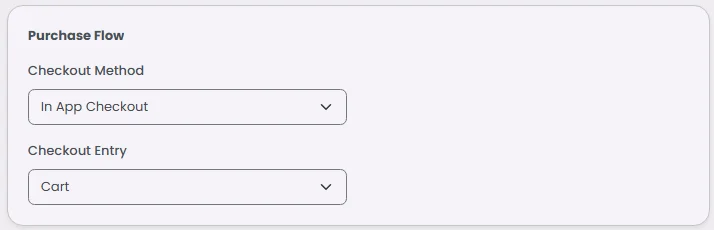
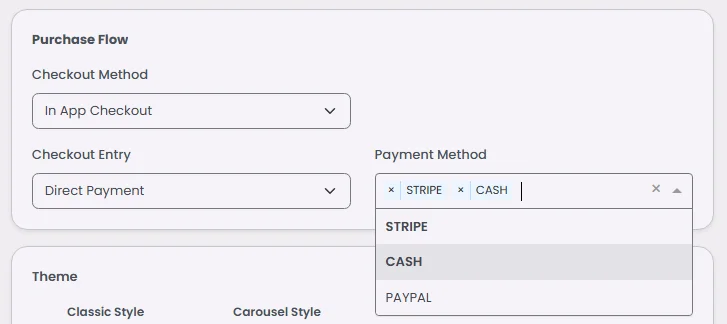
- Choose ‘Redirect’ to direct users to your desired URL.
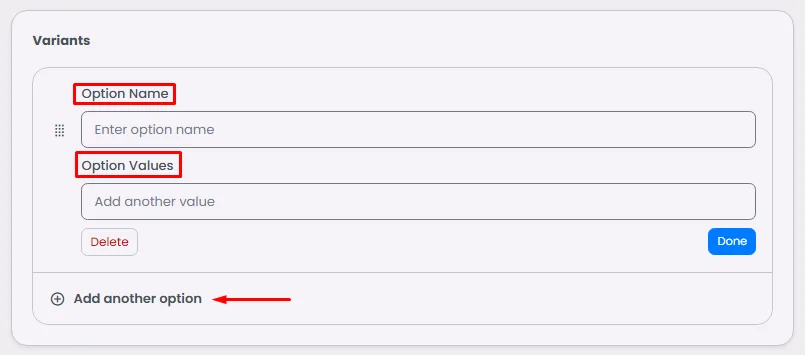
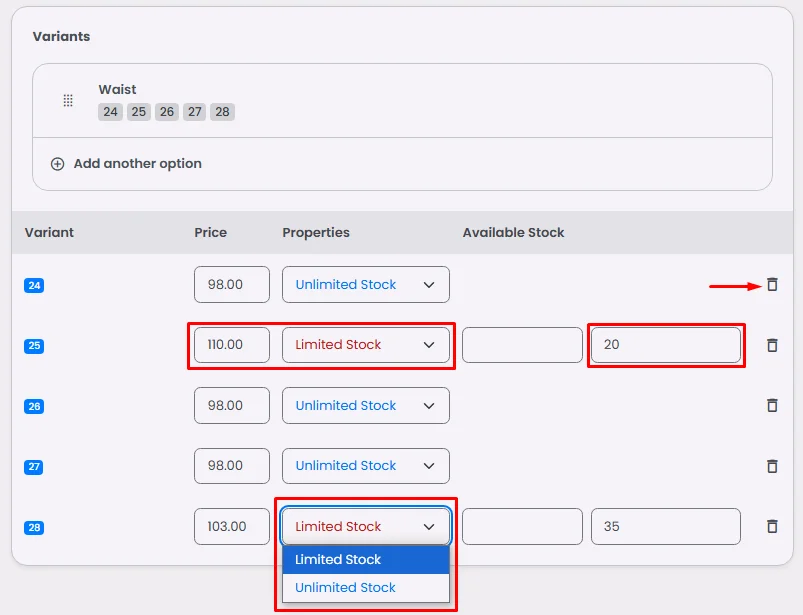
Variants
This section is about setting up product options for users, as they can choose from multiple pre-selected items; think of small, medium, and large-sized dresses, and the user gets to choose their size, their color, or both. Click ‘Add options,’ and let’s start:
- Option Name: Add the category name of your choice.
- Option Values: Add your choices
- Add another option: You can add another option by clicking ‘Add Options,’ and once you're done, click 'Done' to save your settings.
You can delete, add a specific price for certain options, and choose the status of a specific choice: limited or unlimited stock. If it’s limited, don’t forget to update how many units are left of this size option.
And don’t forget to save.
Use Cases
- Artisans & crafters: Add handmade items like ‘Hand-painted mugs,’ ‘Macramé wall hangings,’ or ‘Custom jewelry’ with images, variants, and pricing so buyers can browse your unique offerings.
- Fashion & apparel brands: Create products like ‘Summer T-shirt (S/M/L),’ ‘Denim Jacket,’ or ‘Accessories Bundle,’ each with size or color variants and stock tracking.
- Digital goods creators: Publish digital products such as ‘E-book,’ ‘Design template pack,’ or ‘Online course download’ with links and license info.
- Food & beverage vendors: List menu items as products, e.g., “Vegan Wrap,’ ‘Smoothie Combo,’ or ‘Bakery Box’ with options/add-ons (extra toppings, sides).
- Event merchandisers: Offer branded merchandise like ‘Event T-shirt,’ ‘Official Poster,’ or ‘VIP Goodie Bag,’ with variant options (e.g., colors, sizes) and special pricing.
❓ FAQs
Q: How can I add a new product to my app’s shop without any coding?
A: With nandbox’s no-code tools, you can quickly add product listings, sell items in your app, and manage your entire catalog—all from a visual dashboard. No developer help needed!
Q: Where do I go to create a product?
A:
- From your app builder’s Admin Menu, click on Products.
- Select Add New Product to open the product setup panel.
Q: What product details can I add?
A:
You can fill in all the essentials:
- Title & Description: Give your product a clear name and details.
- Category & Time Zone: Assign it to a category and choose the relevant time zone.
- Product Images: Upload multiple photos to showcase your item.
- Theme: Pick a visual style for how the product appears.
- Link the product to a vendor, add tags, and assign it to a collection for better organization.
Q: How do I set pricing details?
A:
- Price: The current sale price of the product.
- Compare-at Price: Shows the original price to highlight discounts (displays % savings).
- Cost per Item: Lets you track profit margins internally.
- Charge Tax: Turn this on if you want taxes applied automatically.
Bonus: Profit and margin are auto-calculated for you (visible only to you as the business owner).
Q: Can I enable shipping options?
A:
Yes! Just check Enable Shipping and enter the product’s weight in kilograms for accurate delivery rates.
Q: What happens after I click ‘Create’?
A:
Once your product is created, you can fine-tune its settings:
- Product Status: Make it Online (visible to users) or Offline (hidden).
- Inventory: Add stock quantity, SKU, barcode, and tax center info.
- Service Fees: Apply extra charges if needed.
- Variants: Set up different sizes, colors, or options, each with its own pricing and stock levels.
- Checkout Behavior:
- In-App Checkout: Let users pay directly in the app using payment gateways.
- Redirect: Send users to an external URL for purchase.