User management is where you can find your app users’ information on when a user joined, who is and is not permitted to use your app, how to locate a certain user, etc.
Manage App Users
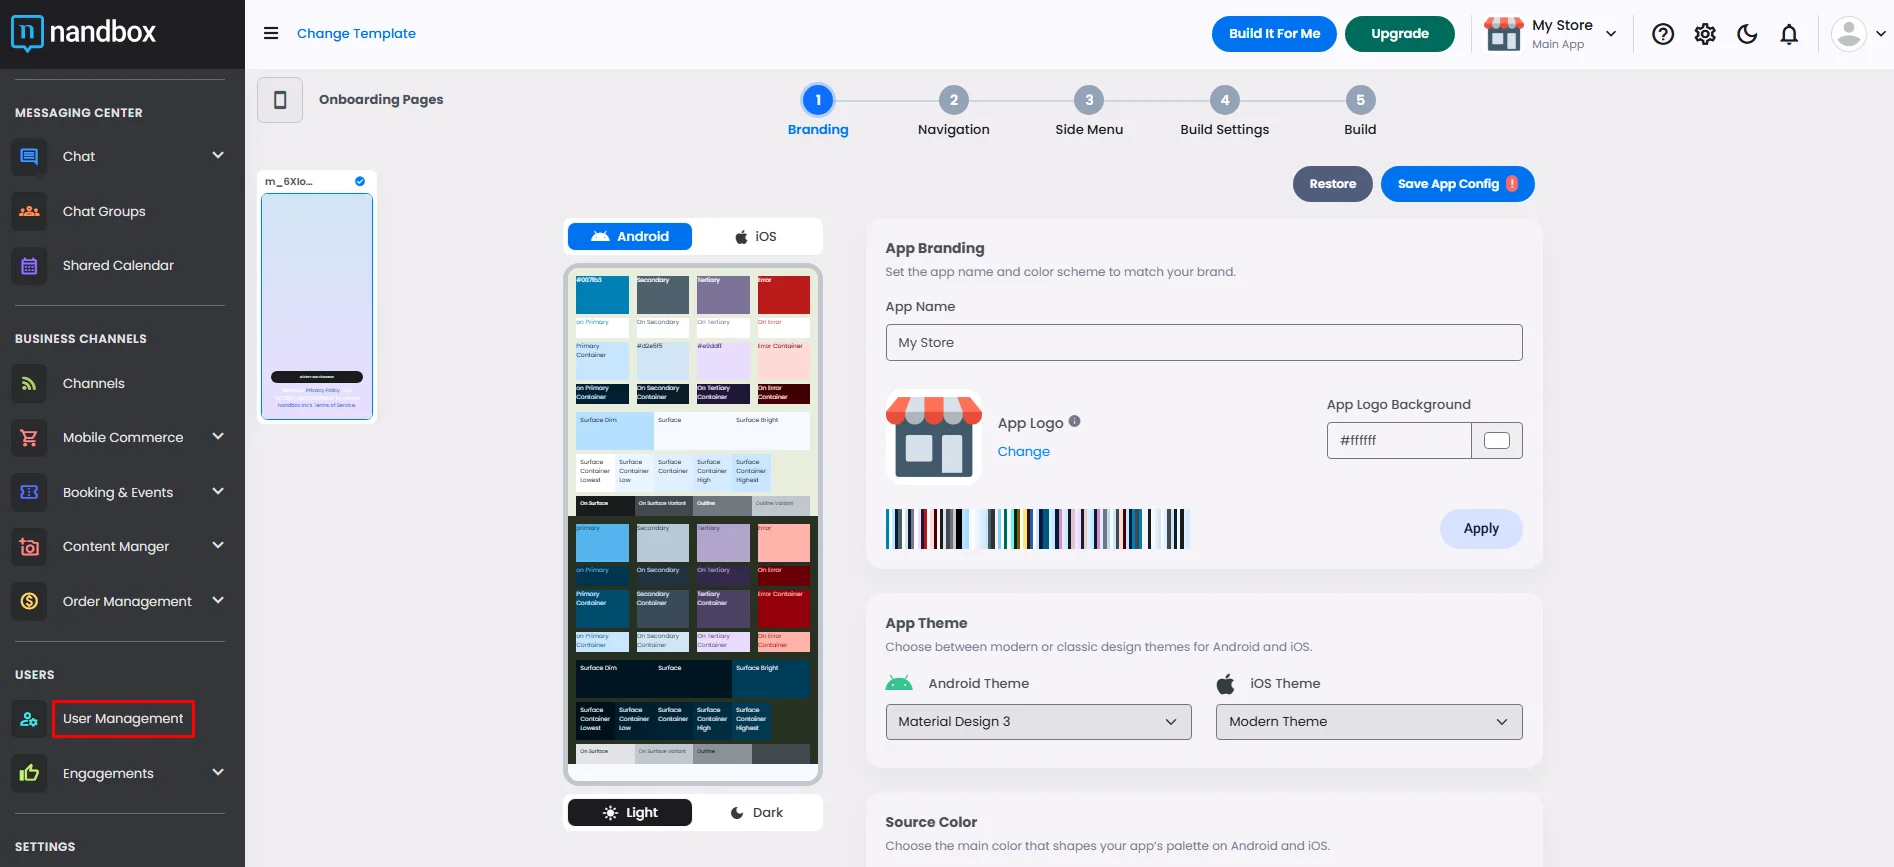
- From the admin menu, click ‘User Management.’
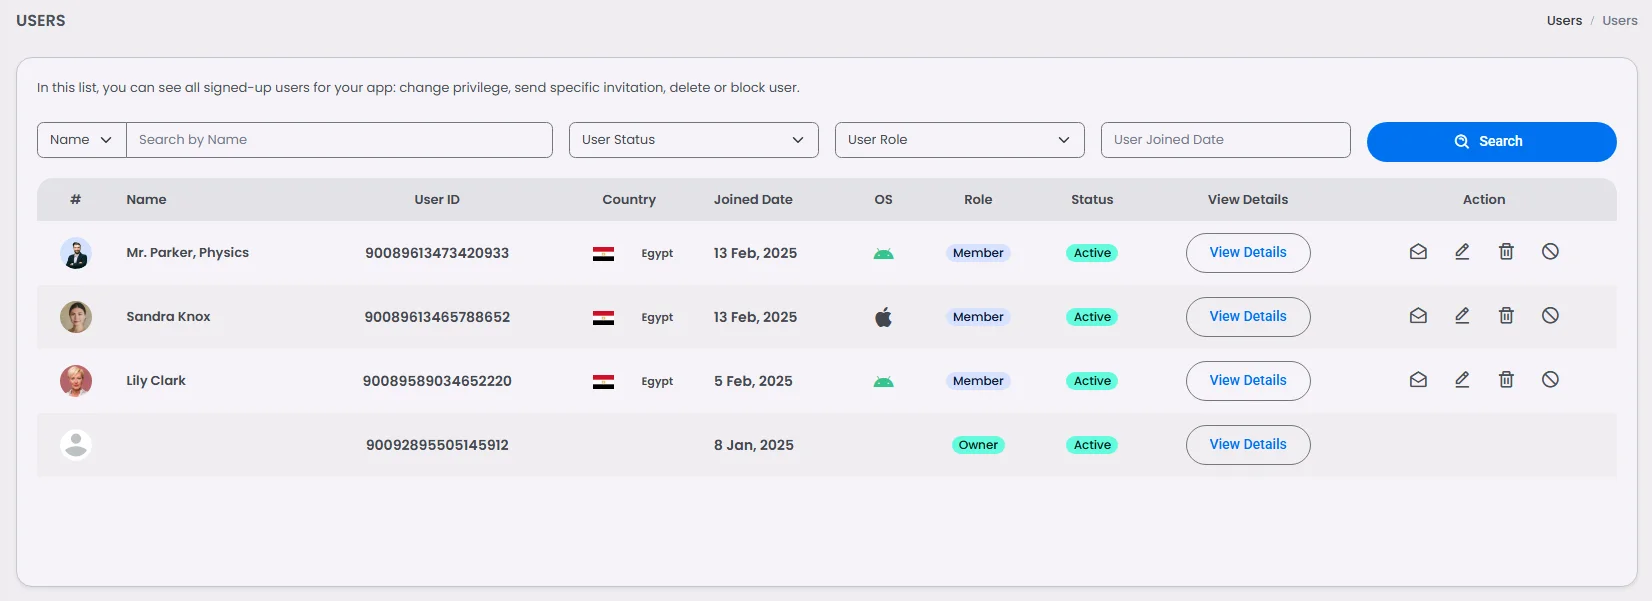
The following screen will prompt you with a list of all your app users.
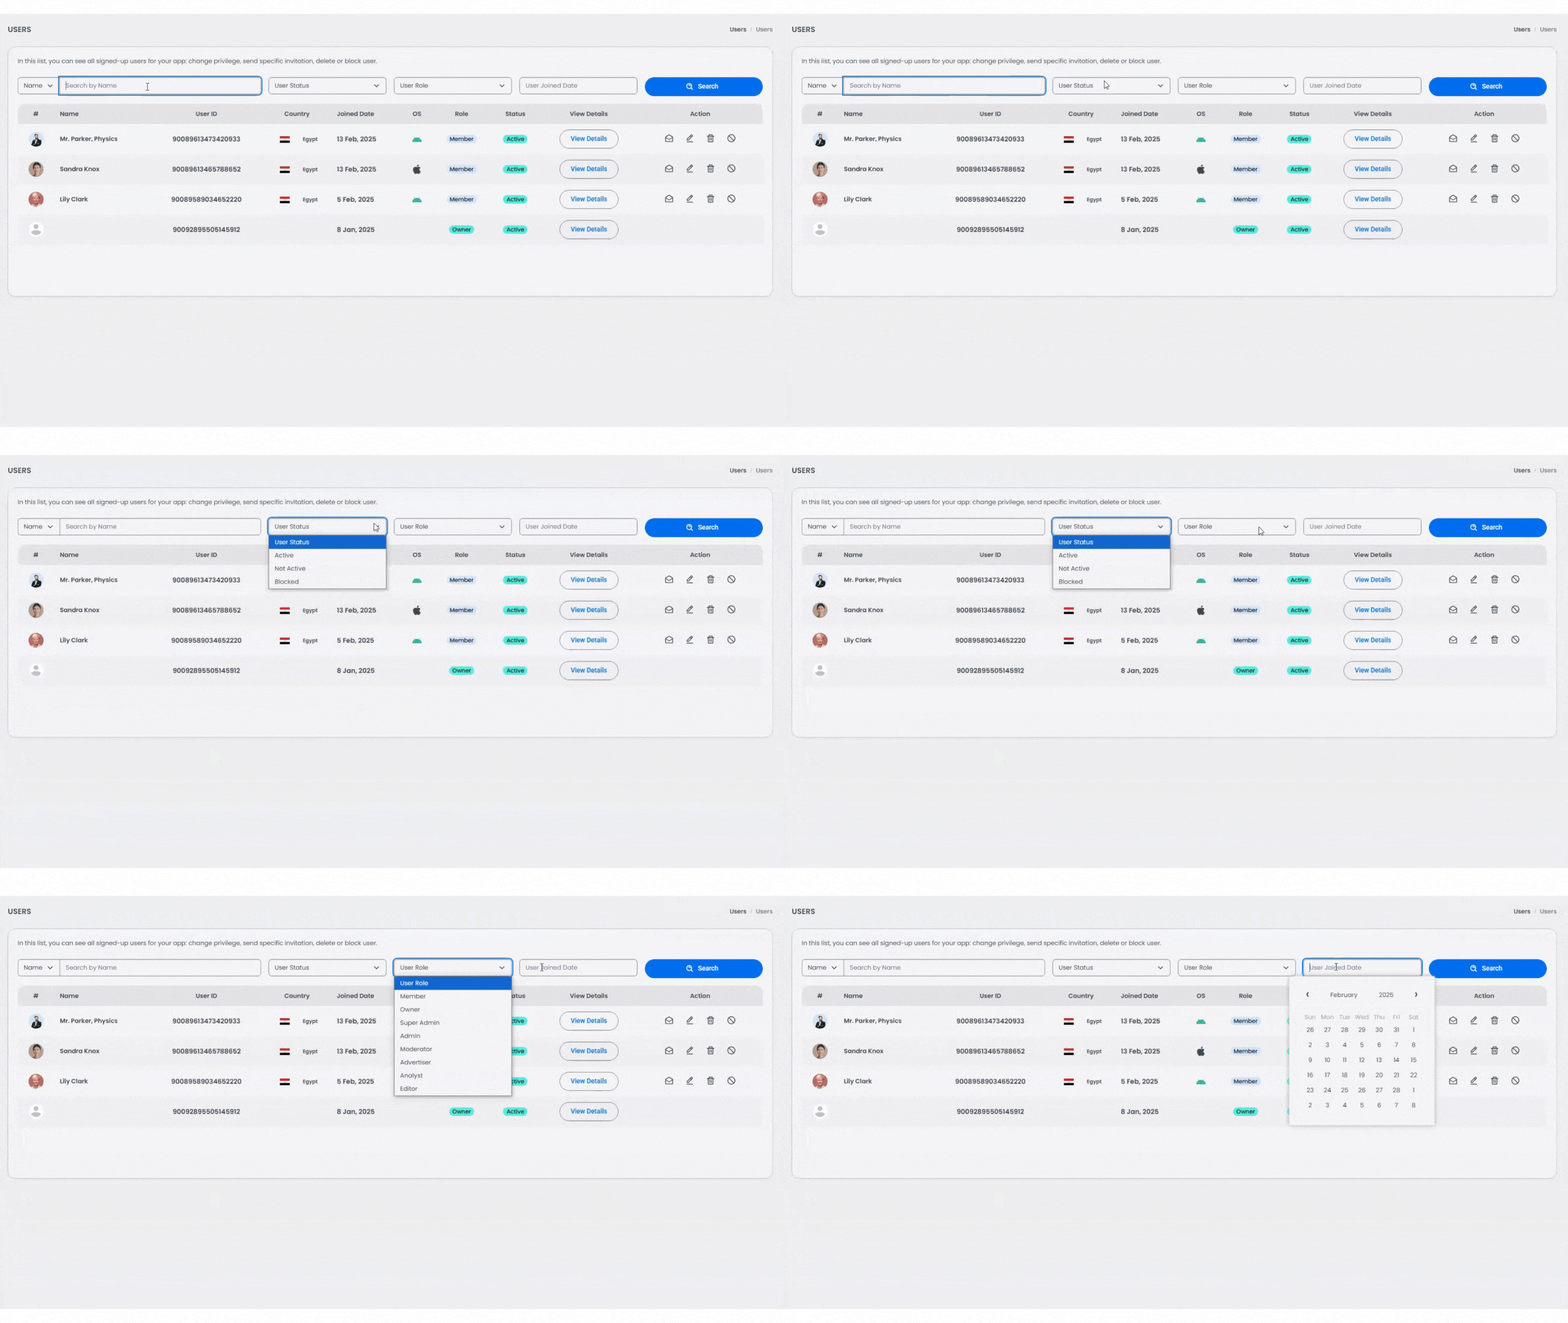
You can search for a certain user by search filters like name, status (active, not active, blocked), role (member, owner, admin, etc.), or joined date.
Editing A User's Privileges
App Admin Role
You can make any user an app administrator by clicking the invitation icon.
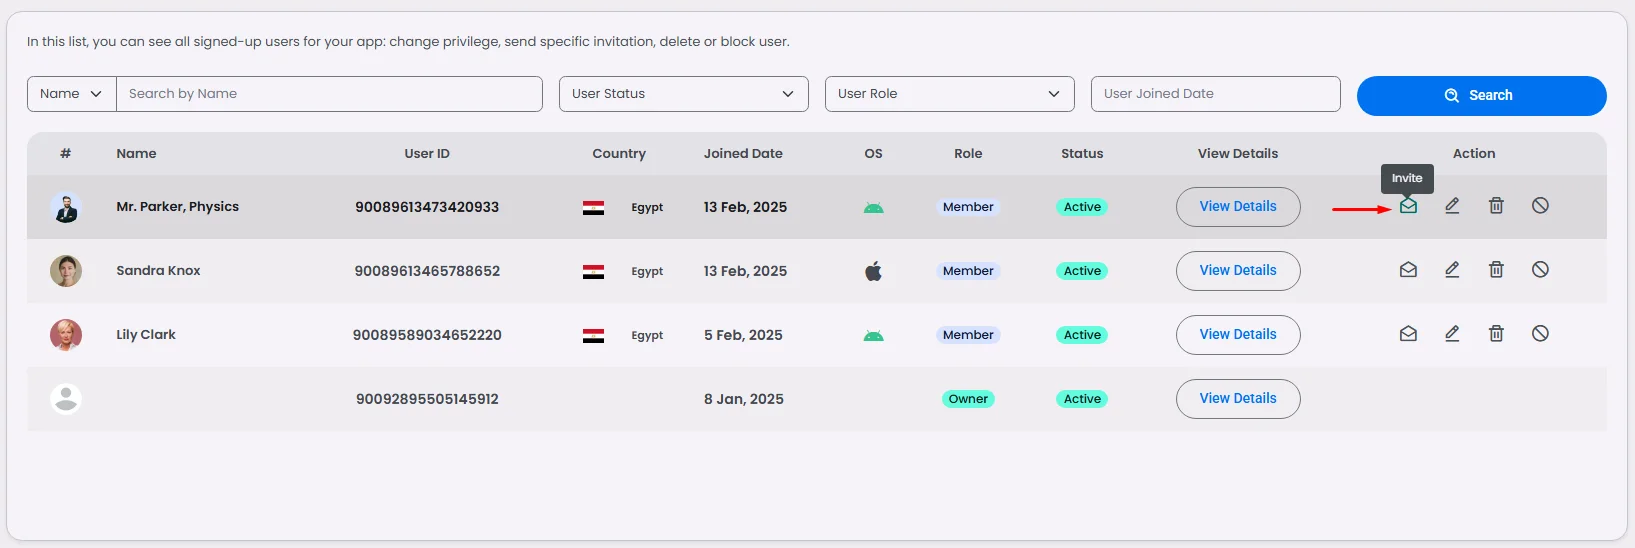
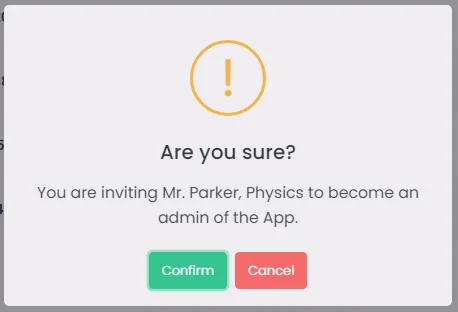
Then click ‘Confirm,’ and the user will receive an app administrator role invitation.
And if you want to delete or block a user from the app itself, you can do it from the user list itself by clicking the delete or the block icon.


Channels and Chat Groups Roles
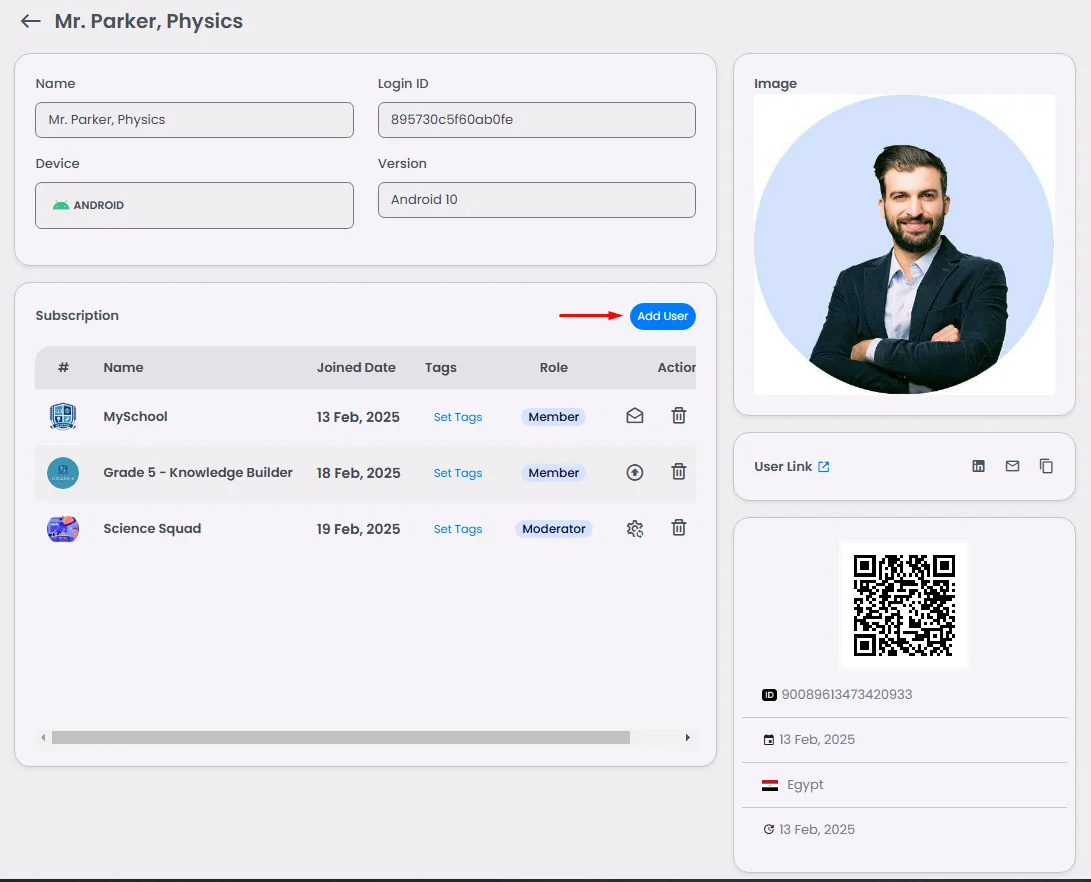
First, you need to access the user’s information page. Click the edit icon.

To add the users in a certain channel or group, click 'Add User.’
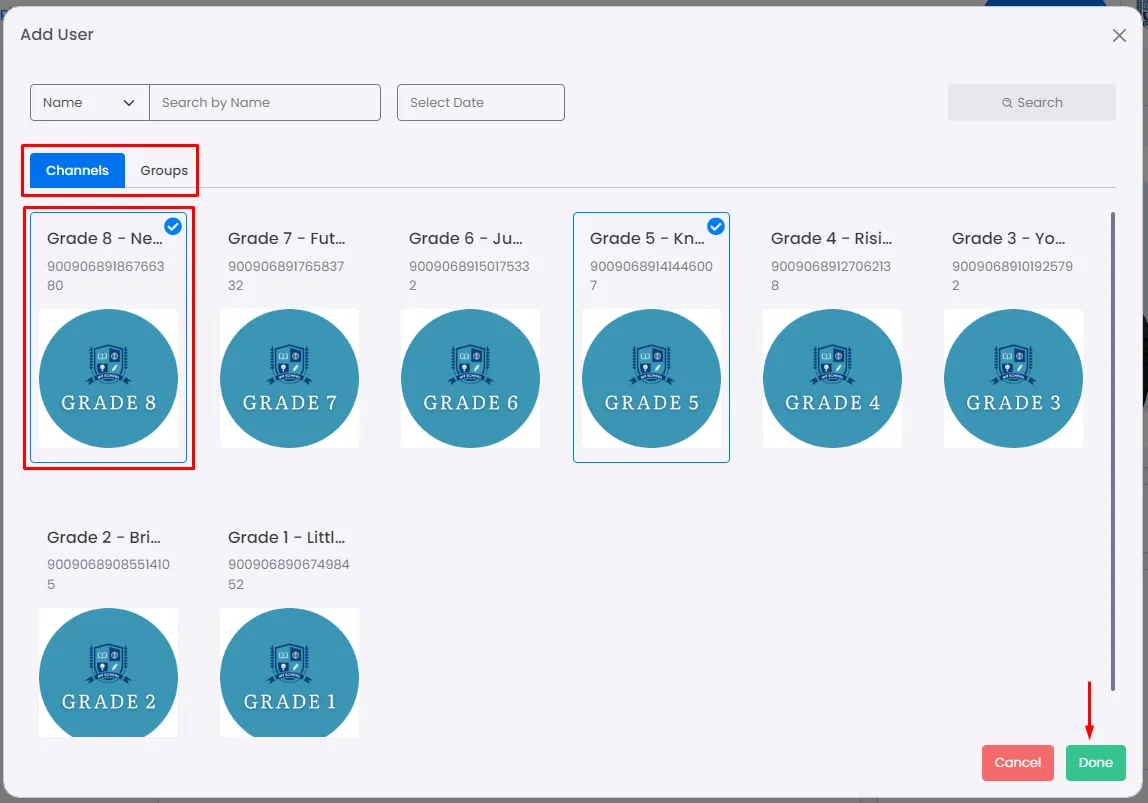
Select the channel/group and click ‘Done.’
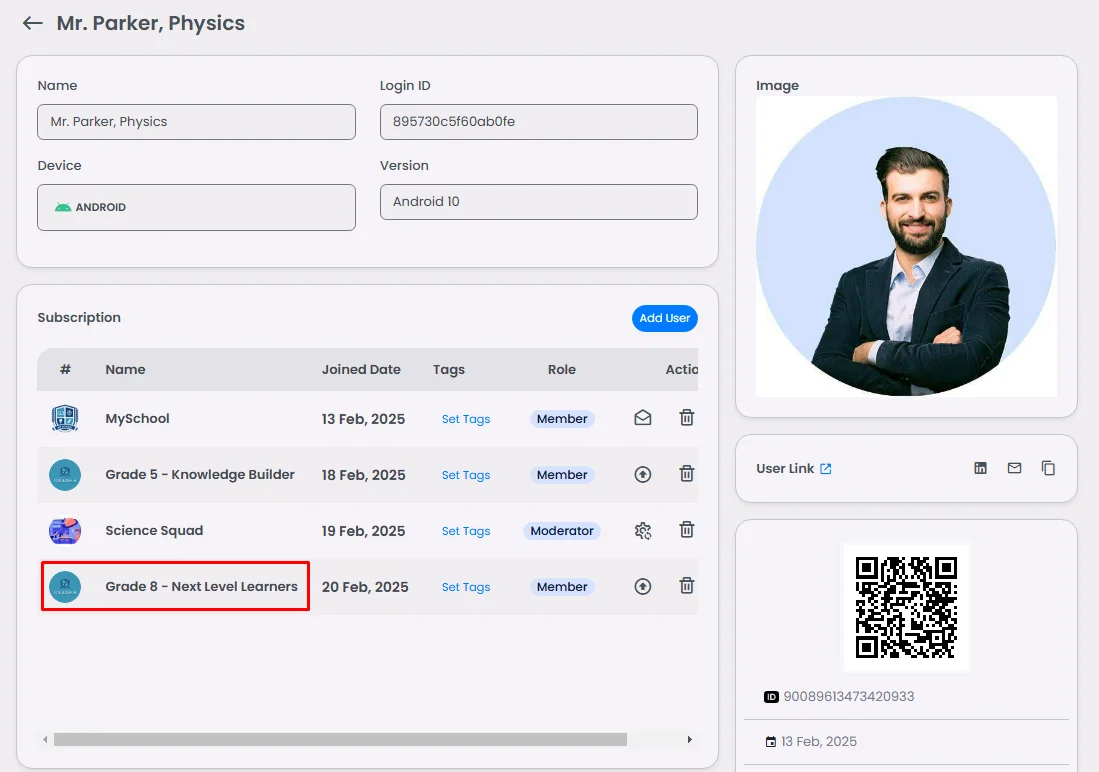
The user now has a 'Member' role in this channel/group. To assign this user a higher role, click the upgrade icon.
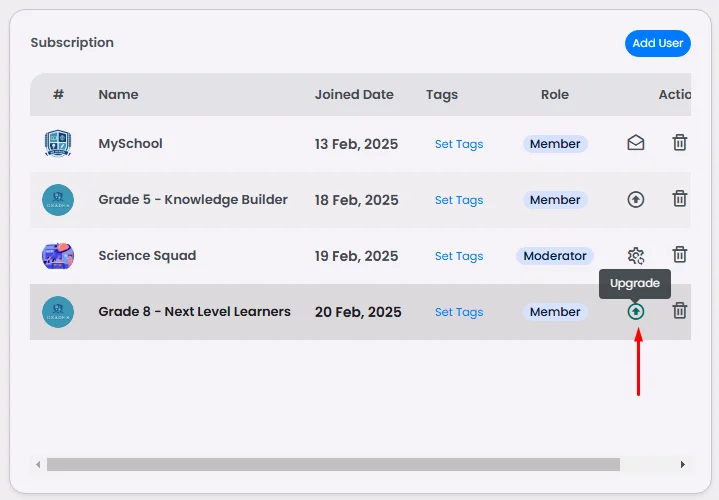
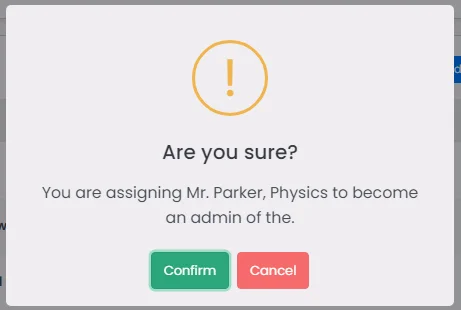
Click ‘Confirm,’ and the user will receive an invitation for the app administration role.
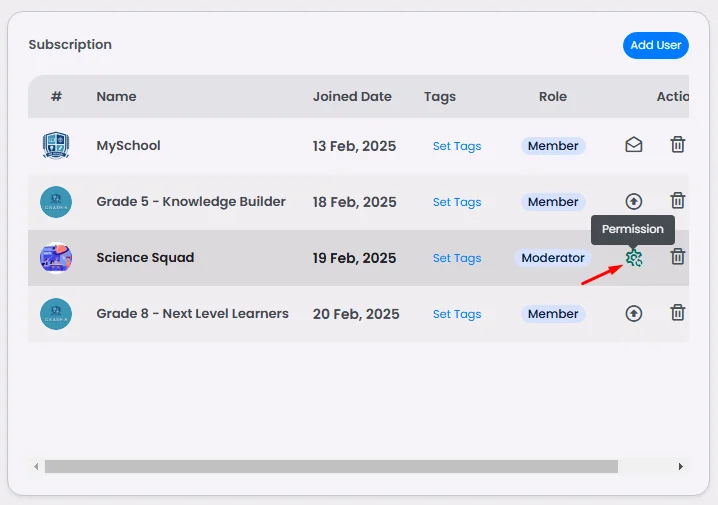
If you want to change the moderation role, click the permission icon.
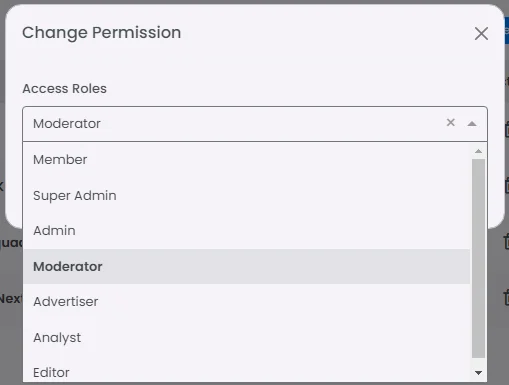
Choose which role you want your user to be assigned to and click ‘Save.’
You can delete or remove a user from a certain group or channel by clicking the delete icon.


User Roles On The Web
Privileges | Owner | Super Admin | Admin | Moderator | Advertiser | Analyst | Editor |
Edit Events | ✔ | ✔ | ✔ | ✔ | ✔ | ||
List Events | ✔ | ✔ | ✔ | ✔ | ✔ | ✔ | ✔ |
Delete Events | ✔ | ✔ | ✔ | ✔ | ✔ | ||
List Coupons | ✔ | ✔ | ✔ | ✔ | ✔ | ✔ | ✔ |
Edit Coupons | ✔ | ✔ | ✔ | ✔ | |||
Edit Bookings | ✔ | ✔ | ✔ | ||||
List Bookings | ✔ | ✔ | ✔ | ✔ | ✔ | ✔ | ✔ |
Edit Members (Roles & Tags) | ✔ | ✔ | ✔ | ✔ | |||
Edit or Dismiss Admin | ✔ | ✔ | |||||
Edit or Dismiss Super Admin | ✔ | ||||||
Invite Admin | ✔ | ✔ | |||||
Invite Super Admin | ✔ | ✔ | |||||
Tags & Memberships | ✔ | ✔ | ✔ | ✔ | |||
View List of Chat Groups | ✔ | ✔ | ✔ | ✔ | ✔ | ✔ | ✔ |
Edit Chat Groups | ✔ | ✔ | ✔ | ||||
Change Password | ✔ | ✔ | ✔ | ||||
View & Edit Design App | ✔ | ||||||
View List of Channels | ✔ | ✔ | ✔ | ✔ | ✔ | ✔ | ✔ |
Create & Edit Channels | ✔ | ✔ | ✔ | ✔ | ✔ | ✔ | ✔ |
Posts | ✔ | ✔ | ✔ | ✔ | ✔ | ✔ | |
Billing | ✔ | ||||||
APIs & Integrations | ✔ | ||||||
List Calendars | ✔ | ✔ | ✔ | ✔ | ✔ | ✔ | ✔ |
Edit Calendars | ✔ | ✔ | ✔ | ✔ | |||
Orders | ✔ | ✔ | ✔ | ||||
List mobile commerce | ✔ | ✔ | ✔ | ✔ | ✔ | ✔ | ✔ |
Edit mobile commerce | ✔ | ✔ | ✔ | ✔ | |||
List Blacklist | ✔ | ✔ | ✔ | ✔ | ✔ | ✔ | ✔ |
Edit Blacklist | ✔ | ✔ | ✔ | ✔ | |||
List Whitelist | ✔ | ✔ | ✔ | ✔ | ✔ | ✔ | ✔ |
Edit Whitelist | ✔ | ✔ | ✔ | ✔ | |||
Locations | ✔ | ✔ | ✔ | ✔ |
User Roles On Mobile
Privileges | Super Admin | Admin |
Device Access (Mobile) | ✔ | ✔ |
Device Access (Web) | ✔ | ✔ |
Edit messages of others | ✔ | ✔ |
Delete messages of others | ✔ | ✔ |
Invite admins | ✔ | |
Change channel info | ✔ | |
Edit admin privileges | ✔ | |
Remove participants | ✔ | ✔ |
Ban participants | ✔ |
❓ FAQs
Q: How can I manage users, roles, and permissions in my app—without writing any code?
A: With nandbox, you can easily add users, assign roles, and control permissions—all visually through the admin panel. No coding or technical setup is needed. It’s the perfect way to decide who can access, manage, or edit different parts of your app.
Q: What can I do with User Management?
The User Management tools let you:
- Add or invite users to join your app (manually or via registration links)
- Block or remove users who shouldn’t have access anymore
- Assign roles, like:
- Admin—full control to manage settings and app sections
- Member/User—standard access to use features
- Set permissions to control what each role can view, edit, or manage
It’s all done from a no-code dashboard—fast and simple.
Q: How do I set up users and roles?
- Log in to your app’s Admin Panel.
- Go to User Management.
- To assign or edit roles:
- Click on a user’s profile
- Select from default roles (Admin, Member) or create your own custom role.
- To control permissions, open the role settings and toggle what features they can access.
Save your changes, and the updates will apply instantly in your app.
