
Make a reservation for any service you offer with fantastic features, including customizable calendars based on the services you offer, hotel, medical, home remodeling, and more!
When you create a booking, you’re not just opening time slots, you’re building a complete reservation template. You decide who can book, when, how much it costs, and how flexible cancellations are. This setup ensures your customers get clear options while you stay in control of your schedule and capacity.
📋 Steps
From the admin menu, click 'Bookings’.
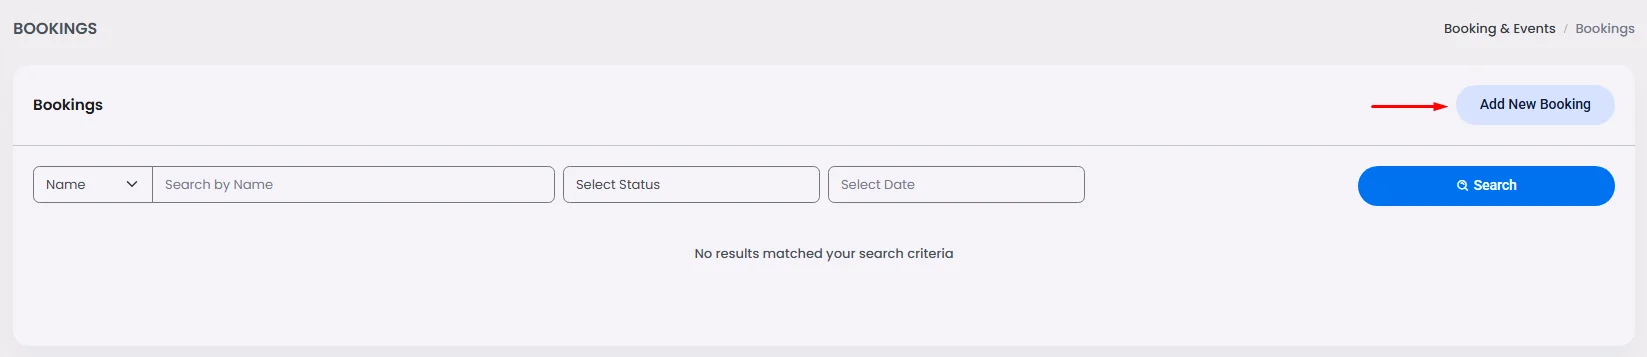
Click ‘Add New Booking.’
A window will appear where you can enter your booking title and description, category, time zone and booking images.
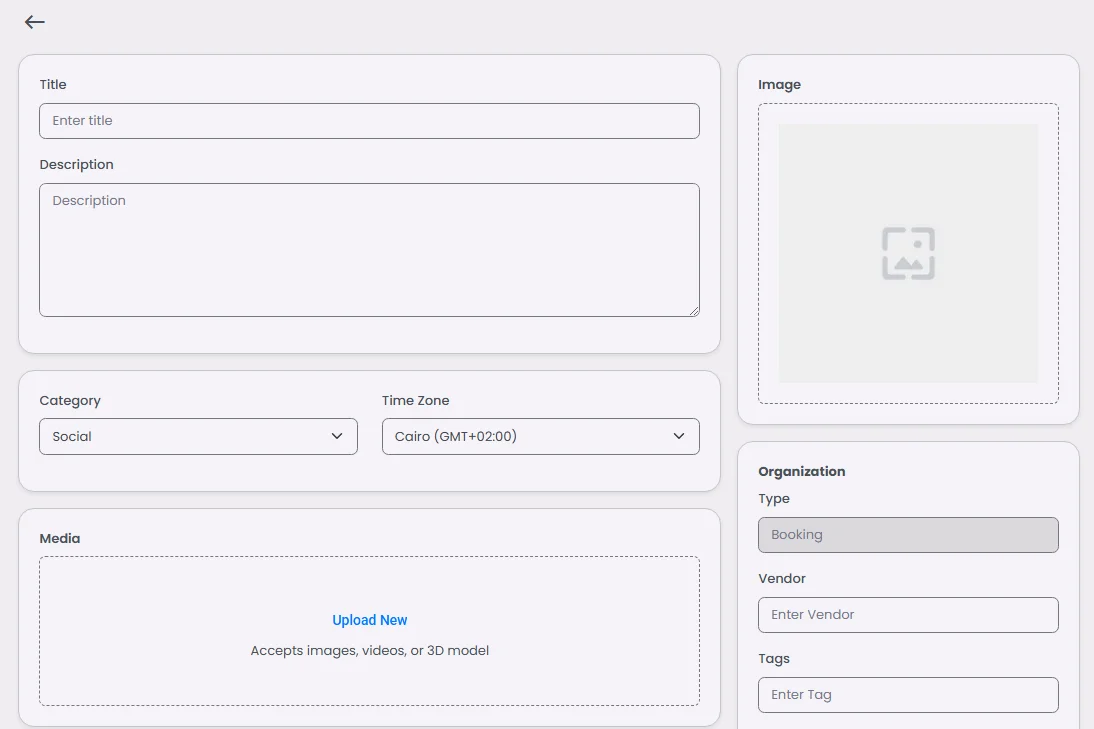
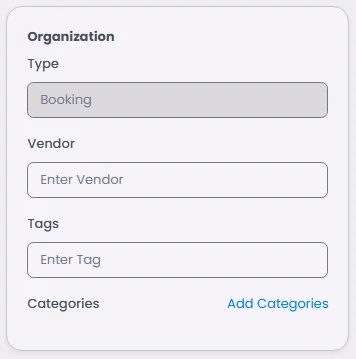
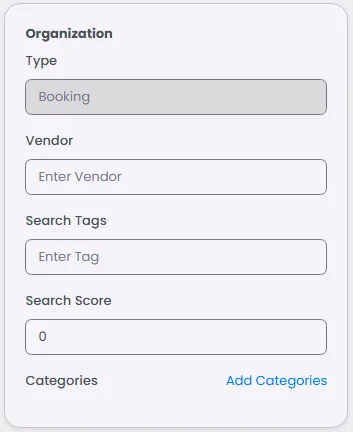
Organization
Choose your booking vendor, add tags, and add a category.
Note that you need to create a category first!
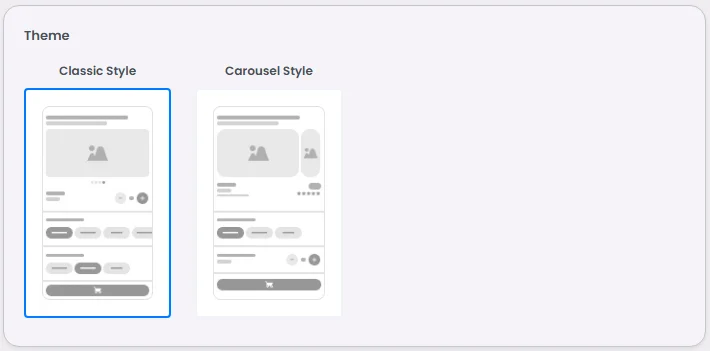
Theme
Choosing a theme for your booking flow is not just about looks—it’s about trust and usability. A well-designed theme makes your service feel professional, reassuring customers that they’re in the right place.
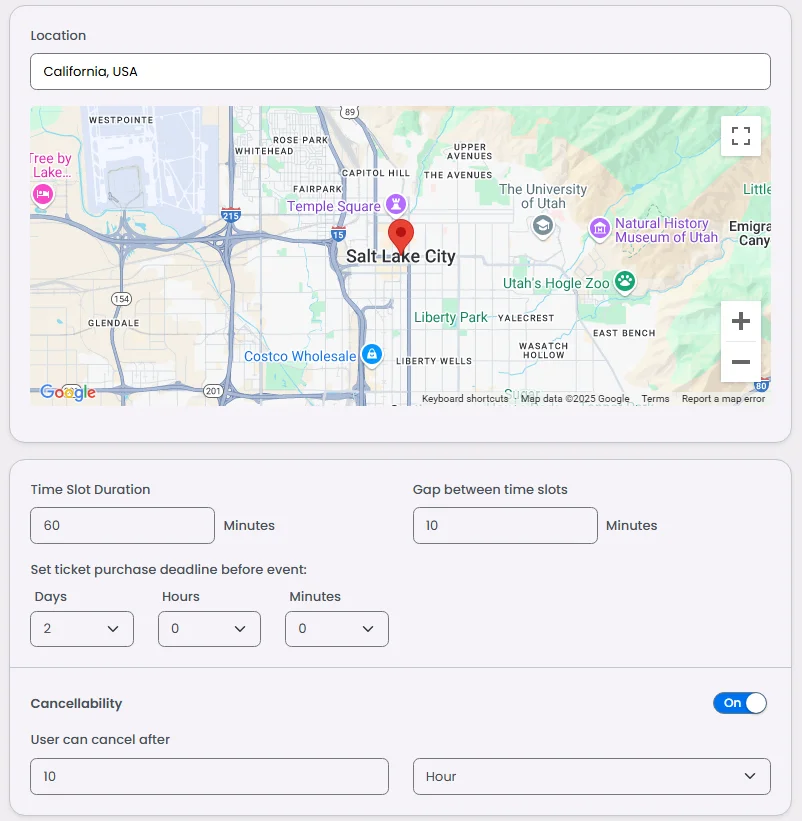
- Location: Add your booking location.
- Time slot duration: Session duration time.
- Gap between time slots: The break time between booking sessions.
Adding gaps between time slots is more than just a technical setting, it’s a practical tool for keeping operations smooth. For example, a dental clinic can use this feature to allow sterilization time between patients, while a fitness coach might set a 10-minute break between sessions to prepare for the next client. These small buffers reduce stress for staff and improve the customer experience by avoiding delays.
- Set ticket purchase deadline before event: Include the time that users have to make their reservations.
- Cancellability: You can activate the option by setting a fixed time for the user to cancel the reservation.
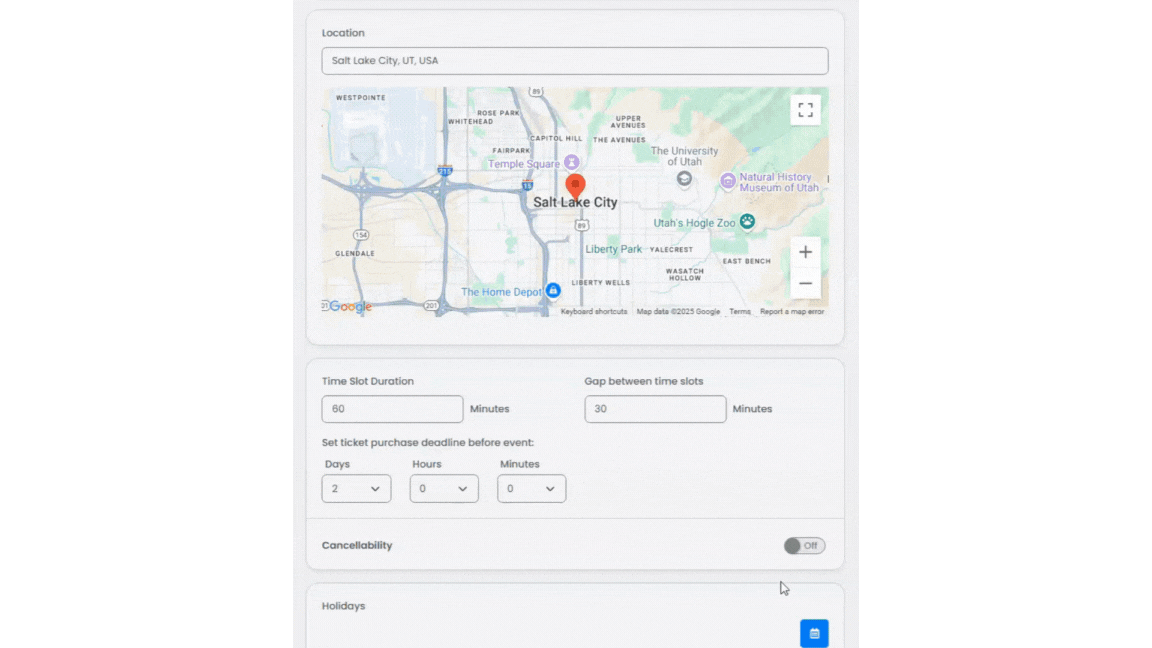
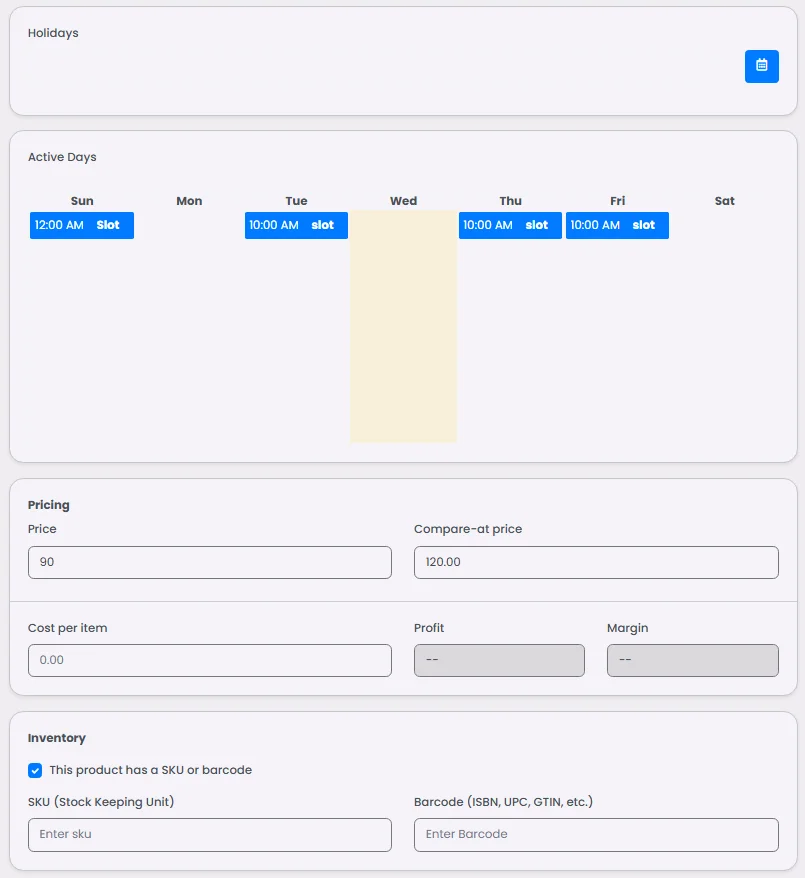
- Holiday: Choose the days of the holidays when your office won't be open. Click the calendar icon to choose your holidays.
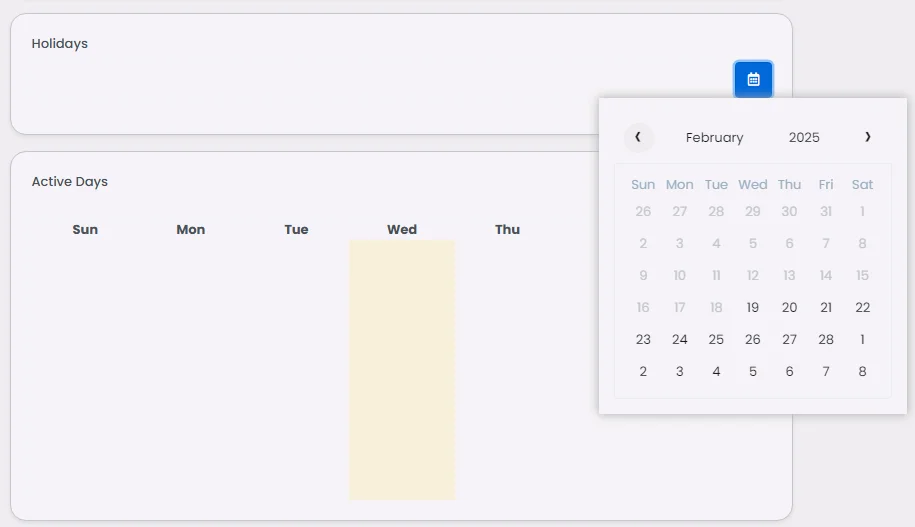
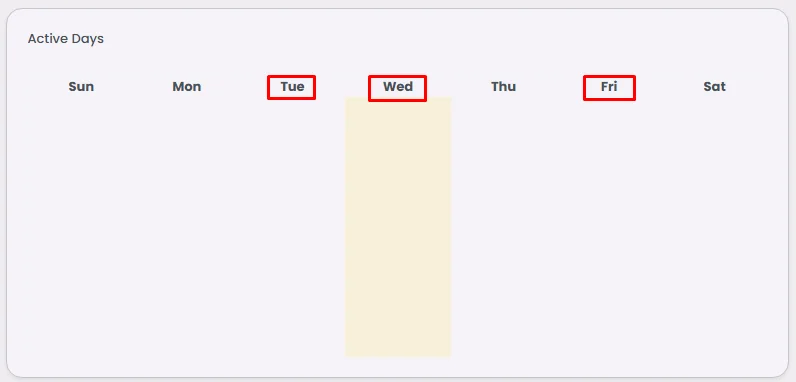
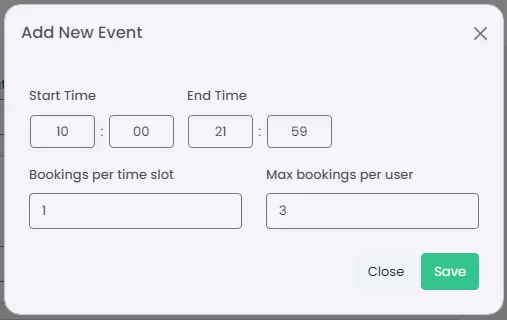
- Active Days: Configure the days that your business will run on; this section allows you to determine when the session begins and ends, so, for example, if you provide a yoga class every Sunday and Monday, select the day:
- Set your start time and end time for your working hours for this day.
- Set how many bookings you want your user to make per time slot.
- Set the maximum number you want your user to create.
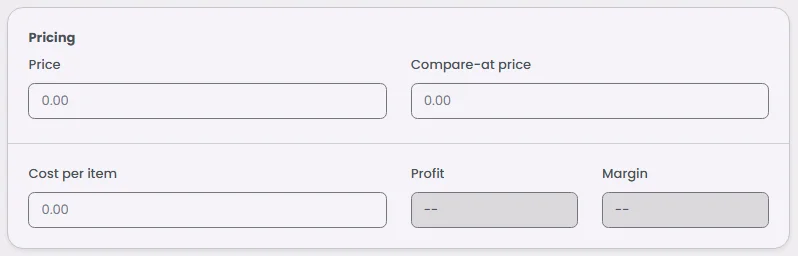
Pricing
- Price: Add the selling price you want to use.
- Compare-at price: This section is for you if you want to examine how your reservation appears both before and after a discount. Add your booking price before the discount. The discounted price will be calculated and displayed to users as a percentage.
- Mark 'Charge tax on this product' if you charge tax.
- Cost per item: Add your booking's original price.
- Profit and Margin will be calculated automatically once you add the cost per item.
For instance, if a service costs $85 to produce but costs $100 to sell, the profit and margin will be calculated automatically to demonstrate to the business owner how much progress he has made.
Smart pricing strategies can make a huge difference in how customers perceive your offers. Businesses often use the compare-at price to highlight discounts in a way that feels rewarding to the user. For example, a wellness center can list a massage session at $85 with a compare-at price of $100, showing clients they are saving $15 instantly. Similarly, seasonal promotions, like discounted yoga passes in January, can motivate customers to book more often. These strategies not only increase sales but also build customer loyalty.
Note that cost per item, Profit, and Margin are only for the business owner, as users won't be able to see these choices as it calculates and tracks how much money you have made with your business.
And when you click ‘Create,’ additional options will appear:
Booking Status & Information
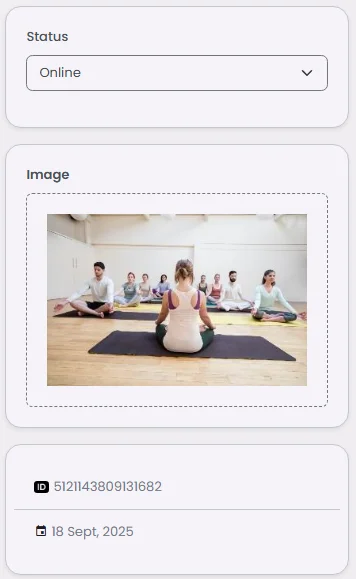
- Above the booking image, select the state of your product; if it isn't in stock, select ‘Offline,’ and below, you’ll find the booking's created ID and date of creation.
- Add your booking vendor.
- Add search tags to connect your booking with a search filter or chip.
- The search score determines the order of the bookings in the search; for example, add 1 to make your booking the first one to appear.
- Add a category
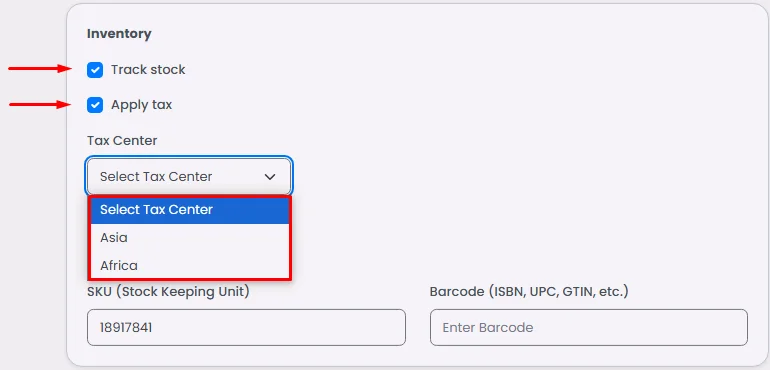
Inventory
Inventory management in bookings goes beyond physical products. A hotel may treat each available room as an inventory unit, while a medical clinic can use it to track open consultation slots. This flexibility means the system adapts to virtually any industry. By keeping stock levels visible, business owners avoid overbooking and ensure a seamless experience for their clients. If demand grows, updating your available inventory is only a few clicks away, giving you full control without technical effort.
- By adding the quantity of stocks, you can keep track of it. Additionally, you can update it if your booking reservation increases.
- If you charge tax on this booking, select one of your created tax centers.
Learn more about how to create a tax center.
- If you charge a service fee.
Learn more about how to create a service fee.
- If your booking has an SKU or barcode.

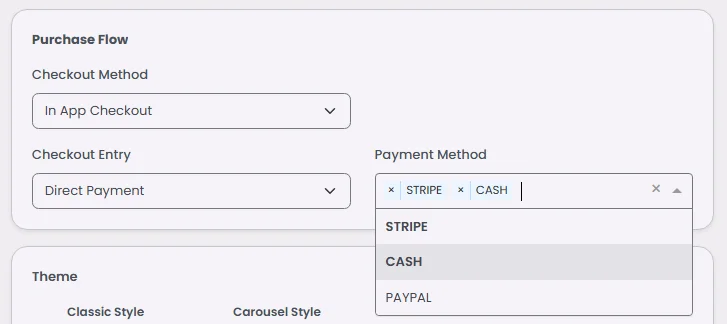
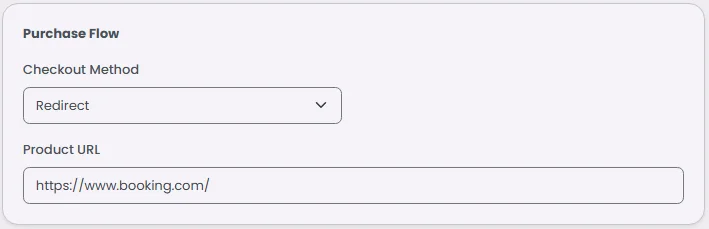
Purchase Flow
The purchase flow defines how your users complete their journey. In-app checkout keeps everything inside your app and is ideal for salons, fitness studios, or tutoring services where immediate payment secures the booking. On the other hand, a redirect flow works well for businesses like travel agencies or large event organizers that already have a trusted external payment portal. Both options give you flexibility to choose what works best for your operations, while customers enjoy a secure and convenient process.
Here, you can choose your checkout button action:
- Choose ‘In App Checkout’ to forward the user to the Cart or Direct Payment.
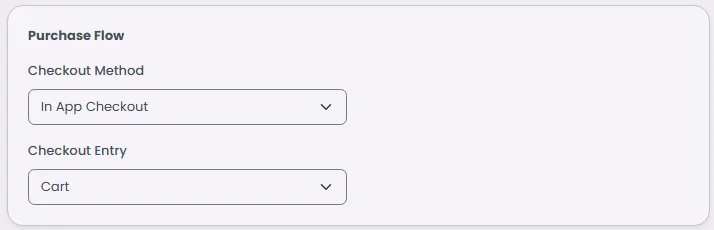
- Choose ‘Redirect’ to direct users to your desired URL.
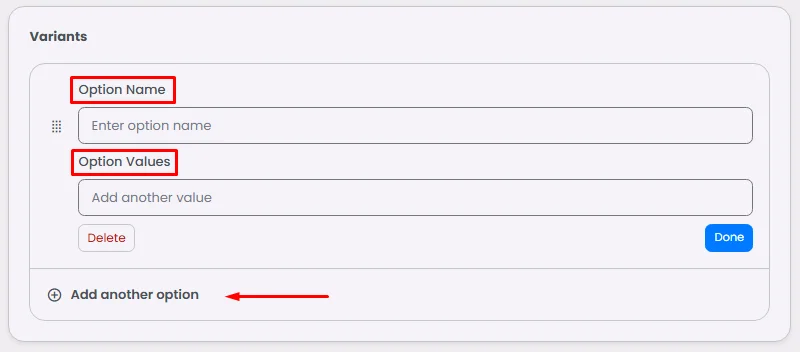
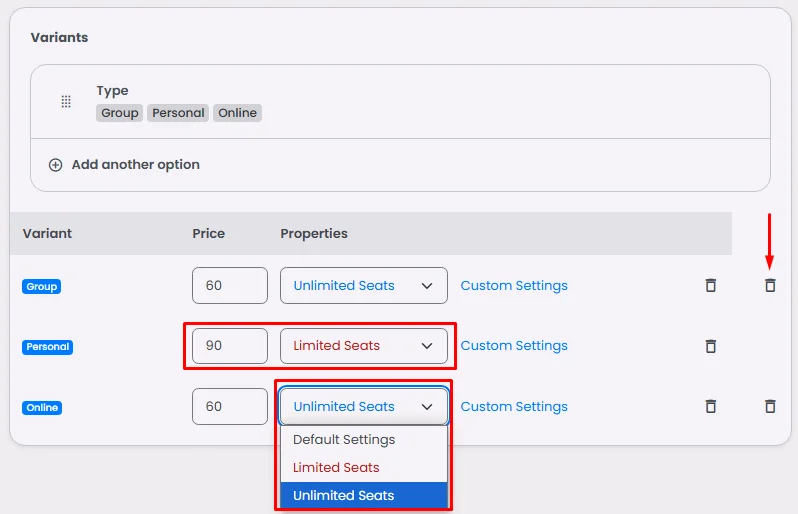
Variants
Variants are a powerful way to personalize bookings for your users. A yoga studio might let users pick their preferred instructor, while a remodeling company can list different packages such as Kitchen Upgrade, Bathroom Renovation, or Living Room Redesign. Each variant can carry its own price and availability, giving customers a choice without creating multiple booking items. For limited options, such as “only 5 seats available” in a workshop, you can set precise limits to maintain fairness and manage capacity.
Adjust the following:
- Option Name: Add the category name of your choice.
- Option Values: Add your choices
- Add another option: You can add another option by clicking ‘Add Options,’ and once you're done, click 'Done' to save your settings.
You can delete, add a specific price for certain options, and choose the status of a specific choice: limited or unlimited booking seats. If it’s limited, don’t forget to update how many seats are left of this option.
If you have a certain option that has a different booking location, date or time, click ‘Custom Settings.’
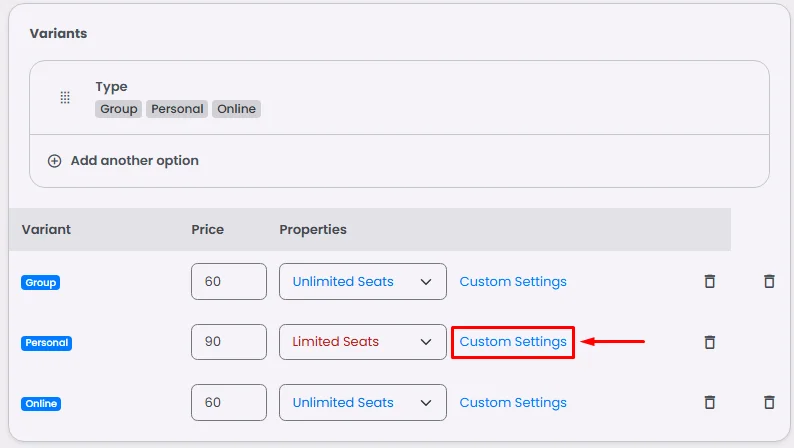
And start customizing the option’s own settings.
And don’t forget to save.
Use Cases: Create a Booking
- Consulting business/coaching: Create individual appointment slots (e.g., ‘30 min strategy call’) that clients can book directly.
- Medical/wellness clinics: Offer time slots for practitioners (e.g., ‘Dental check-up,’ ‘Physiotherapy’) with buffer times and rules (like lead time) to manage patient flow.
- Hair salons/spas/beauty services: Let clients pick offerings (e.g., ‘Haircut,’ ’Massage’), specify preferred staff (if available), and reserve an available slot.
- Event/workshop hosts: Create limited-capacity sessions (e.g., ‘Photography 101, 2 PM slot’) as ‘bookings’ (or micro-events), optionally with add-ons or extras.
- Co-working spaces/meeting rooms: Enable users to reserve rooms or desks for specified durations (e.g., ‘3-hour meeting room booking’) with setup time or cleaning buffer.
❓ FAQs
Q: How can I let users book appointments in my app without writing any code?
A: With nandbox’s no-code Booking tool, you can easily let users reserve time slots, sign up for events, and even set up paid bookings—all without needing tech skills. In just a few clicks, you can define your schedule, add tickets (if needed), and allow users to book directly inside your app.
Q: How do I create a booking schedule in the app?
A: Follow these simple steps to set it up:
- In your admin panel, go to the Booking and Event section.
- Click Create Booking.
- Add a title and optional description for your booking (e.g., Yoga Class, Consultation Slot).
- Set the start and end date for when this booking is available.
- Choose the days of the week it applies to (like Monday–Friday).
- Set daily start and end times (e.g., 9:00 AM–5:00 PM).
- Choose the duration per slot (e.g., 30 minutes).
- (Optional) Add a gap between slots to allow for breaks or cleanup time.
Your app will automatically create a calendar showing available times, so users can easily pick and book a slot.
Q: Can I control how many users can book or how often?
A: Absolutely! You can:
- Set a maximum number of bookings per time slot.
- Limit how many times a single user can book (e.g., one per day).
- Add ticket types and pricing if you’re offering paid bookings or events.
This gives you full control over availability and helps you manage capacity with ease.