
How To Install The Component
These components can be installed in:
- App's Navigation Page ✓
- App's Side Menu ✓
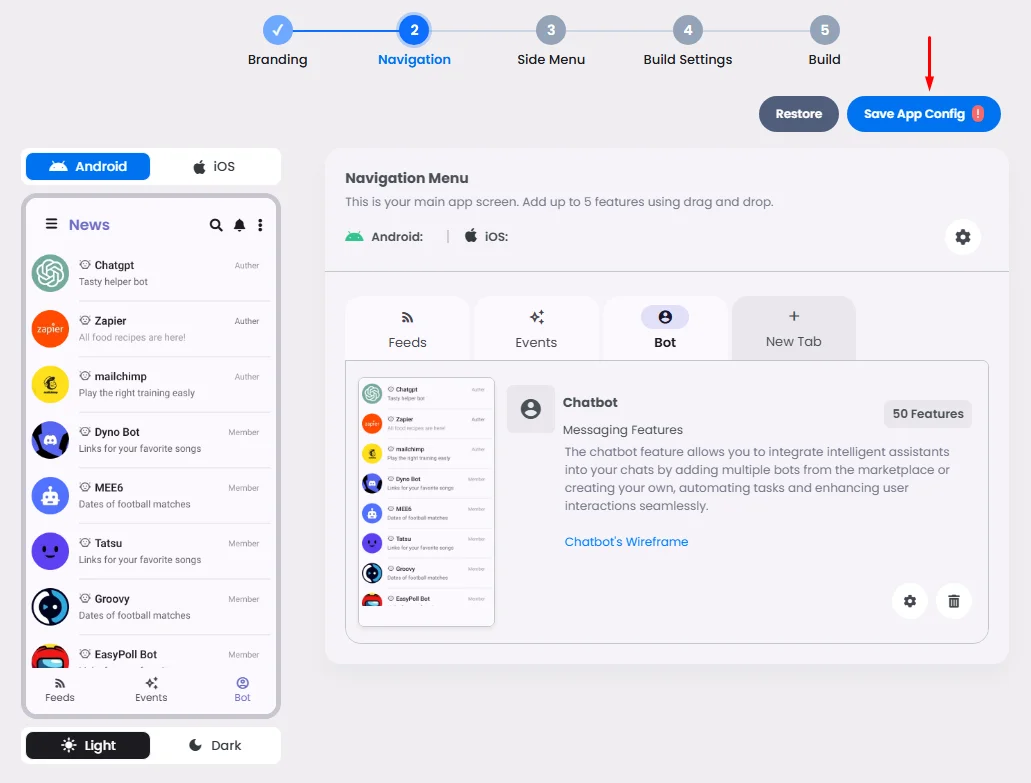
You can find the bot chat component in the Messaging Features section. Click or drag and drop the components into your navigation or side menu to install them.

How To Configure The Component
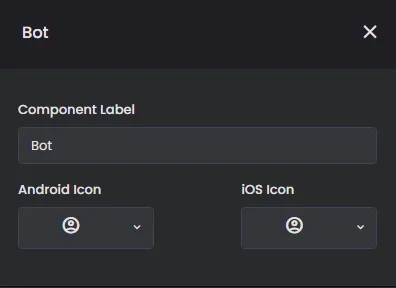
Click the gear icon to configure the component settings.
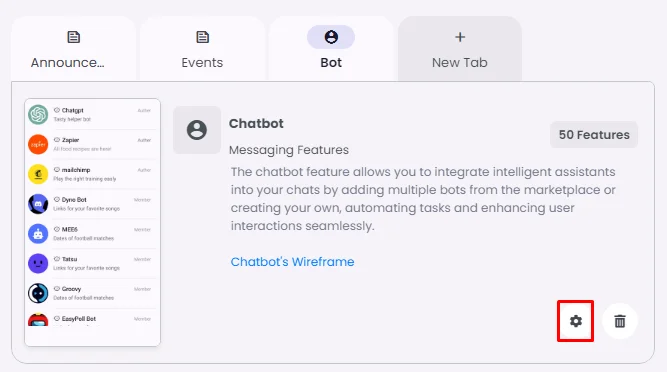
Rename the component and choose an Android and an iOS icon for it.
Select Bot: Since the component can hold a created bot, we need to create a bot first and understand how bots work!

How Bots Work
Users can interact with bots in two ways:
- Send messages and commands to bots through a direct chat, by adding them to groups or channels, or by associating them with your nandbox apps. This technique is useful, for example, in automated chatbots or news bots.
- Send requests directly from the input field by typing the bot's @handle and a query. This allows sending content from inline bots directly into any chat, group, or channel within the nandbox apps.
Messages, commands, and requests sent by users are passed to the software running on your servers, where Bot is hosted. Our intermediary server handles all encryption and communication with the nandbox bot for you. You communicate with this server via a WebSocket interface that offers a simplified version of the nandbox bot. You can also connect the bot to your backend system through the API key.
Create Bot & Generate API Key
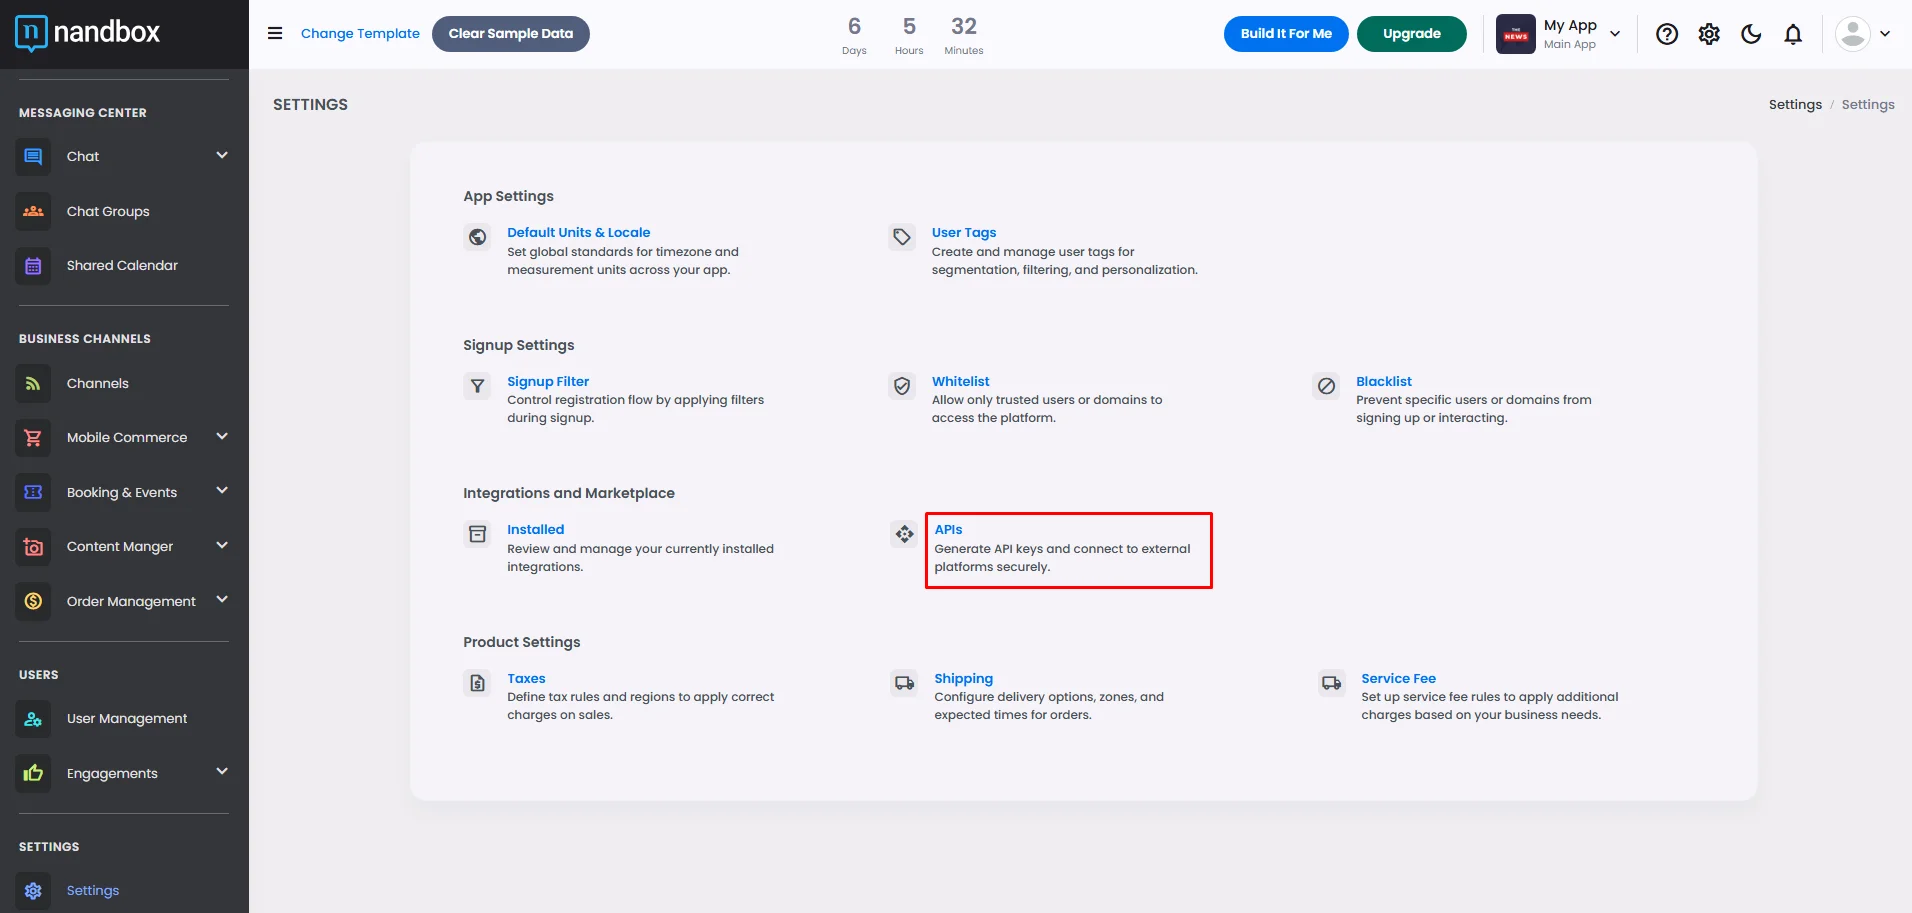
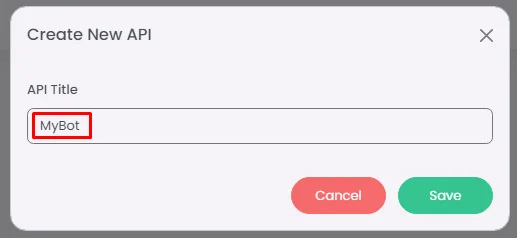
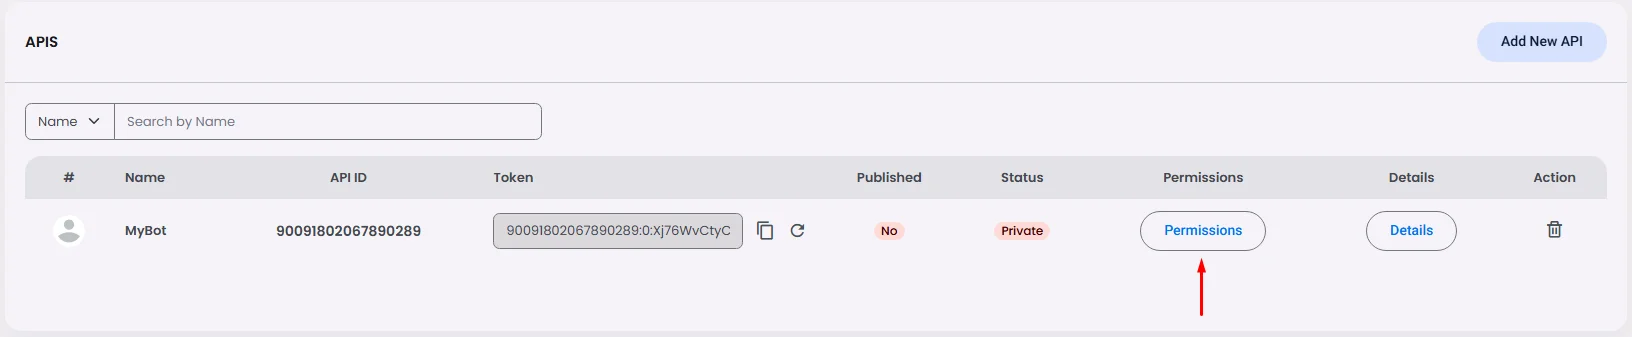
From the admin menu, go to ‘Settings,’ then click ‘API.’
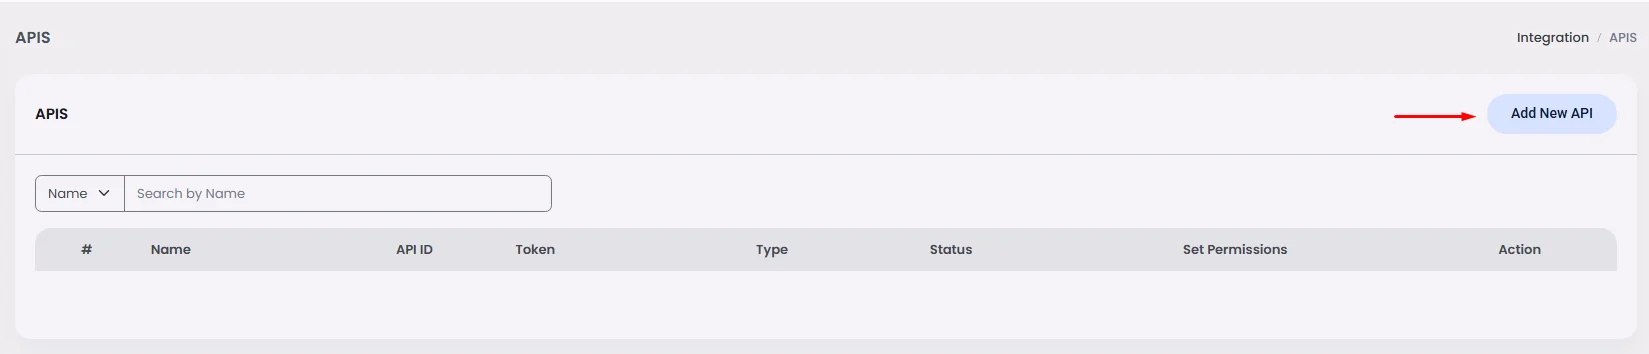
Click ‘Add New API.’
Add a title, then click ‘Save.’
Once your bot is created, you’ll receive a token that can be used to connect your backend system to the bot.
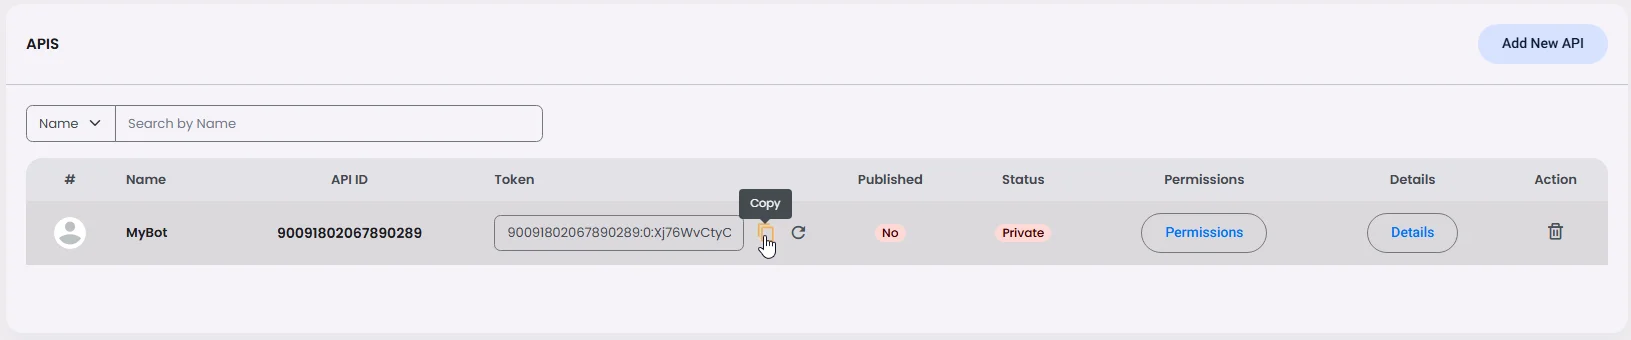
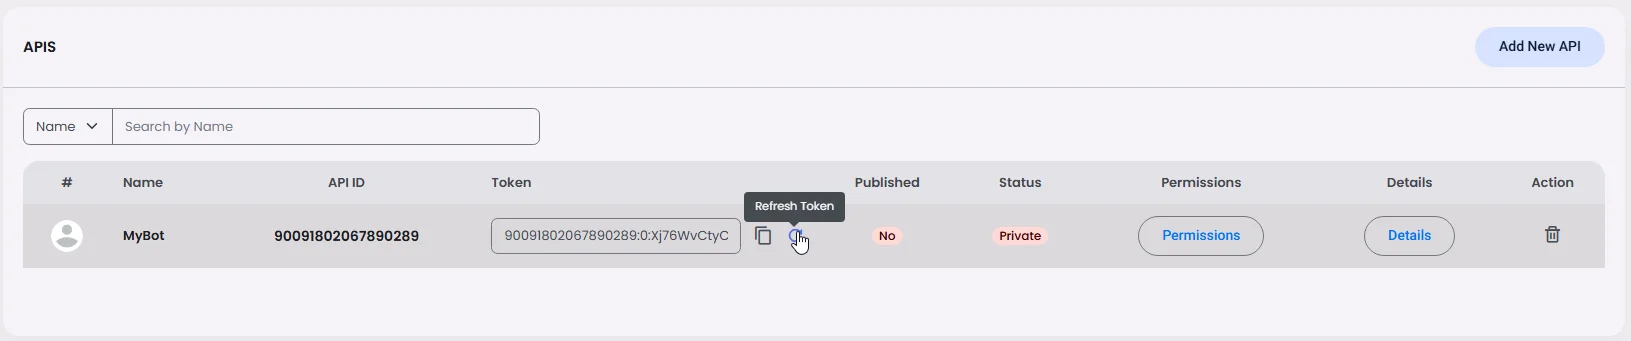
You can even change the token if you want.
Check out this documentation to learn more about Authentication Token
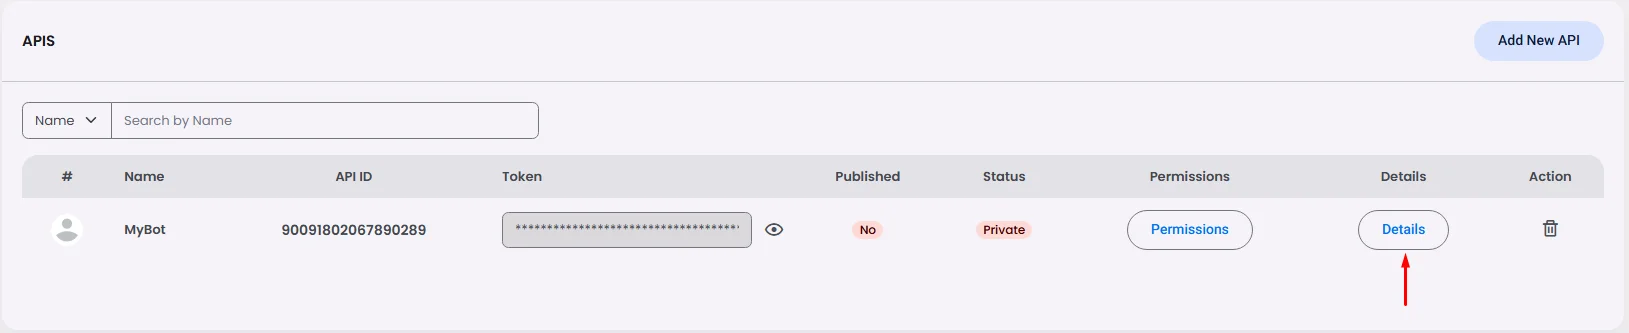
Go back and click ‘Details’ to configure your bot/API settings.
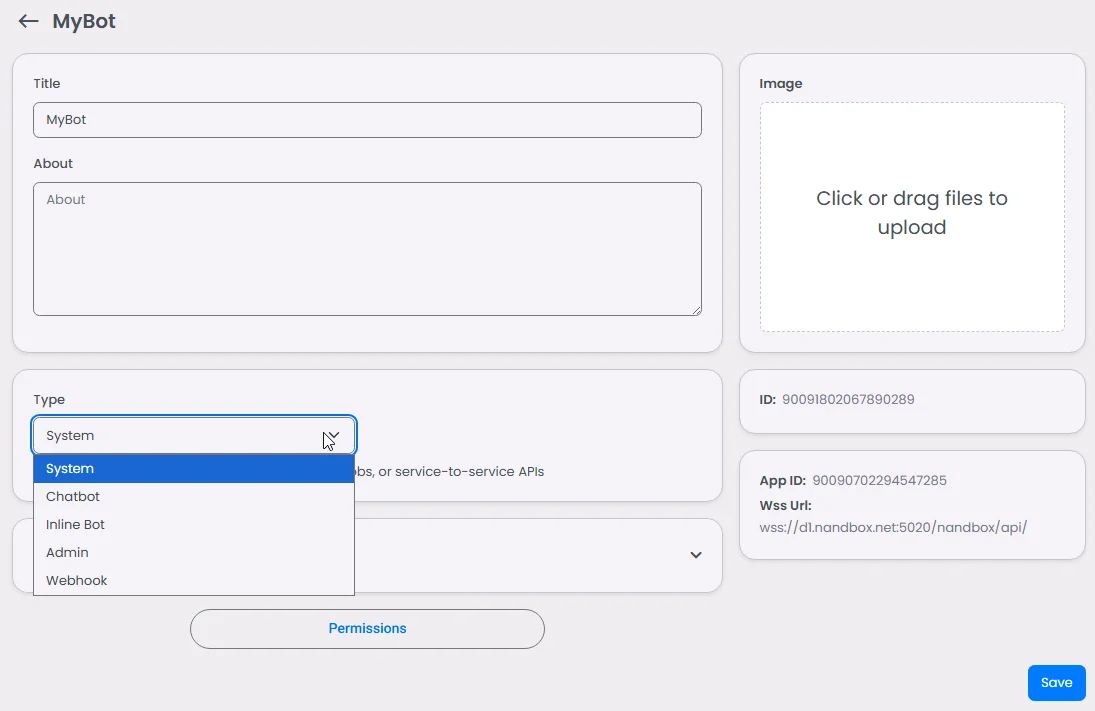
Here is where you fill in your bot's information:
- Bot image
- Title & About (Description)
- bot type:
- System
- Chatbot
- Inline bot
- Admin
- Webhook
This is your App ID and WebSocket URL
Learn more about how to establish a WebSocket connection
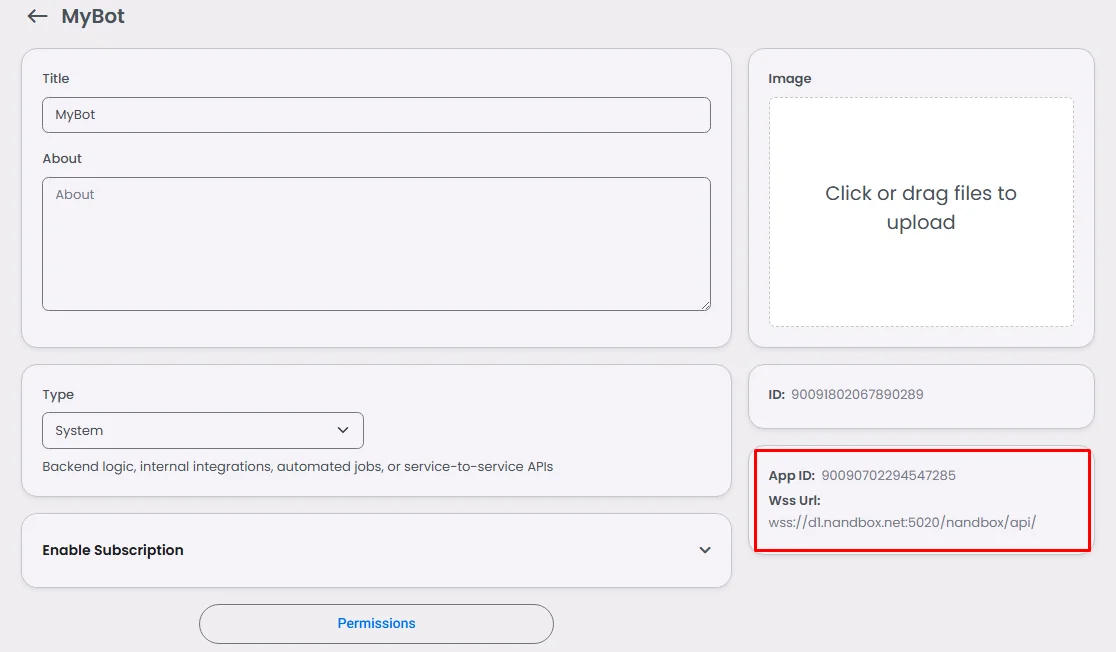
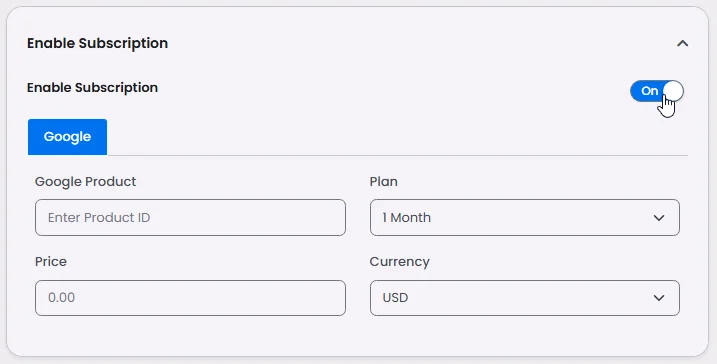
You can even set up a payment if you want to create your bot with a subscription service.
Check out this documentation for more information.
Now click ‘Set Permissions’ to customize your bot/API performance.
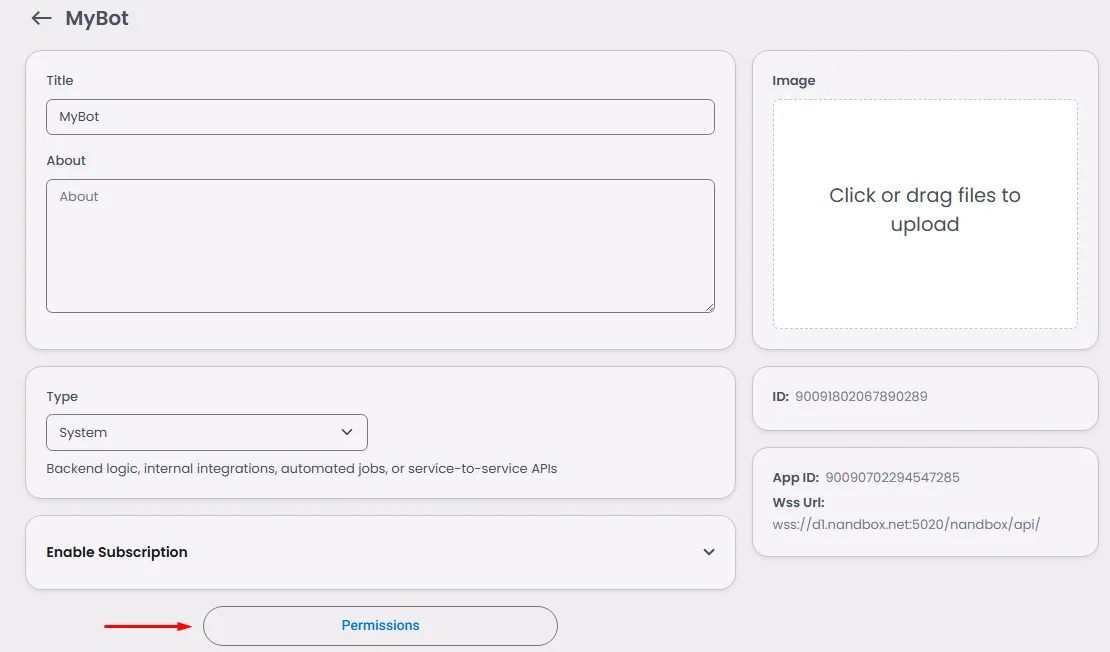
Now start giving your bot certain permissions you wish your bot to have.
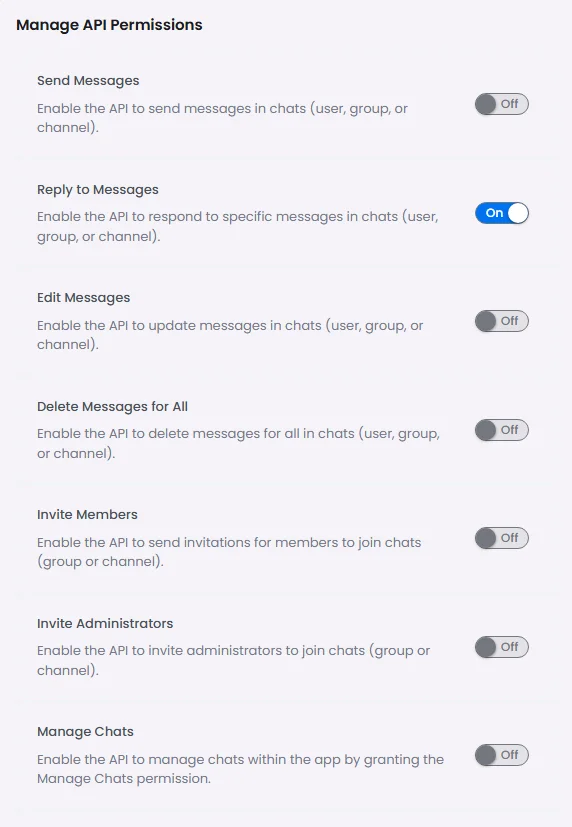
And don’t forget to click ‘Save.’
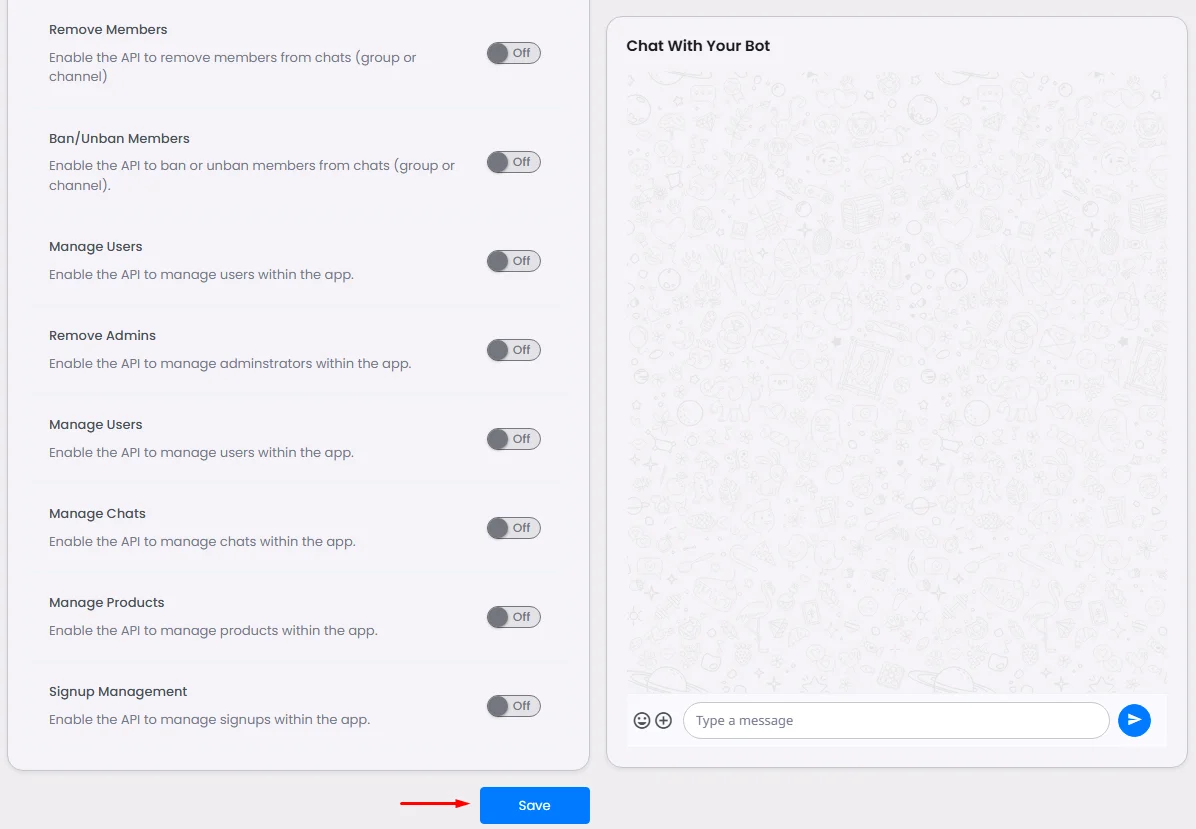
You can access also bot permission from here
Assign Your Bot To The Component Tab
Go back to the chatbot component settings and click ‘Set.’
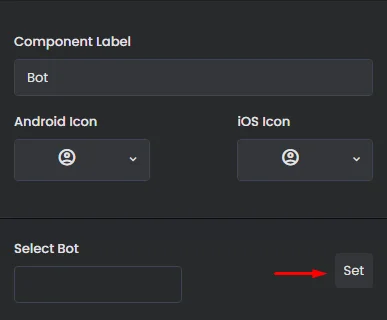
Select your bot and click ‘Done.’
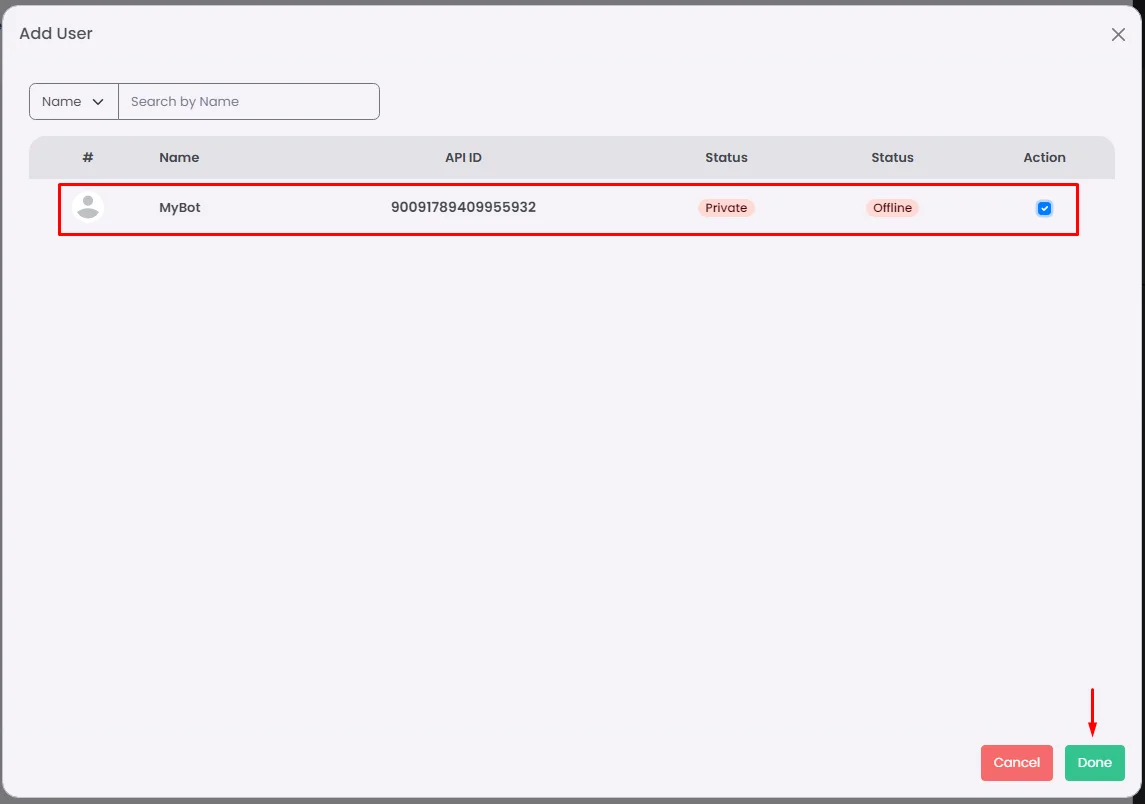
And don’t forget to save.
❓ FAQs
Q: How does the chatbot in my app work, and how can I set it up without coding?
A: The nandbox platform makes it easy to add a chatbot to your app—no coding required. Your chatbot can:
- Greet users
- Respond to commands or inline queries
- Post in channels or groups
- Trigger backend actions
The bot runs on your backend and communicates securely using WebSocket and an API token, while nandbox handles encryption and message delivery.
Q: How do I install and activate the chatbot component?
A:
- In the nandbox App Builder, go to Messaging Features
- Drag and drop the Chatbot component into your app’s Navigation Page or Side Menu
- Click the gear icon to configure:
- Rename the tab (e.g., Support Bot, Live Assistant)
- Upload icons for Android and iOS
- Click Set to select your chatbot
- Click Done, then Save to activate the chatbot in your app
Q: How do I create a chatbot that responds to users automatically?
A:
- Go to your Admin Panel → Settings → API
- Click Add New API, name your bot, and click Save
- You’ll get an API Token—keep this to connect your backend
To finish setup:
- Click Details next to your new bot
- Add:
- Profile picture
- Bot title and description
- Bot Type (Chatbot, Inline, Webhook, etc.)
- Set permissions like:
- Send messages
- Post in groups or channels
- Handle inline queries (e.g.,
@yourbot search) - Access media, locations, and more
Once configured, your chatbot can:
- Send messages
- Respond to user messages or commands in private chats, groups, and channels.
- Handle queries sent using its @handle.
- Communicate with your backend over a WebSocket API connection—nandbox manages the encryption and message delivery for you.
- Click Save